Getting Started Using Segment Anything with Label Studio

Announcing an Update to the Segment Anything Label Studio Backend!
Earlier this year, the Label Studio Community launched a new machine learning backend that brought the power of Meta’s Segment Anything Model (SAM) to Label Studio. The community-contributed feature made it possible to run Segment Anything as a service to give annotators a tool for rapidly creating image label masks, freeing up their time to devote to more challenging annotation tasks.
After a significant amount of feedback from community members who tested and used SAM in their workflows, we made several updates to improve the reliability and user experience of the model. We’re excited to announce the release of an update to the machine learning backend, which we’re calling Advanced Segment Anything.
These improvements include:
- Improved support for CPU-based inference.
- The option to switch between different model implementations, including MobileSAM and ONNX-based models.
- A more streamlined labeling interface.
- The ability to connect to Label Studio's local cloud storage.
- A Docker-based quickstart build.
- Several bug fixes to improve the reliability of the model.
If you’re eager to get started, head over to the Label Studio Machine Learning Backend repository and try it. If you want to learn more about SAM and its work with Label Studio, read on!
What is the Segment Anything Model?
Segment Anything is a model developed by the Meta AI research team “that can ‘cut out’ any object, in any image, with a single click.” One of the most compelling features of SAM is that it “is a promptable segmentation system with zero-shot generalization to unfamiliar objects and images, without the need for additional training.”
What this means at a higher level is that SAM has a more generalized notion of what objects are, allowing it to identify and segment objects in an image even if it has never previously encountered them in training. This sort of zero-shot generalization, combined with powerful keypoint and bounding-box cueing, makes SAM an ideal tool for pre-annotating new image segmentation datasets.
You can learn more about the model at the official SAM website.
What Does the Segment Anything ML Backend Provide?
The Segment Anything Backend for Label Studio provides a bridge between the prediction capabilities of SAM and the labeling interface of Label Studio. Included with the backend is example source code that wraps a variety of SAM implementations with the Label Studio ML backend interface. The repository also includes a sample Dockerfile for building an easily deployable instance of the backend and a Docker Compose file to help you run the backend service.
Available architectures for the model include:
- The original SAM model, ideal for environments where you need the best accuracy and have GPU hardware to support it.
- Mobile SAM, a lightweight model that is suitable for resource-constrained systems at the expense of accuracy.
- ONNX SAM, a faster implementation of the SAM, with the drawback that some parameters (like image size) need to be encoded into the model at compile time.
The SAM ML Backend supports both keypoint and bounding-box cueing. SAM can merge both negative and positive keypoints to interactively improve segmentation accuracy.
Installing the SAM ML Backend
The SAM ML Backend was designed to quickly get you up and running with the model. It offers a demonstration environment that can be the starting point for putting the model into production in your environment. It has some limitations, including building the model weights directly into the container and relying on cloud-local storage for image hosting.
Prerequisites
For this example, we recommend using Docker for hosting the SAM ML Backend and Label Studio. Docker makes it possible for you to install the software without any other system requirements and helps to make the installation and maintenance process much more manageable. For desktop or laptop use, the fastest way to get Docker is by installing the official Docker Desktop client for Mac and Windows operating systems or by installing Docker using the official package manager for Linux systems.
The Segment Anything Model is a large, complex foundation model that works best on a GPU. Because many people will be testing this software on commodity hardware like laptops or desktop computers, by default, the model ships with Mobile SAM enabled. The backend will automatically detect if you have a GPU available, using the most appropriate hardware for your system.
Consult the official Docker documentation and Docker Compose documentation for enabling GPU passthrough for your guest containers.
At a minimum, your system should have 16 GB of RAM available, with at least 8 GB allocated to the Docker runtime.
You must also have Git installed on your system to download the Label Studio ML Backend repository.
Clone the Repository
After you have installed Docker and Git, the next step is to clone the Label Studio ML Backend git repository into your system.
git clone https://github.com/HumanSignal/label-studio-ml-backend.gitThen, change into the SAM working directory.
cd label-studio-ml-backend/label_studio_ml/examples/segment_anything_modelBuild the Docker Image
You can now build the SAM ML Backend for your system.
docker build . -t sam:latestIt will take as long as 20 minutes to build the model, or longer, depending on your internet connection speed. This build process embeds the SAM model weights into the Docker image with a 2.4G file size. It’s best practice to store the model weights separately from the model runtime for production usage to allow for updates and checkpointing.
Verify that the model is built and ready to use.
docker image listDocker should output a list of available images with an entry similar to this:
REPOSITORY         TAG              IMAGE ID       CREATED         SIZE
sam latest f69344cb96a5 5 minutes ago 4.61GBUsing the SAM ML Backend
With the image built, it’s time to build out an image segmentation project using Label Studio.
Install Label Studio
First, you need to install Label Studio. For this example, the SAM ML Backend relies upon enabling local storage serving. To start an instance of Label Studio with this turned on, enter the following command:
docker run -it -p 8080:8080 \
    -v $(pwd)/mydata:/label-studio/data \
    --env LABEL_STUDIO_LOCAL_FILES_SERVING_ENABLED=true \
    --env LABEL_STUDIO_LOCAL_FILES_DOCUMENT_ROOT=/label-studio/data/images \
heartexlabs/label-studio:latestThis command tells Docker to launch Label Studio, make it available for viewing at http://localhost:8080, store the database and task files on your local hard drive, and enable local file serving. Once Label Studio has started up, you can navigate with your browser to http://localhost:8080 where you’ll be presented with the Label Studio login screen.
Set up the Project
Select the “Sign Up” tab, then create a new Label Studio user account.
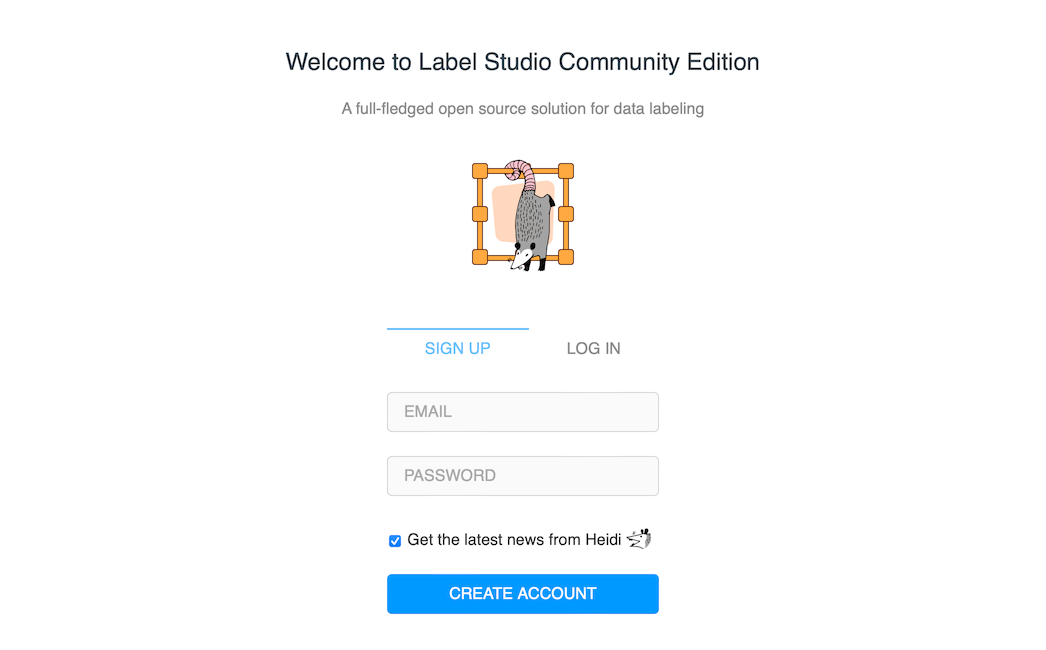
The Label Studio "Sign Up" Interface
Upon your first login, you’ll be greeted by Heidi the Opossum, asking you to create a new project. Select “Create Project”
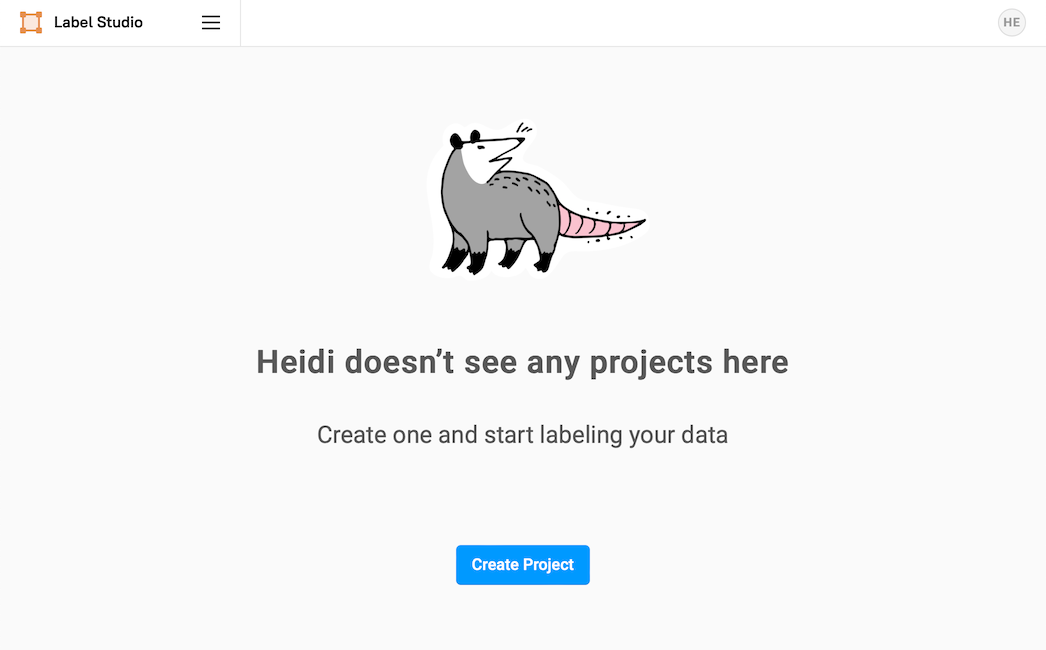
"Heidi doesn't see any projects here"
In the “Create Project” dialog, you will see three tabs. In the first tab, enter the name of your project (for example, “Segment Anything”), then select Labeling Setup. You’ll be presented with a selection of pre-configured labeling templates, but we will import a custom template for this project. Select the “Custom Template” option.
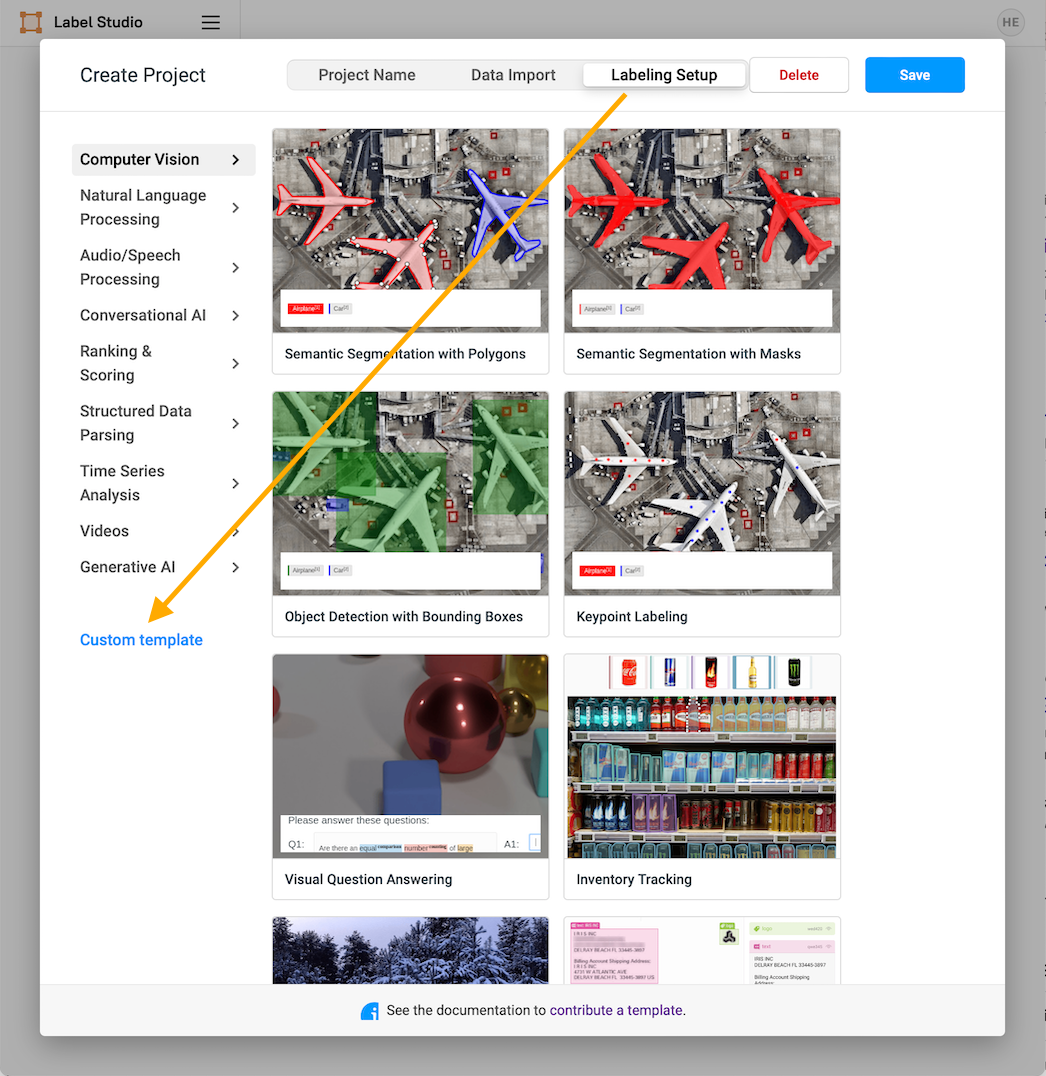
The Labeling Setup Interface
You’ll be presented with a template editing interface. Select “Code” and then paste the following configuration into the text field (ensuring you replace all the preexisting code).
<View>
  <Image name="image" value="$image" zoom="true"/>
  <Header value="Brush Labels"/>
  <BrushLabels name="tag" toName="image">
  	<Label value="Dog" background="#FF0000"/>
  	<Label value="Possum" background="#0d14d3"/>
  </BrushLabels>
  <Header value="Keypoint Labels"/>
  <KeyPointLabels name="tag2" toName="image" smart="true">
    <Label value="Dog" smart="true" background="#000000" showInline="true"/>
    <Label value="Possum" smart="true" background="#000000" showInline="true"/>
  </KeyPointLabels>
  <Header value="Rectangle Labels"/>
  <RectangleLabels name="tag3" toName="image" smart="true">
    <Label value="Dog" background="#000000" showInline="true"/>
    <Label value="Possum" background="#000000" showInline="true"/>
  </RectangleLabels>
</View>Note that for this example, we are interested in labeling images with “Dogs” and “Possums.” Feel free to replace these tag values with whatever application you’re interested in and with as many tags as you wish.
The labeling configuration includes interface elements for brush, keypoint, and rectangle labels. The keypoint and rectangle labels will send inference requests to the SAM ML Backend.
You’ll be presented with a sample labeling interface as you enter the code. When you are satisfied with the interface, select “Save.”
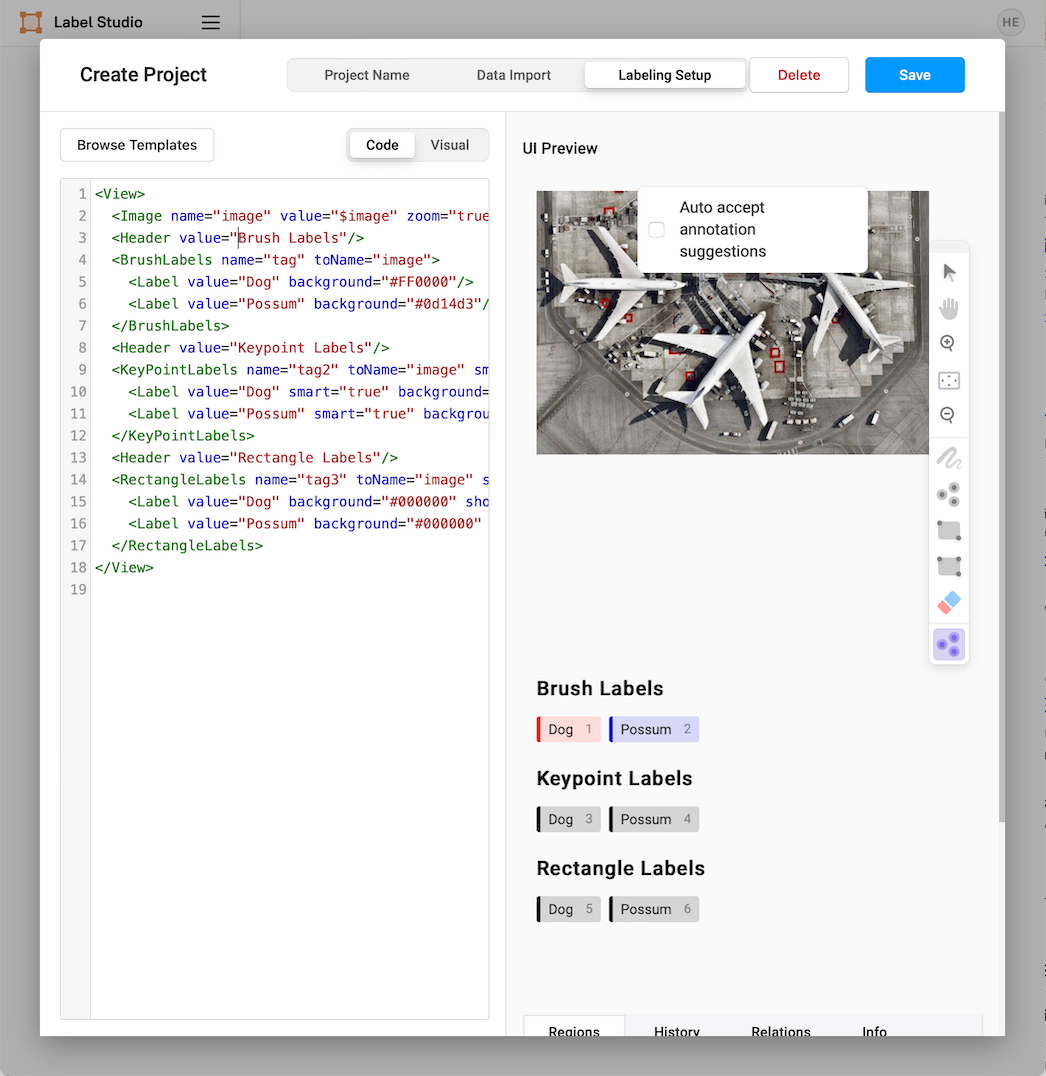
The final custom labeling interface
This will take you to the task management interface, where you’ll see a screen indicating you haven’t imported any data yet.
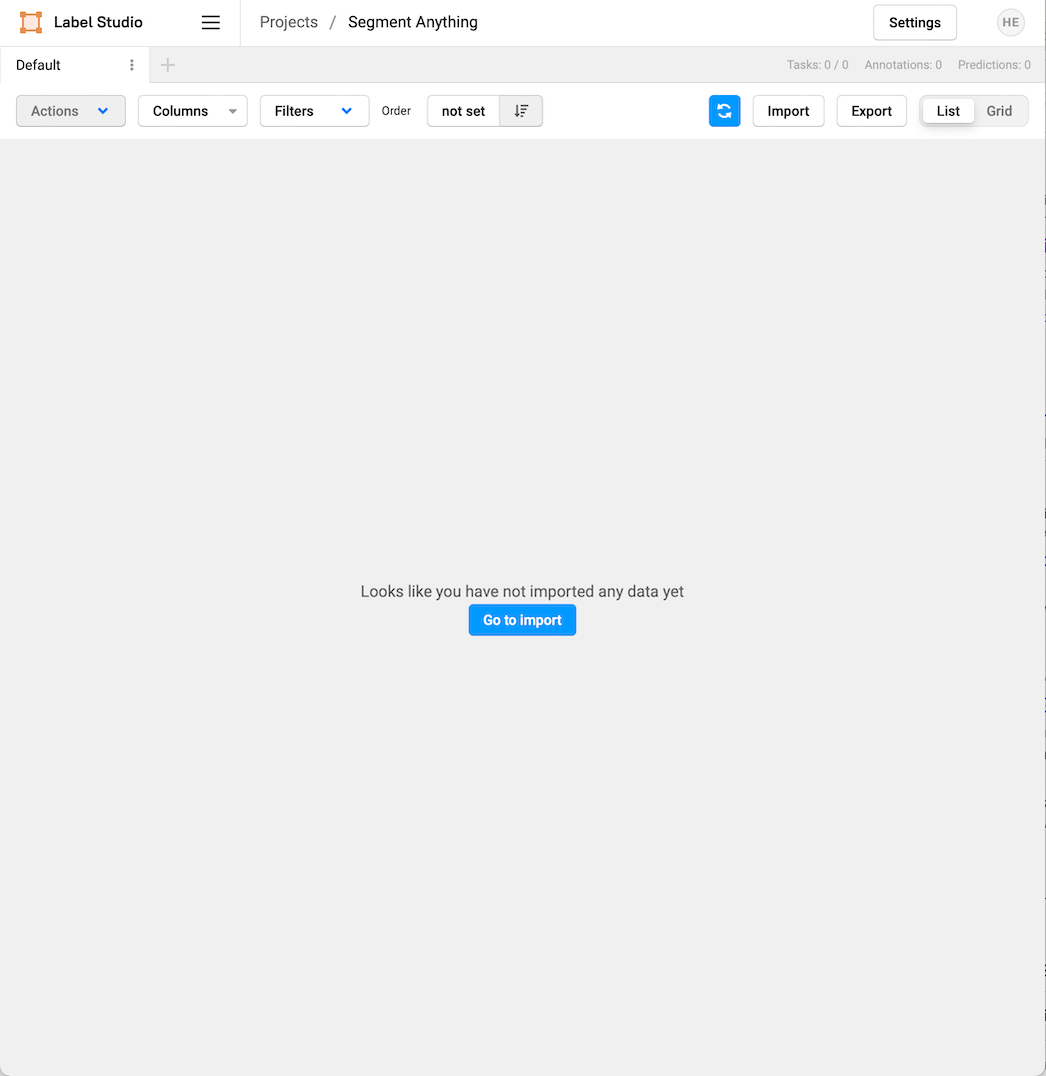
Looks like you have not imported any data yet
Before starting up the ML Backend, you’ll need to gather additional information about your Label Studio installation. You’ll first need the API token to access Label Studio. The token is required for downloading images from the Label Studio instance to the SAM ML Backend. You can find the token by selecting the user setting icon in the upper right-hand corner of the interface, then selecting “Accounts & Settings.”
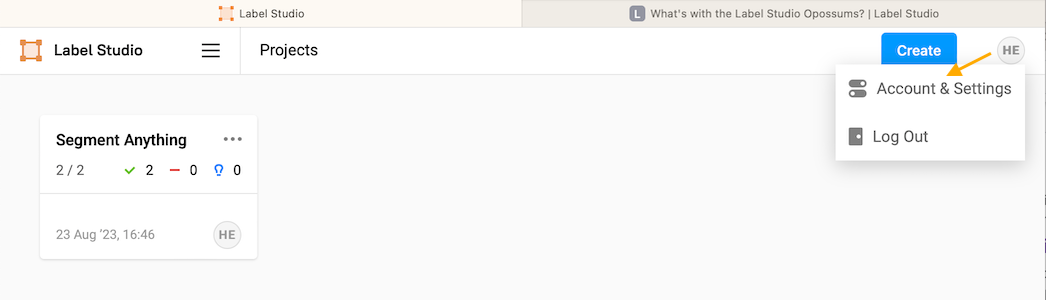
Accounts & Settings
Copy the Access Token from this screen and make a note of it. You will need it for configuring the SAM ML Backend.
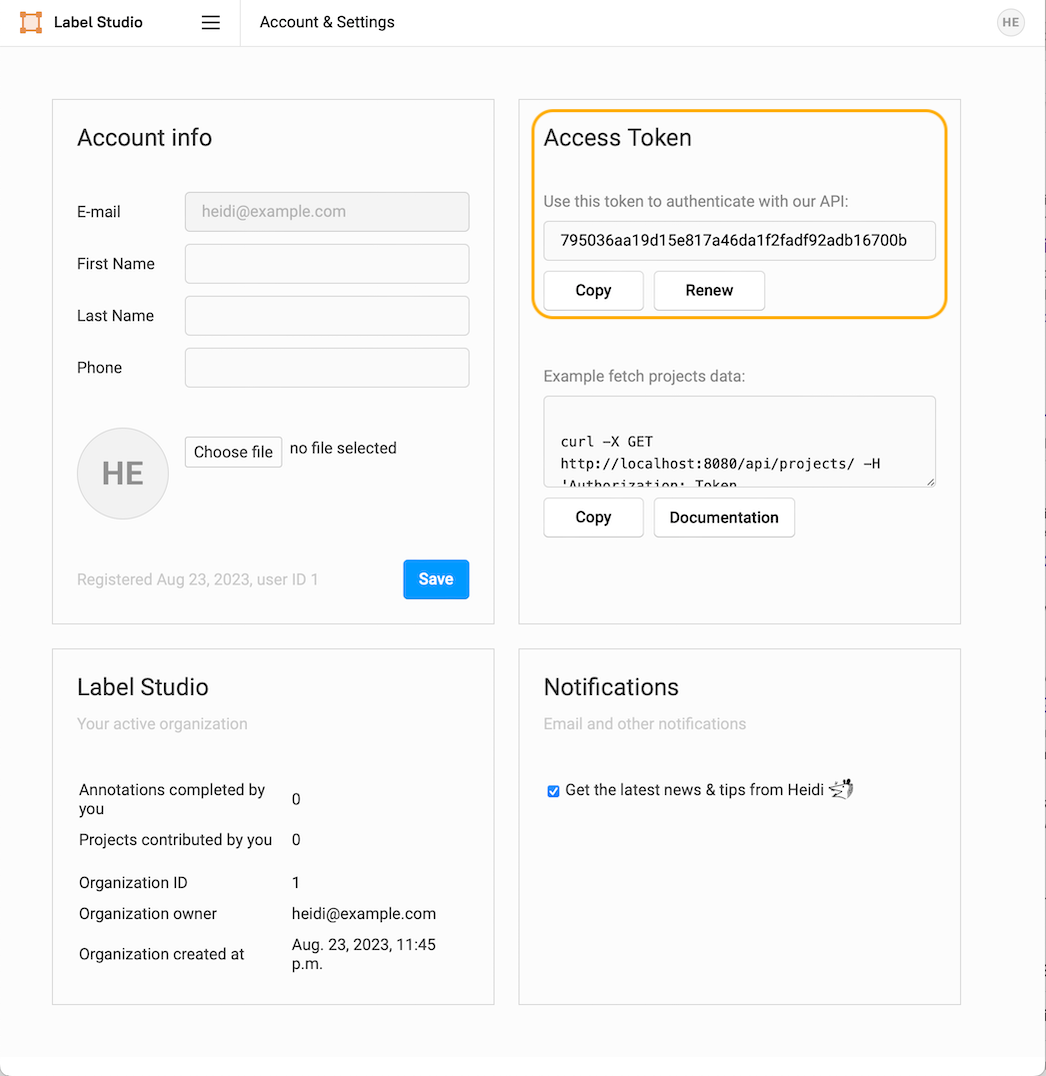
Copy the access token
You will also need the local IP address of your host machine. You can find this in several different ways. On Mac and Windows systems, the easiest way is to look up your IP address in your system settings. You can use network commands from the command line like ip a or ifconfig to discover the local IP address. It’s important to know the actual address because Label Studio and the Label Studio ML backend treat localhost as local to the container, not to the container host. As a result, the localhost name will result in unexpected and incorrect behavior.
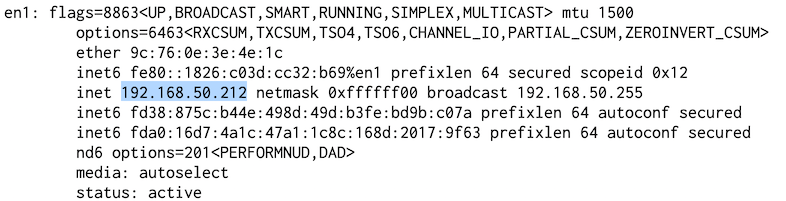
Example output of using ifconfig for discovering your ip address
Start the SAM ML Backend
With the project set up, and the host and access information about Label Studio available, we can now start the SAM ML Backend. Open the `docker-compose.yml` file using your favorite text editor and edit the following lines to include your Label Studio host and API access keys.
# Add these variables if you want to access the images stored in Label Studio
      - LABEL_STUDIO_HOST=http://<YOUR_HOST_IP_ADDRESS_HERE>:8080
- LABEL_STUDIO_ACCESS_TOKEN=<YOUR_ACCESS_TOKEN_HERE>Save the file, and start the backend with the command:
docker compose upYou should see output similar to:
[+] Running 1/0
 ✔ Container server  Recreated                                                                                                          0.0s
Attaching to server
server  | [2023-08-23 03:40:23,575] [DEBUG] [sam_predictor::__init__::33] Using device cpu
server | [2023-08-23 03:40:23,689] [INFO] [sam_predictor::__init__::65] Using MobileSAM checkpoint /app/models/mobile_sam.ptConnect the ML Backend
Go back to your browser and the Label Studio instance, select the menu, “Projects,” and “Segment Anything” (or whatever name you set for your project). Select “Settings” then “Machine Learning.”
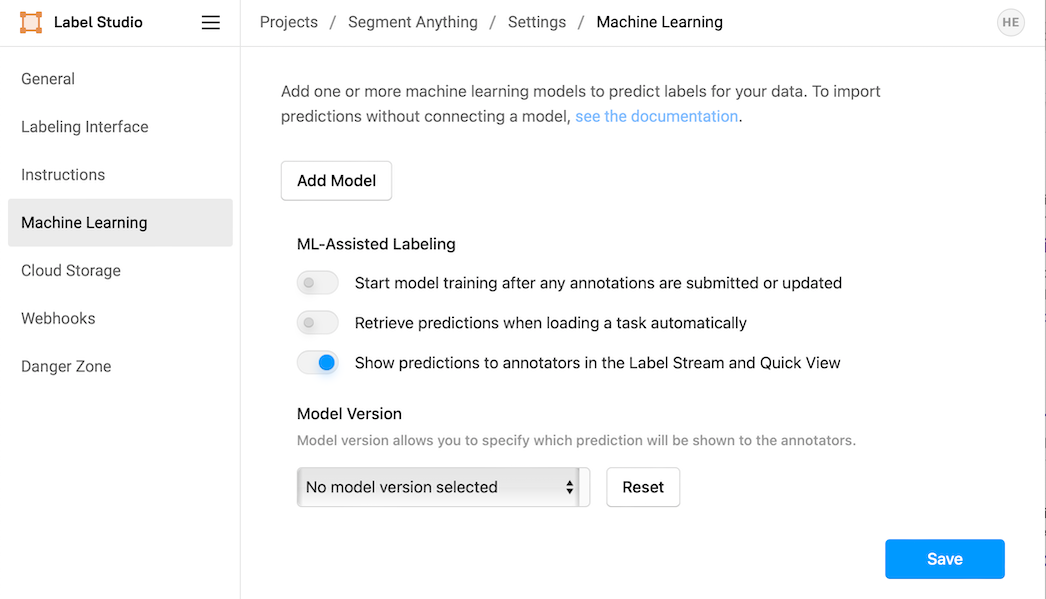
Machine learning settings interface
Select “Add Model,” and fill in the details for the “Title” and the “URL”. The URL will be your local IP address and port 9090. For example, `http://192.168.50.212:9090`. Toggle the switch for “Use for interactive preannotations” to be on, then select “Validate and Save.”

Connecting the Segment Anything ML Backend
Select “Save,” then select the project name in the navigator (right after “Projects,” in this example, “Projects / Segment Anything”) to return to the task interface.
Import Images
Select “Go to import” and import your first project images. Select “Upload Files” and choose any images you wish to use. For this example, we will use an image of a dog and an image of a possum, but you should use any images you want.
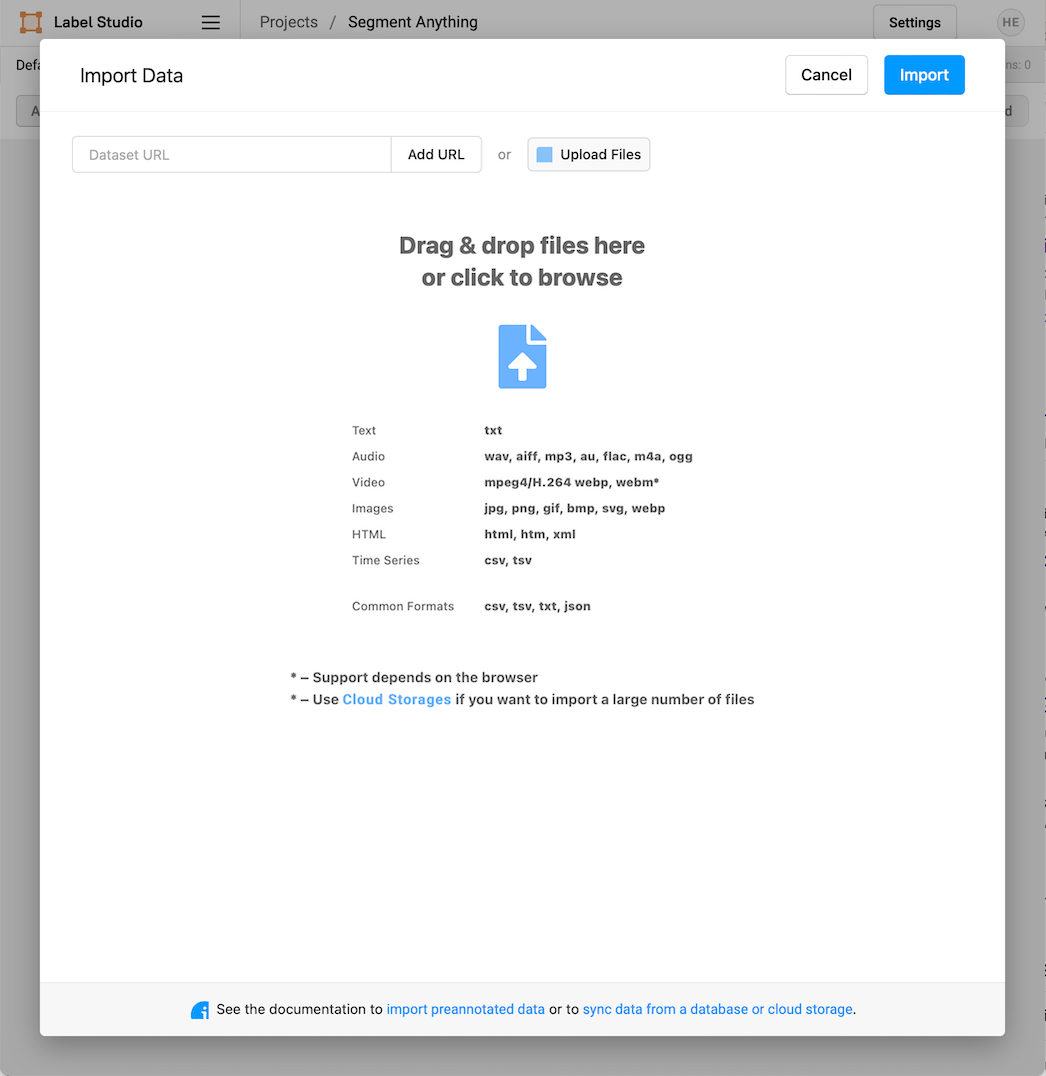
The Import Data interface
With your images imported, it’s time to start labeling! Select “Label All Tasks” to get started!
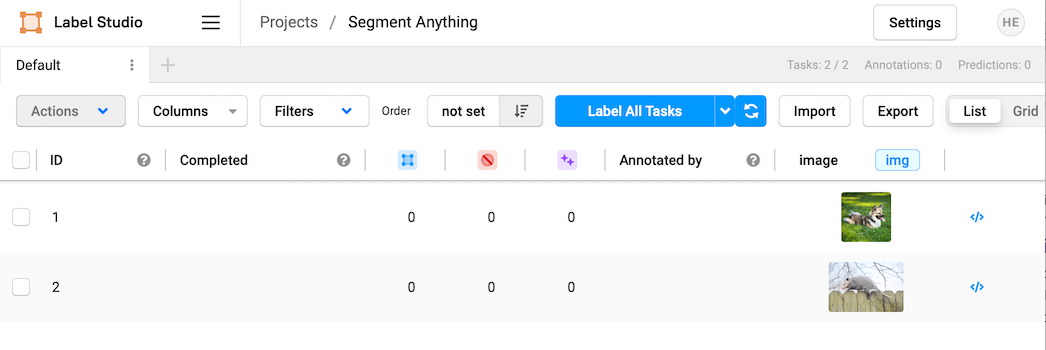
The Label Studio Task Interface
Label with Keypoints
After selecting “Label all Tasks,” you'll be presented with the task labeling interface. You'll have your image labeling task on the upper left side of the interface. Below it will be three rows of labels. The top row is for brush labeling, the second is for keypoint labeling, and the third is for bounding box labeling. To the right of the image, you’ll see a toolbar. At the bottom, you will see some navigation buttons. From the navigation buttons, ensure “Auto-Annotation” is toggled to the on position, then make sure “Auto accept annotation suggestions” is unselected at the top of the image.
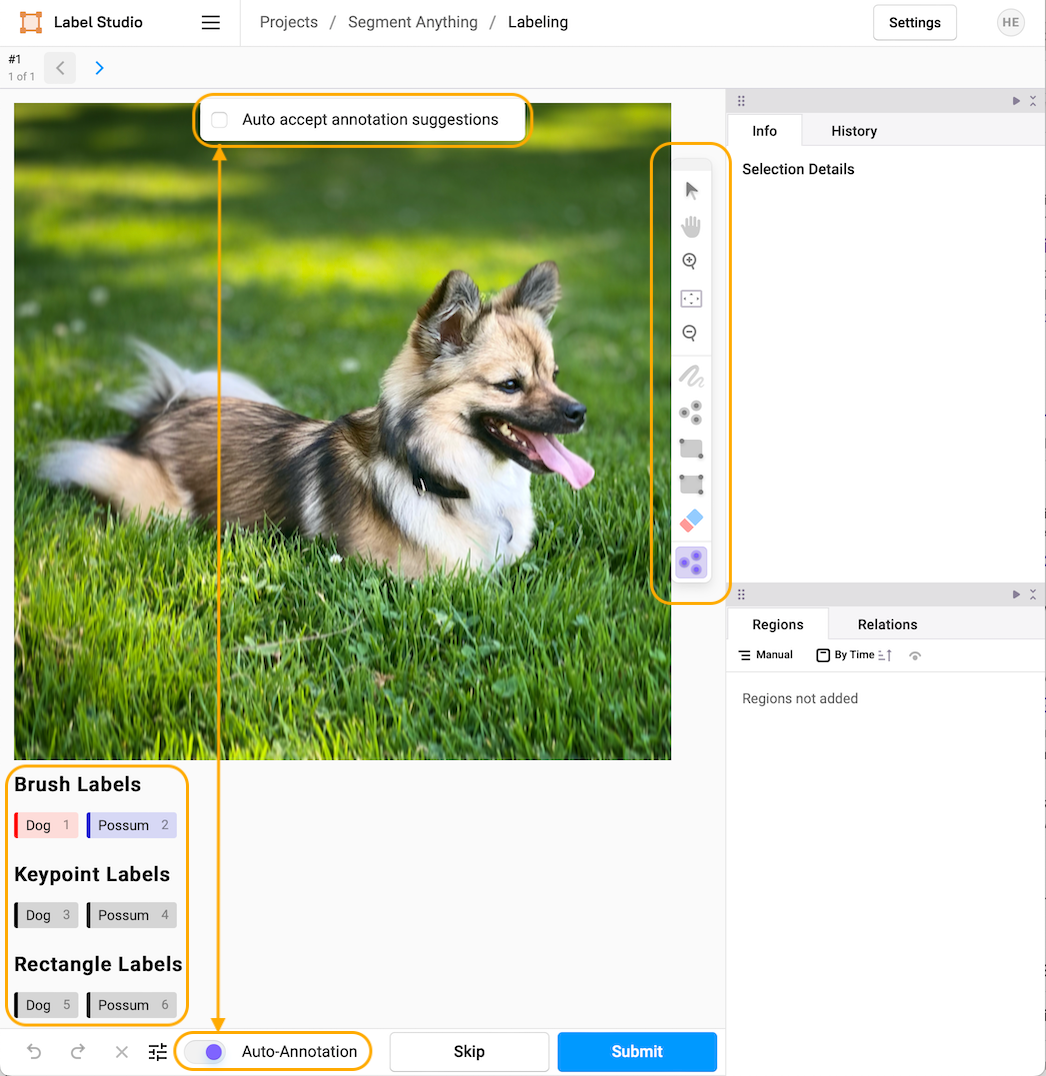
Overview of the Labeling Interface
We will begin with automated keypoint labeling. In the toolbar to the right, select the purple smart selection tool and click on it until the three purple dots are selected (this selects the smart keypoint tool).
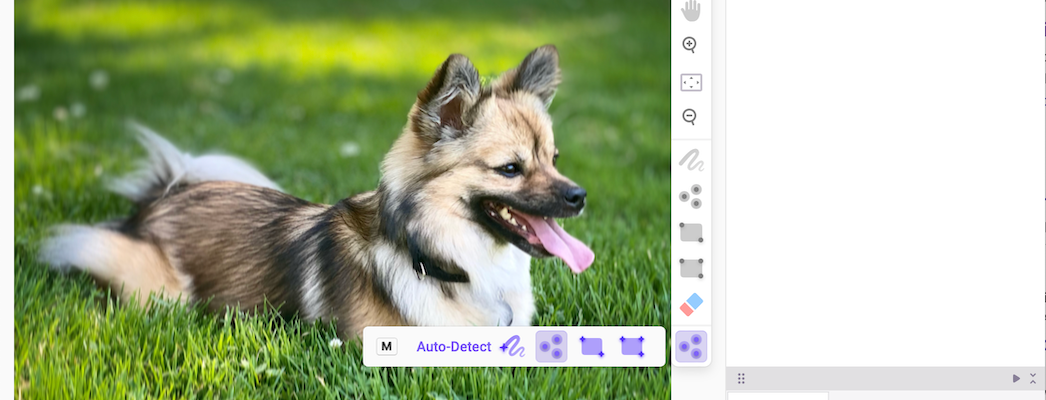
Selecting the Smart Keypoint tool
Now select the label you want in the second row (pro-tip, use the hot-key selection associated with the label to pick the label you want, in this case, `3`). When the label is highlighted, select anywhere in the image to drop a keypoint and automatically trigger the SAM backend. Depending on your hardware, the model may take a few seconds to make the prediction.
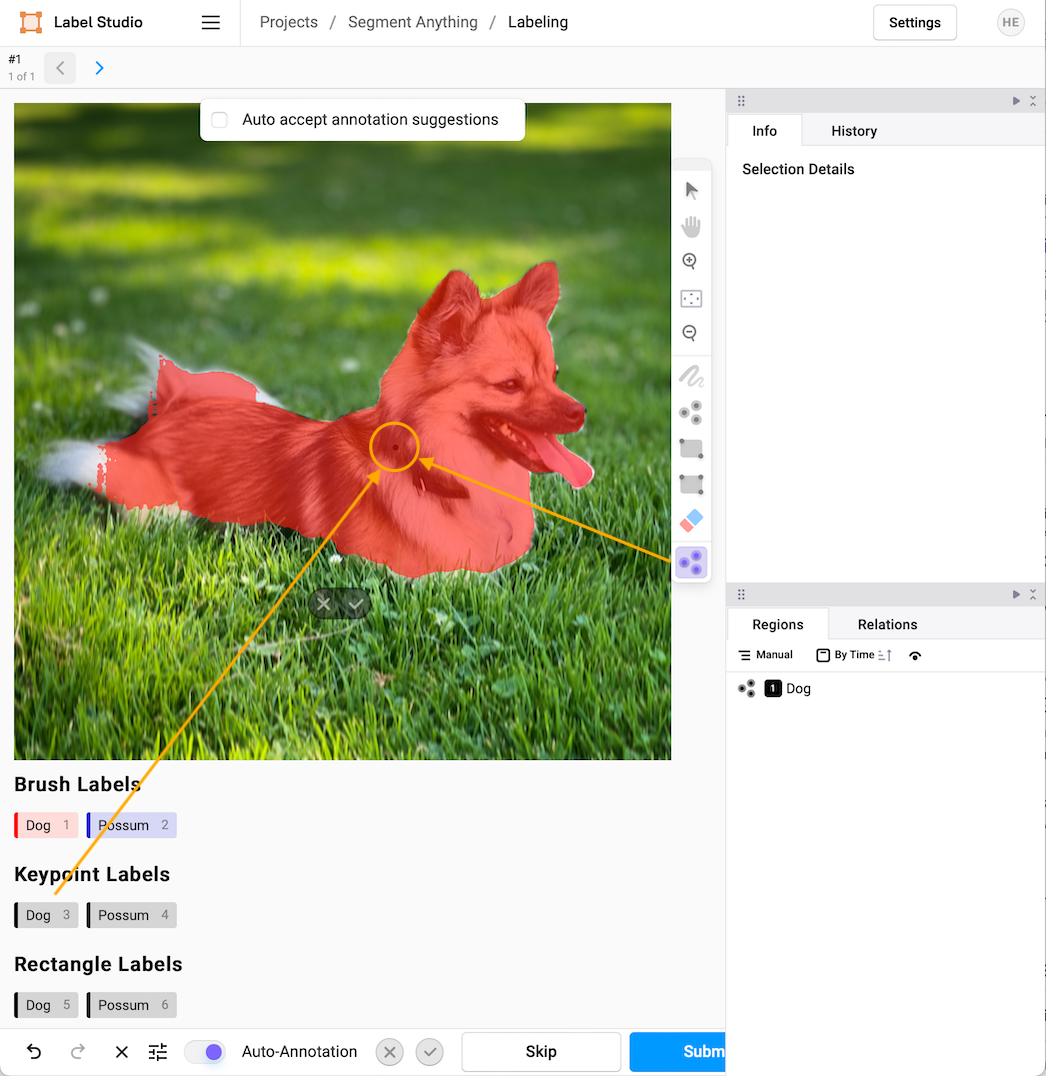
Using a smart keypoint to select an object mask
If you’re satisfied with the segmentation mask, click the check mark next to the “Auto-Annotation” tool. If you’re not, repeat the process by selecting the keypoint tool and clicking the region you want to add to the annotation (this is where using hotkeys comes in handy, so in this instance, you would press 3 to select the Dog keypoint annotation then click on the region you want to refine).
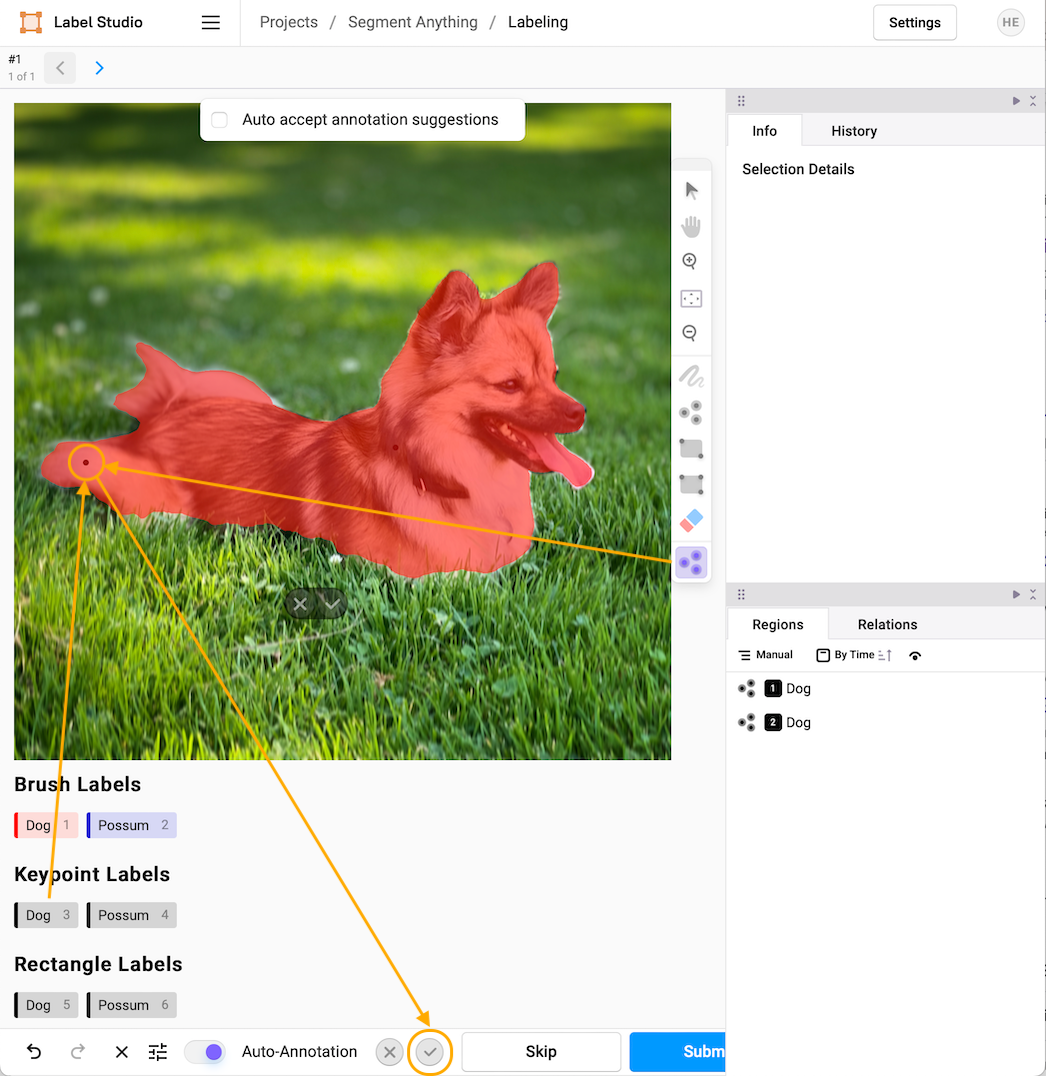
Refining the selection with additional keypoints
If the model has over-selected a region, you can make negative selections by holding down the “option” key while you drop a keypoint. This will create a negative affinity and remove unwanted parts of the annotation. Select the checkmark when you’re satisfied with the selection, and the labeling interface will merge your keypoint selections into one mask. Note that the model also gives a confidence score for the selection, in this case 97%.
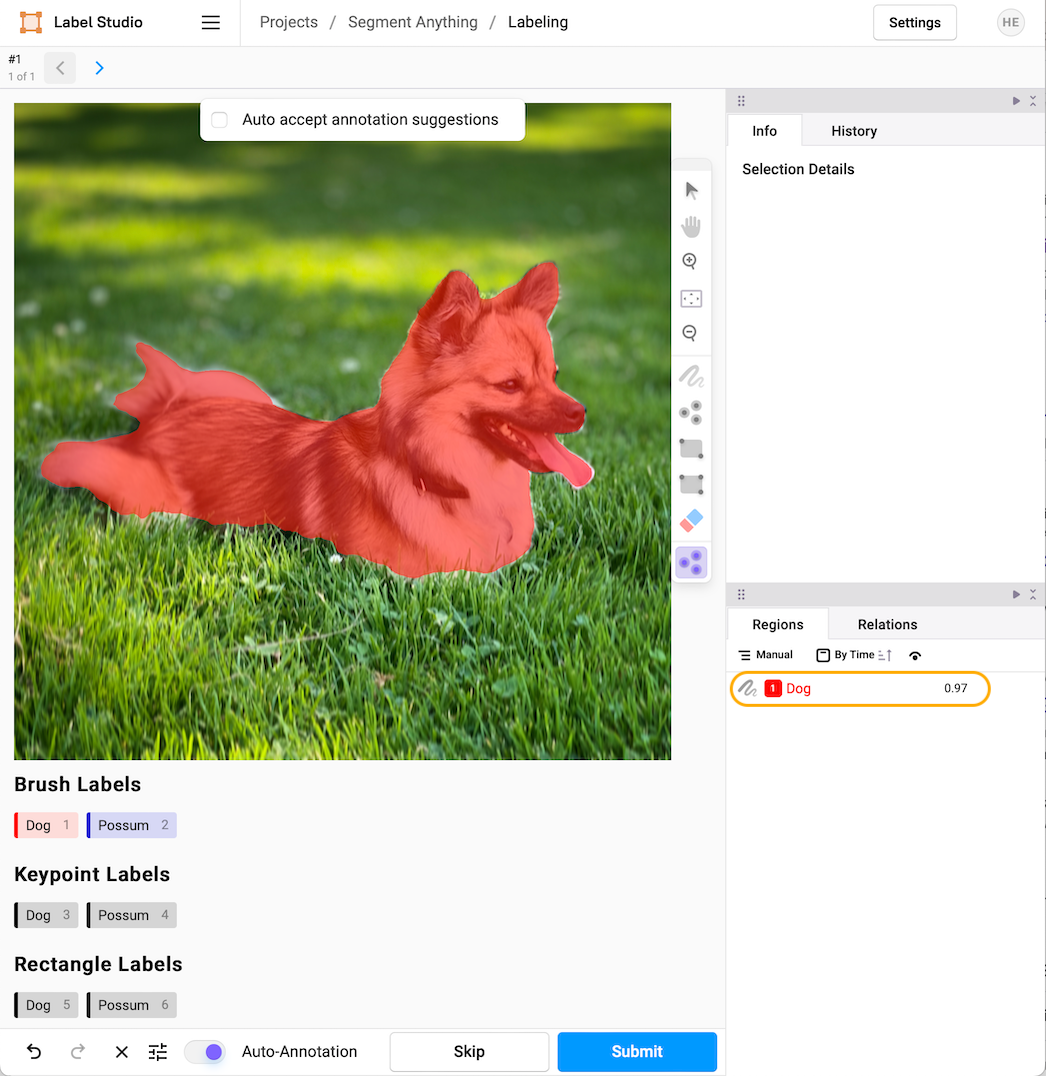
The final image annotation
If you’re happy with the label, select “Submit” and advance automatically to the next labeling task.
Label with Bounding Boxes
On the next example, this time with a possum, begin by selecting the appropriate smart annotation tool, in this case, the rectangle bounding box.
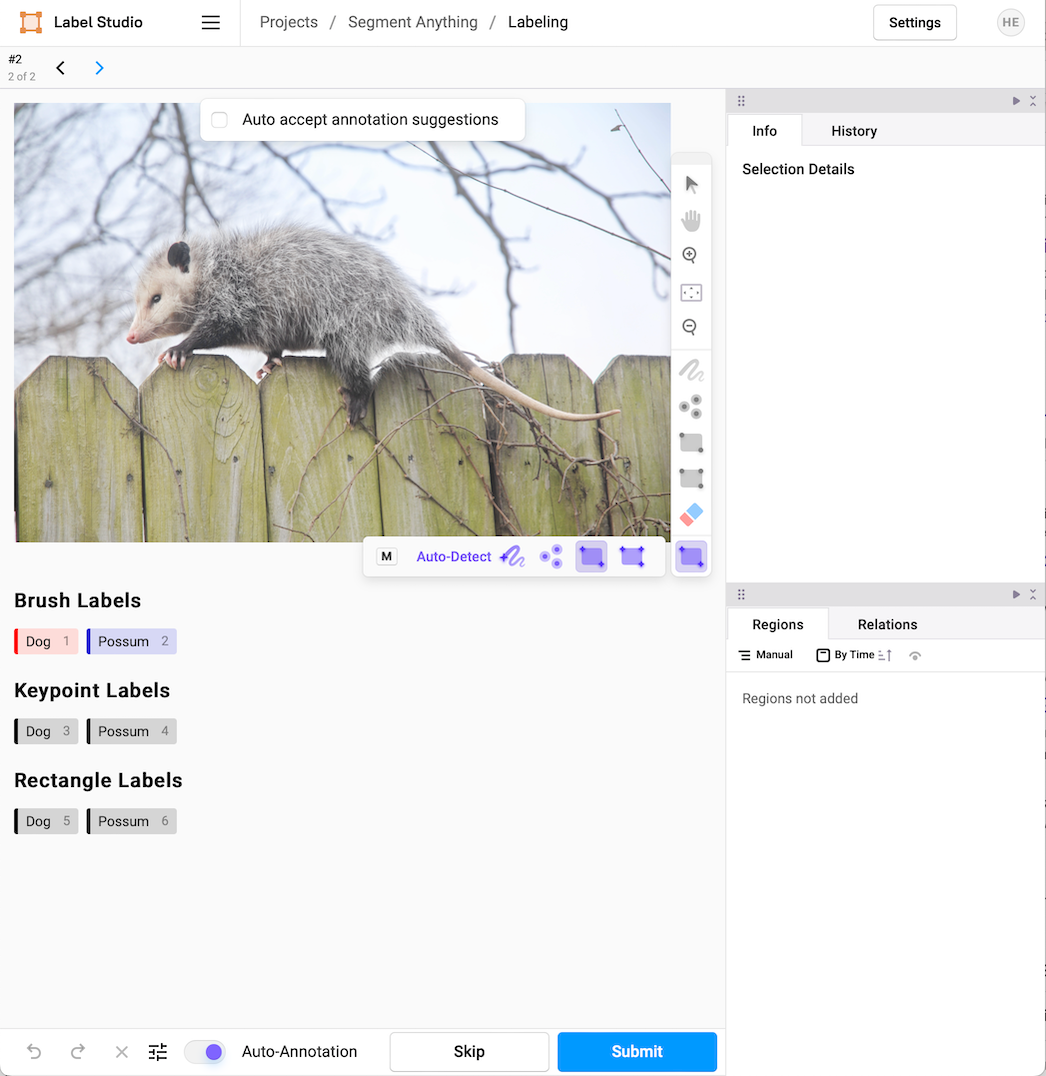
Selecting the smart rectangle tool
Then select the rectangle tag you want to apply from the third row, in this case, “Possum” (with the associated hot-key “6”). Drag a rectangle around the subject you’re interested in, and the SAM model will make a prediction based on that region.
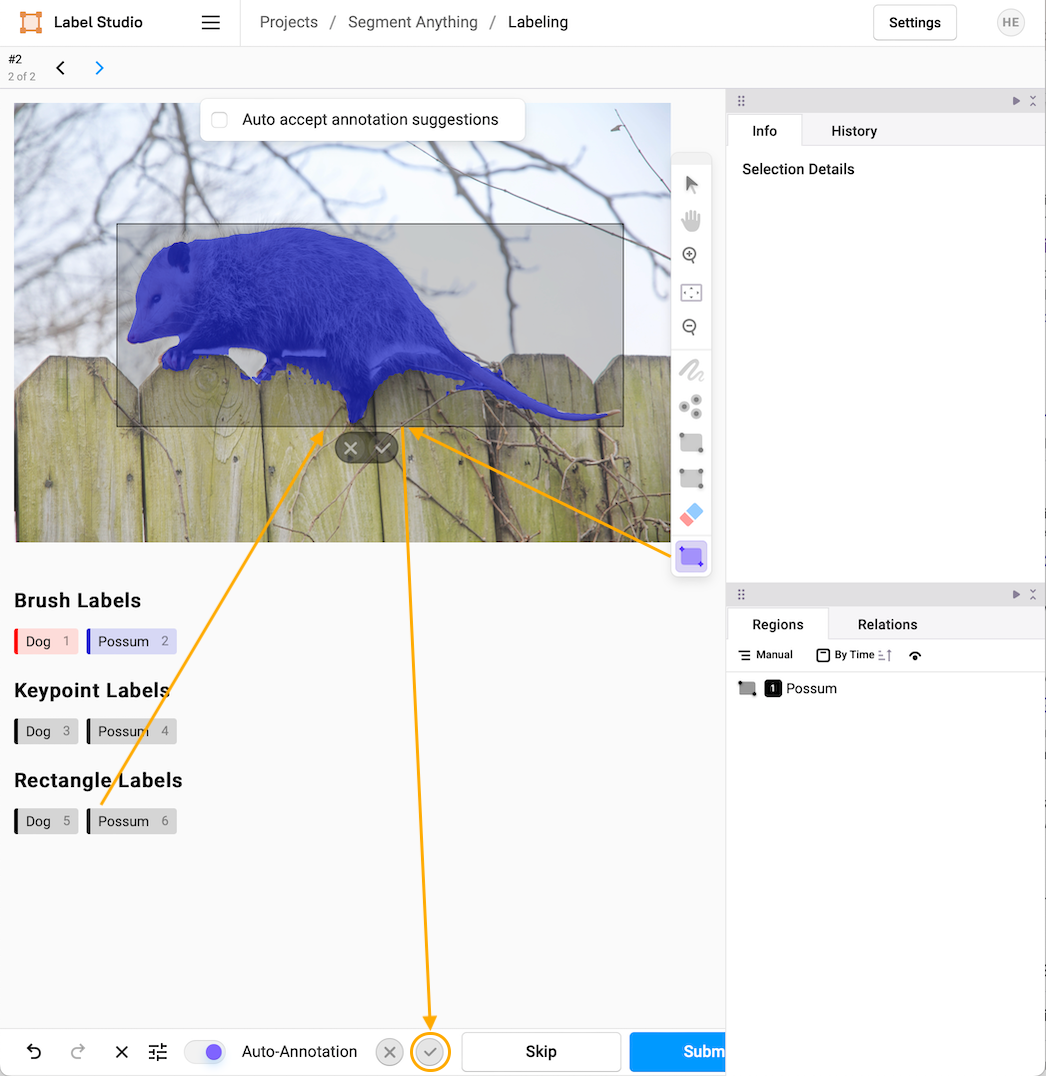
Object mask using the smart rectangle tool
If you’re satisfied with the chosen region, select the check mark and submit the annotation.
Submitting the final annotation
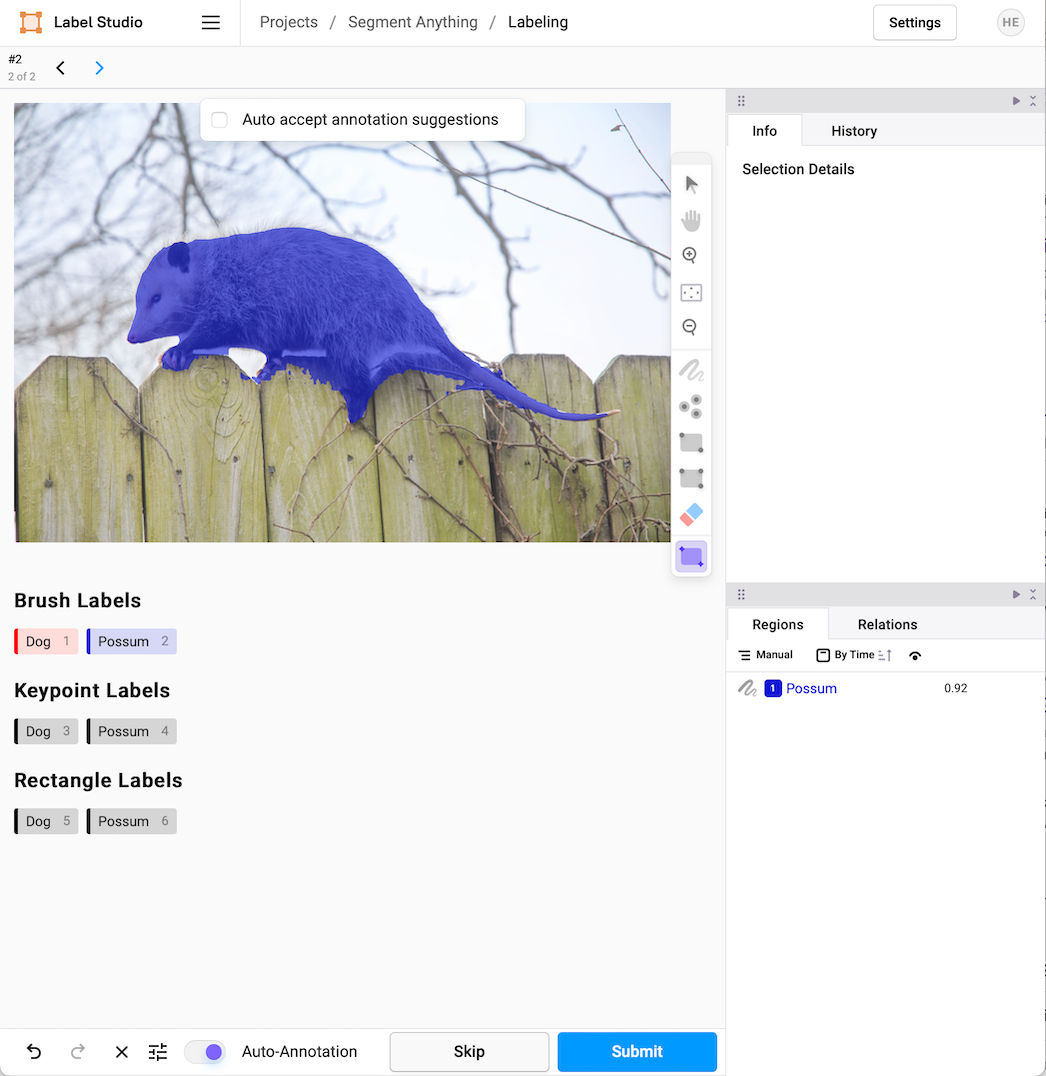
Suppose you find (as with this example, with a confidence score of 92%) that the region is over-selected, you should use the keypoint tool to give you more control (with affinity and anti-affinity points) over the refinement of the selection.
What’s Next?
Label Studio plays a critical role in the machine learning pipeline, giving an interface for humans to guide the essential step of labeling and annotating data alongside machine learning systems to speed the process. You can learn more about integrating Label Studio into your machine learning pipeline in the Label Studio docs. Check out the GitHub repository for complete documentation on the SAM ML Backend.
Once a labeling project is finished, you can export the labels using the “Export” interface from the project management home. Masks and annotations are exported as a JSON catalog to use in your ML and data science pipeline.
Shivansh Sharma, an active Label Studio Community member, developed the original SAM ML Backend. If you have projects you’d like to share or want to collaborate with others in launching your labeling project, join the Label Studio Slack Community, where over 10,000 Label Studio users have signed up to share insights and meet with their peers.
Happy Labeling!