Use YOLO26 with Label Studio
YOLO models are a common choice for object detection because they run fast and fit well into practical labeling workflows. YOLO26 is the newest release in the Ultralytics YOLO family, and it’s a natural next step for teams already using YOLO for pre-labeling or model-assisted annotation.
In this guide, you’ll connect the YOLO ML Backend to a Label Studio project so YOLO26 can generate bounding box pre-annotations. That means your annotators start from predictions and spend their time reviewing and correcting, instead of drawing every box from scratch.
If you want to go beyond bounding boxes, the YOLO ML backend includes other supported templates and feature examples you can use with YOLO26 (for different annotation types and workflows). You can find them in the supported features section of the YOLO ML backend examples.
After the setup, you’ll find a “Frequently Asked Questions” section. It covers the most common issues teams run into when using YOLO with Label Studio and the fastest ways to diagnose them.
Using YOLO26 with Label Studio
To use YOLO26 with Label Studio, we’ll set up the YOLO ML Backend for our project. If you’ve used other YOLO models with Label Studio before, this process will feel extremely similar with one small change. If you haven’t, we’ll go over everything step by step. From start to finish, you should be up and running with YOLO in Label Studio in less than 10 minutes!
Prerequisites
To follow along, you’ll need the following tools ready:
- Github
- Docker
- Label Studio (any tier)
- A code editor of your choice
Step 1: Clone Label Studio ML Backend repository
The first thing you’ll need to do is clone our ML Backend repository on GitHub if you haven’t already done so. Run the following command from your bash shell:
git clone https://github.com/HumanSignal/label-studio-ml-backend.git This will copy all of our example ML backends to your local machine. Navigate to the folder label-studio-ml-backend/label_studio_ml/examples/yolo and open the file docker-compose.yml.
Step 2: Edit docker-compose.yml
The docker-compose.yml file holds all of the environment variables that we’ll need to run the YOLO integration. Edit the variables as follows:
- LABEL_STUDIO_URL: the url to your label studio instance. If you’re running Label Studio Starter Cloud or Enterprise, this will most likely be https://app.humansignal.com. If you’re running locally, you need to use http://host.docker.internal:8080, substituting 8080 for the port number as appropriate. If you use localhost in the url, it won’t work properly!
- LABEL_STUDIO_API_KEY: either the Legacy Token or a Personal Access token for your Label Studio account. To find it, click on the circle with your initials in the right hand corner of the screen, and click on Account & Settings, as shown in the screenshot. Then, scroll down to Legacy Token or Personal Access Token and follow the on screen instructions. If you don’t see it, ask your admin to enable it in the organization settings.

After you’ve changed these two variables, you can save and close docker-compose.yml.
Now, you’re ready to run the backend!
Step 3: Running the Docker Container
With the docker-compose.yml file ready, all we need to do is build and run the container. To do this, run the following command in your bash shell:
docker compose up --buildThis will kick off the building of your Docker container. It will take a while to build, as it needs to download all the necessary models and packages. Be patient!
If you’re running Docker locally and Label Studio in the Cloud
You’ll need to create a tunnel so that Label Studio can “see” your Docker container. We like using ngrok for this. You can find more about ngrok here: https://ngrok.com/docs/getting-started
With ngrok set up, you can run the following command to tunnel to your local Docker container running YOLO:
ngrok http 9090On the screen that appears, you’ll use the Forwarding URL. That probably ends with “ngrok-free.app”. Make note of this URL.
Step 4: Setting Up Label Studio
It’s time to start the fun stuff! You can do this while you wait for your Docker container to build.
Open your Label Studio account, and create a new project. Give it a name, and then upload your images as usual.
For this demo, we’ll set up a bounding box project, but the same YOLO backend should work for all of our supported features (but don’t forget to use different labeling configs per annotation type), as per our documentation found here. When you get to the project creation step where you set up your labeling config, copy and paste the following:
<View>
  <Image name="image" value="$image"/>
  <RectangleLabels model_path="yolo26n.pt" name="label" toName="image" model_score_threshold="0.25">
    <Label value="Car" background="blue" predicted_values="jeep,cab,limousine,truck,car"/>
  </RectangleLabels>
</View> You’ll notice that this labeling config is identical to the one in the YOLO backend documentation, with one small change: we’ve added model_path=”yolo26n.pt” to the RectangleLabels tag as a parameter. In fact, adding this parameter is how you specify which YOLO model you’d like to use when using any of the labeling configs we provide in the documentation, or if you create one yourself. Feel free to play around with changing the model_path to any of the YOLO26 models, as outlined in the YOLO26 documentation.
In our case, we’re looking to identify cars, which can be predicted by YOLO as “jeep, cab, limousine, truck, or car”. If you want to use a different tag, make sure that you update this section to reflect not only what you’d like to call the tag (the “value” parameter), but also what YOLO might predict it as (the “predicted_values” parameter, which is a comma separated list with no spaces).
Save and open your project.
Step 5: Adding the ML Backend
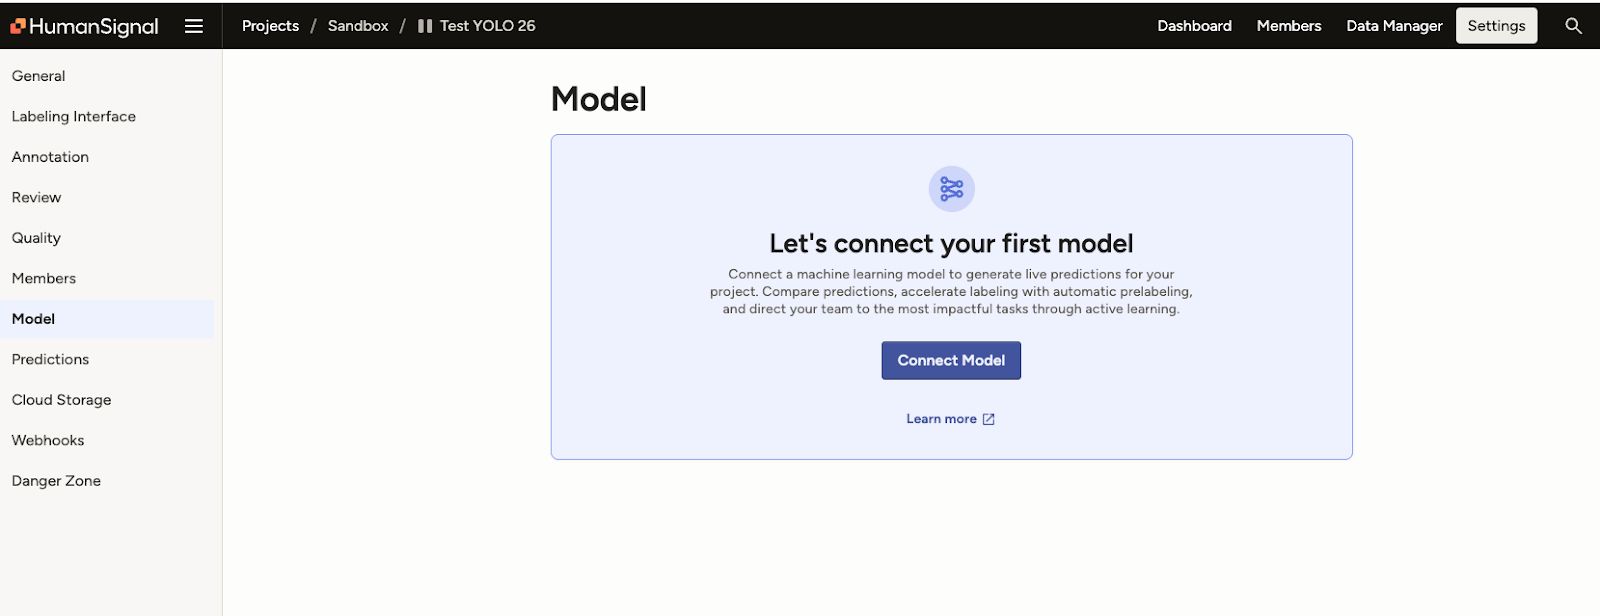
All that’s left to do is to attach your running Docker container with the YOLO backend to your Label Studio project. Open your project and click on the Settings tab. Click on Model in the left hand sidebar. Then, click “connect model”.
Fill out the form that pops up. The name can be anything you’d like – this is what will appear as the name of the annotator when you make model predictions, so we recommend something that will clearly express the model that you’re using. Here, we’ve used “YOLO26”. The backend URL is the path to your running Docker container – remember to use a tunnel like ngrok if you’re running the model locally and Label Studio in the cloud, or https://host.docker.internal:<YOUR PORT> if you’re running everything locally.
Make sure you toggle OFF interactive pre-annotations, or else the backend won’t work. Then, validate and save.
Step 6: Annotation!
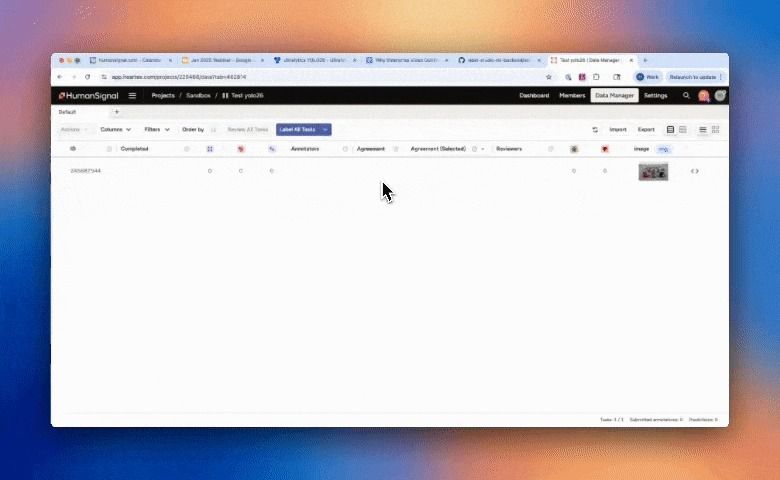
Now that everything is running and connected, you’re ready to start labeling. Go back to your project and open the first task. You may need to toggle ON “Auto-Annotation”, but then sit back and watch the magic happen!
Frequently Asked Questions from the Community
Setup and connectivity
1) My YOLO backend is connected, but predictions don’t appear in the UI. What should I check first?
What’s usually happening: The backend validates, but predictions fail to render because inference fails or the backend returns a prediction payload the UI can’t display.
Fast checks (in order):
- Open one task, trigger Auto-Annotation, and watch the backend logs while it runs
- Confirm the backend can download the task image successfully (no 401/403)
- Confirm the backend returns predictions and the JSON matches Label Studio’s expected pre-annotation format
- Confirm YOLO is predicting classes that you included in predicted_values in your labeling config (if the model predicts a class you didn’t list, it won’t map cleanly to your UI labels)
Most common fix: Bounding boxes need the expected keys (x, y, width, height) and percent units (not pixels). Also confirm your predicted_values covers the class names YOLO actually returns. If you wrapped the backend in custom code, compare your JSON to the official YOLO backend example output and match it exactly.
2) I used localhost for LABEL_STUDIO_URL and it won’t work. Why?
What’s usually happening: When the YOLO backend runs in Docker, localhost points to the container itself, not your host machine running Label Studio.
Fast checks:
- Check LABEL_STUDIO_URL in docker-compose.yml
- Confirm the container can reach your Label Studio URL
Most common fix: Use host.docker.internal with the correct port for local Label Studio. If that fails in your environment, use your machine’s real host IP that Docker can reach.
Auth and permissions
3) I see 403/Forbidden (or 401) when the backend tries to download images. How do I fix it?
What’s usually happening: The backend needs to fetch task media to run inference. If token/auth is wrong, inference can’t run and no predictions show up.
Fast checks:
- Look for 401/403 in backend logs when running Auto-Annotation
- Confirm whether it fails mainly for local storage assets vs uploaded images
Most common fix: Confirm LABEL_STUDIO_API_KEY is correct and the backend is actually using it on media download requests. Re-test on one task with logs open so you can see the failure disappear.
Label configuration and class mapping
4) My model returns detections, but nothing shows up, or I see “no matching labels.” What causes this?
What’s usually happening: Detections exist, but Label Studio can’t map predicted classes to the labels defined in your project.
Fast checks:
- Review your labeling config Label value=...
- Confirm
predicted_valuesmatches the class names YOLO outputs - Check for casing problems and duplicates (Person vs person)
Most common fix: Normalize label naming (consistent casing, no duplicates) and make predicted_values match the model’s output class names exactly.
Runtime and dependency issues
5) YOLOv8 works, but YOLO11 or YOLO26 fails to load in the backend. What’s going on?
What’s usually happening: Ultralytics version mismatch. A newer model can require a newer Ultralytics runtime than your backend container has installed. Fast checks:
- Check backend logs during startup/model load for missing module/class errors
- Confirm the Ultralytics version installed in the backend environment
Most common fix: Align the Ultralytics version in the backend with the version used to train/export your YOLO model, then rebuild the container.
Conclusion
Once your YOLO backend is connected and your labeling config matches the classes you want to capture, YOLO26 becomes a practical way to speed up annotation: you start from model predictions, then reviewers correct and finalize labels.
If you run into issues, start with the same checks the community runs into most often: confirm Docker networking and URLs, confirm the backend can download task images with the right token, confirm labels map cleanly to YOLO class names, and confirm the prediction payload format matches what the Label Studio UI expects. Those fixes solve the majority of “connected but nothing shows” cases.
From here, you can expand this workflow by testing other YOLO26 model sizes, adjusting thresholds after you confirm predictions render correctly, and validating exports early so your final dataset comes out in the format your training pipeline expects.
Related Content
-
SAM2 vs YOLO for Bounding Box Labeling: Which Should You Use?
A practical comparison of SAM2 and YOLO for bounding box labeling, with pros, cons, and how to use each model in Label Studio.

Micaela Kaplan
August 14, 2025
-
Tutorial: Importing Local YOLO Pre-Annotated Images to Label Studio
Today, we're diving into Label Studio Format Converter, a handy tool that helps you encode labels into formats compatible with your favorite machine learning libraries, enhancing workflow efficiency.

Label Studio Team
May 15, 2024