5 Tips and Tricks for Label Studio’s API and SDK

Label Studio is known for its flexibility and user-friendly interface. But one of the often unsung heroes of the Label Studio backend is its powerful API and SDK, which can significantly enhance your data labeling workflow. Whether setting up a new project, managing large datasets, or configuring complex labeling tasks, these tools provide the flexibility and robustness needed for high-quality data preparation.
In this post, we will show five essential tips and tricks that will open your eyes to the power of the API and SDK backend. From automating project creation to schema modifications and export operations, we’ll address some of the most common beginner's problems and even some advanced practitioner situations. By the end of this guide, you'll be equipped with practical insights and best practices to leverage Label Studio's capabilities to their fullest, ensuring your datasets are of the highest quality.
Tip 1: Know When to Use the API and SDK
The first tip is to know when to use the API and the SDK. Label Studio’s web application is designed to simplify working with data regardless of the type. But if there’s one thing I’ve found, working with data is never simple. Whether it’s data preparation or connecting labeling tools into a workflow, there always seems to be a need for something custom. Luckily, Label Studio has extension points to help you incorporate data labeling into any workflow with the API and SDK. But when should we use these tools?
The Label Studio API is a RESTful interface that directly interacts with the Label Studio server. It features endpoints for various operations, including project creation, task import, annotation export, and user management. This versatile API can be utilized across any programming language via HTTP requests, making it ideal for system integrations and automated workflows in non-Python languages.
On the other hand, the Label Studio SDK, designed specifically for Python, offers a more intuitive layer over the API. It streamlines API interactions with user-friendly Python methods and classes. This simplification benefits routine tasks such as project setup, task handling, and data export.
Usage Recommendations:
- Opt for the API when working in non-Python environments or when precise control over HTTP requests and responses is required. It’s also suitable for scenarios needing direct HTTP integration, such as specific web applications or languages lacking an SDK.
- Choose the SDK for Python-centric workflows, including those involving Jupyter notebooks. It's especially useful for data scientists and machine learning engineers who prioritize data handling over the complexities of API communication.
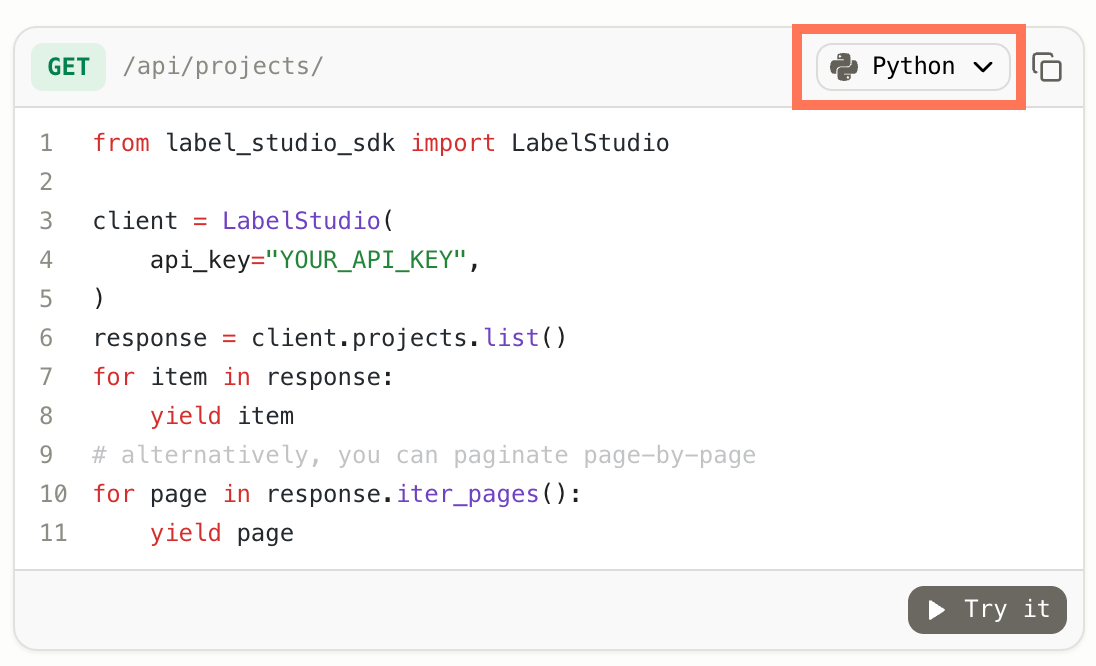
- The SDK and API are documented together. To see SDK commands, select Python from the examples:
Tip 2: Streamline Project Creation with the SDK
Initiating a new project is a fundamental step in utilizing Label Studio. Creating multiple smaller projects for better organization and automation is advantageous in specific workflows.
The first thing you will need is a Label Studio API token. As described in the documentation, we can use the UI to get a token for our user, as shown below.
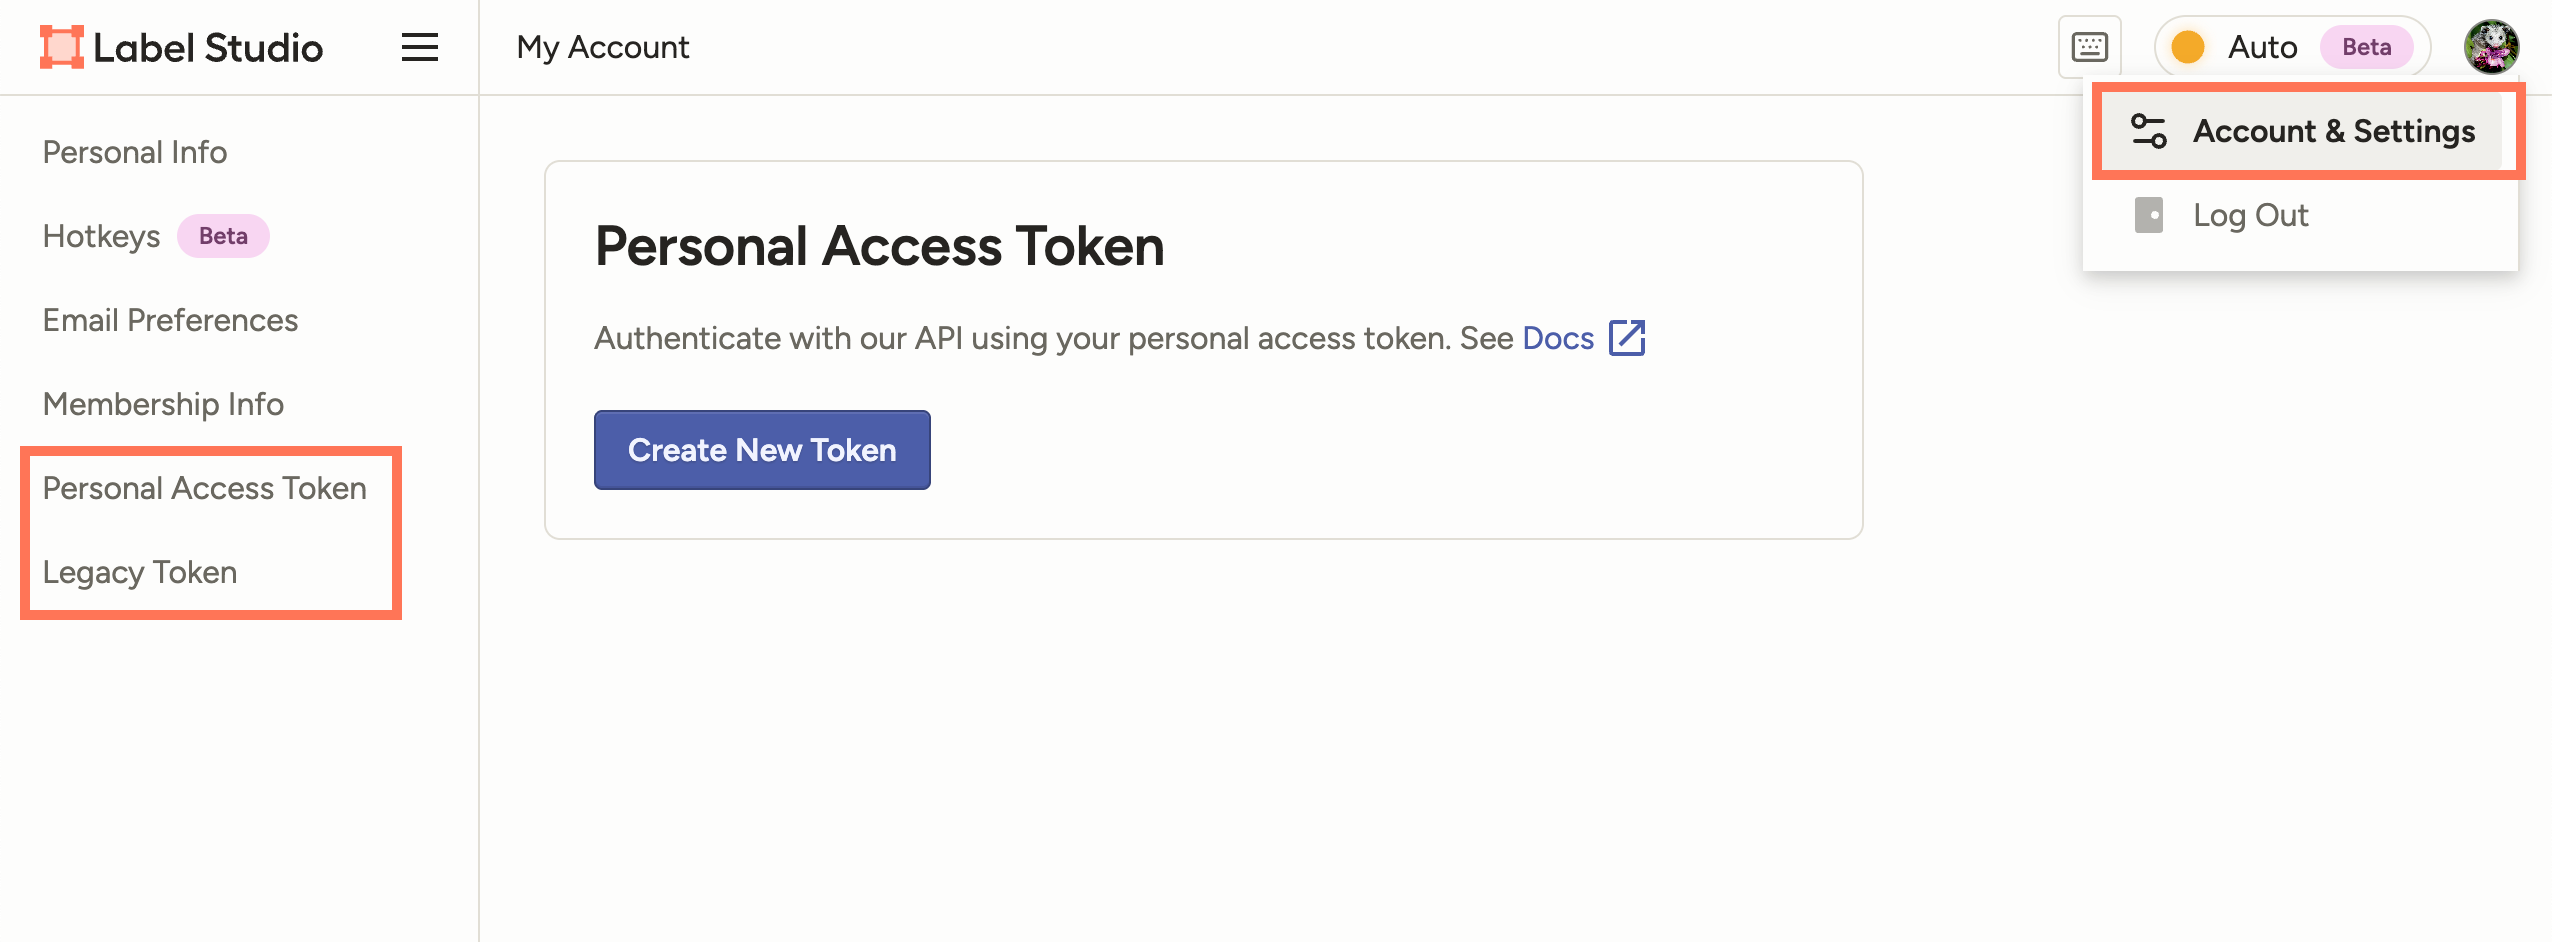
Obtaining an API token in Label Studio.
Note the following:
- If you do not see these options, you may need to enable them from Organization > API Token Settings.
- As described in the documentation, the legacy token is easier to use with HTTP API, but the personal access token is preferred for the SDK.
While the direct API can be used for project creation, the complexity of these calls can quickly escalate, especially when embedding label configurations in requests, as shown in this example:
!curl -H "Content-Type:application/json" -H "Authorization: Token your-api-token" -X POST "http://localhost:8080/api/projects" --data "{\"title\": \"api_project\", \"label_config\": \"<View><Image name=\\\"image\\\" value=\\\"\$image\\\"/><Choices name=\\\"choice\\\" toName=\\\"image\\\"><Choice value=\\\"Dog\\\"/><Choice value=\\\"Cat\\\" /></Choices></View>\"}"Conversely, the SDK simplifies this process with more intuitive functions and reduced boilerplate. Here’s how:
- Installation and Setup: Install the Label Studio SDK via pip and import it into your Python environment.
!pip install label-studio-sdk- Connecting to Label Studio: Initialize the client with your Label Studio URL and API token.
Note: These lines should go at the top of your script in the following examples.
from label_studio_sdk import LabelStudio

BASE_URL   = "http://localhost:8080"  # replace with your LS URL
API_KEY    = "YOUR_API_KEY" # Use legacy or personal access token

client = LabelStudio(base_url=BASE_URL, api_key=API_KEY)- Creating a New Project: Use the SDK to effortlessly create a new project. Define the project's name, description, and labeling configuration in XML format.
project = client.projects.create(
  title='Image Classification Project',
  label_config='''
<View>
<Image name="image" value="$image"/>
<Choices name="choice" toName="image">
<Choice value="Dog"/>
<Choice value="Cat" />
</Choices>
</View>
'''
)This code creates an image classification project with options for Dog and Cat labels. By using the SDK, we can significantly reduce the complexity of project creation, making your workflow more efficient and less error-prone.
Tip 3: Advanced Project Configurations
When dealing with datasets that have a large number of classes, like the CoCo dataset with 80 object classes, manual configuration can be cumbersome. The Label Studio SDK allows for automated setup using existing class lists to streamline this process. Here's how you can set up a project for the CoCo dataset:
- Fetch Class List: Write a script to fetch the list of COCO classes automatically.
import requests

def get_coco_classes():
    classes_url = "https://raw.githubusercontent.com/amikelive/coco-labels/master/coco-labels-2014_2017.txt"
    response = requests.get(classes_url)
    if response.status_code == 200:
        classes = response.text.splitlines()
    else:
        classes = ["Error: Unable to fetch COCO classes"]
    return classes

coco_classes = get_coco_classes()- Create Project with Class List: Use the fetched class list to create a custom XML configuration for your project.
def create_xml_for_classes(classes):
    xml_structure = "<View>\n\t<Image name=\"image\" value=\"$image\"/>\n\t<Choices name=\"choice\" toName=\"image\">\n"
    for cls in classes:
        xml_structure += f"\t\t<Choice value=\"{cls}\"/>\n"
    xml_structure += "\t</Choices>\n</View>"
    return xml_structure

xml_with_coco_classes = create_xml_for_classes(coco_classes)

project = client.projects.create(
    title='Coco Image Classification Project',
    label_config=xml_with_coco_classes
)Now, when we navigate to the project, we can see that we have all 80 classes in our project.
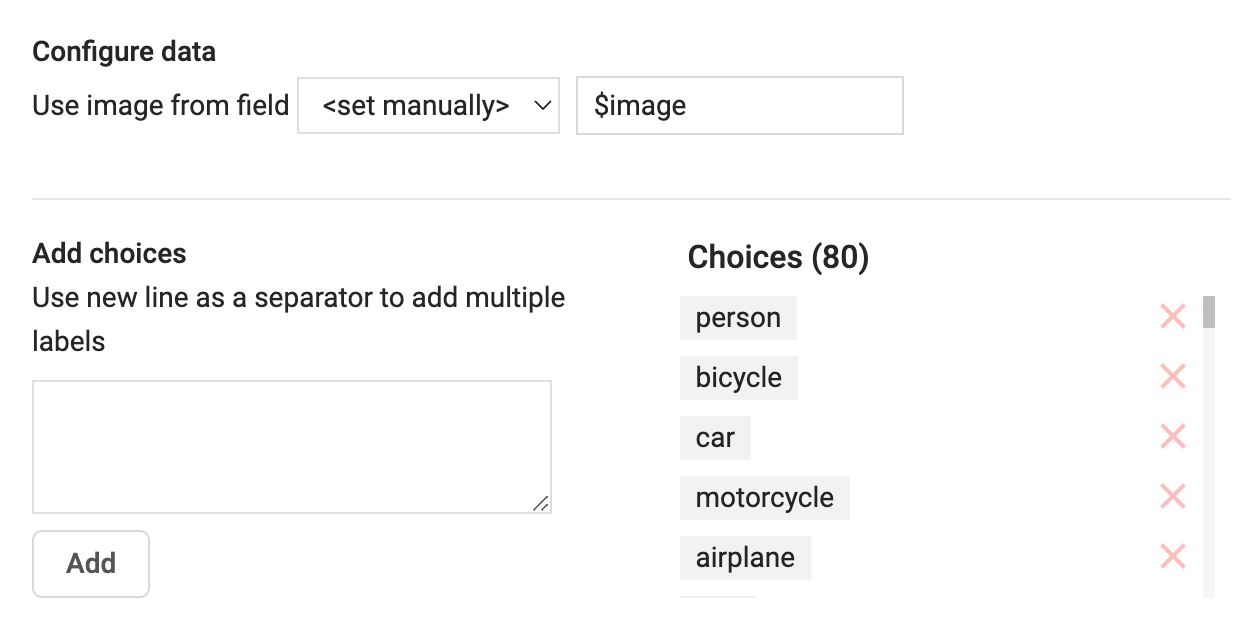
Project settings for our Coco image classification project.
Project settings our Coco image classification project.
This approach automates a complex project setup with numerous classes, ensuring efficiency and accuracy.
Tip 4: Simplify Task Imports and Data Management
Once your project is set up, the next phase involves importing tasks (data points). The Label Studio SDK streamlines this process as well:
- Data Preparation: Organize your data suitably for Label Studio. For image labeling, this might involve compiling a list of image URLs.
- Importing Tasks: The SDK facilitates task importation from various sources, including URLs.
PROJECT_ID = 1 # Replace with your project ID. You can find this in the URL when viewing your project.

tasks = [
  {'image': 'https://data.heartex.net/open-images/train_0/mini/0045dd96bf73936c.jpg'},
  {'image': 'https://data.heartex.net/open-images/train_0/mini/0083d02f6ad18b38.jpg'}
 ]

resp = client.projects.import_tasks(
    id=PROJECT_ID,
    request=tasks,
    return_task_ids=True,
)
print(resp)This example shows how to import images for classification. The process is similar for other data types like images or audio.
- Managing Additional Data Columns: Sometimes, we want to create additional data columns after project creation. For example, if we wanted to add a 'link_source' column, we could add a new task with the new column included.
tasks = [
  {'link_source':'wikipedia', 'image': 'https://upload.wikimedia.org/wikipedia/commons/thumb/2/25/Siam_lilacpoint.jpg/294px-Siam_lilacpoint.jpg'}
]- Backfilling Missing Data: If we want to fill in missing values for this new column for existing tasks, we can update tasks individually or in bulk with the SDK.
for task in client.tasks.list(project=PROJECT_ID, fields="all"):
    data = dict(task.data or {})
    if "source" not in data:
        data["source"] = "http://data.heartex.net"  # use a plain URL (not Slack markup)
        client.tasks.update(id=task.id, data=data)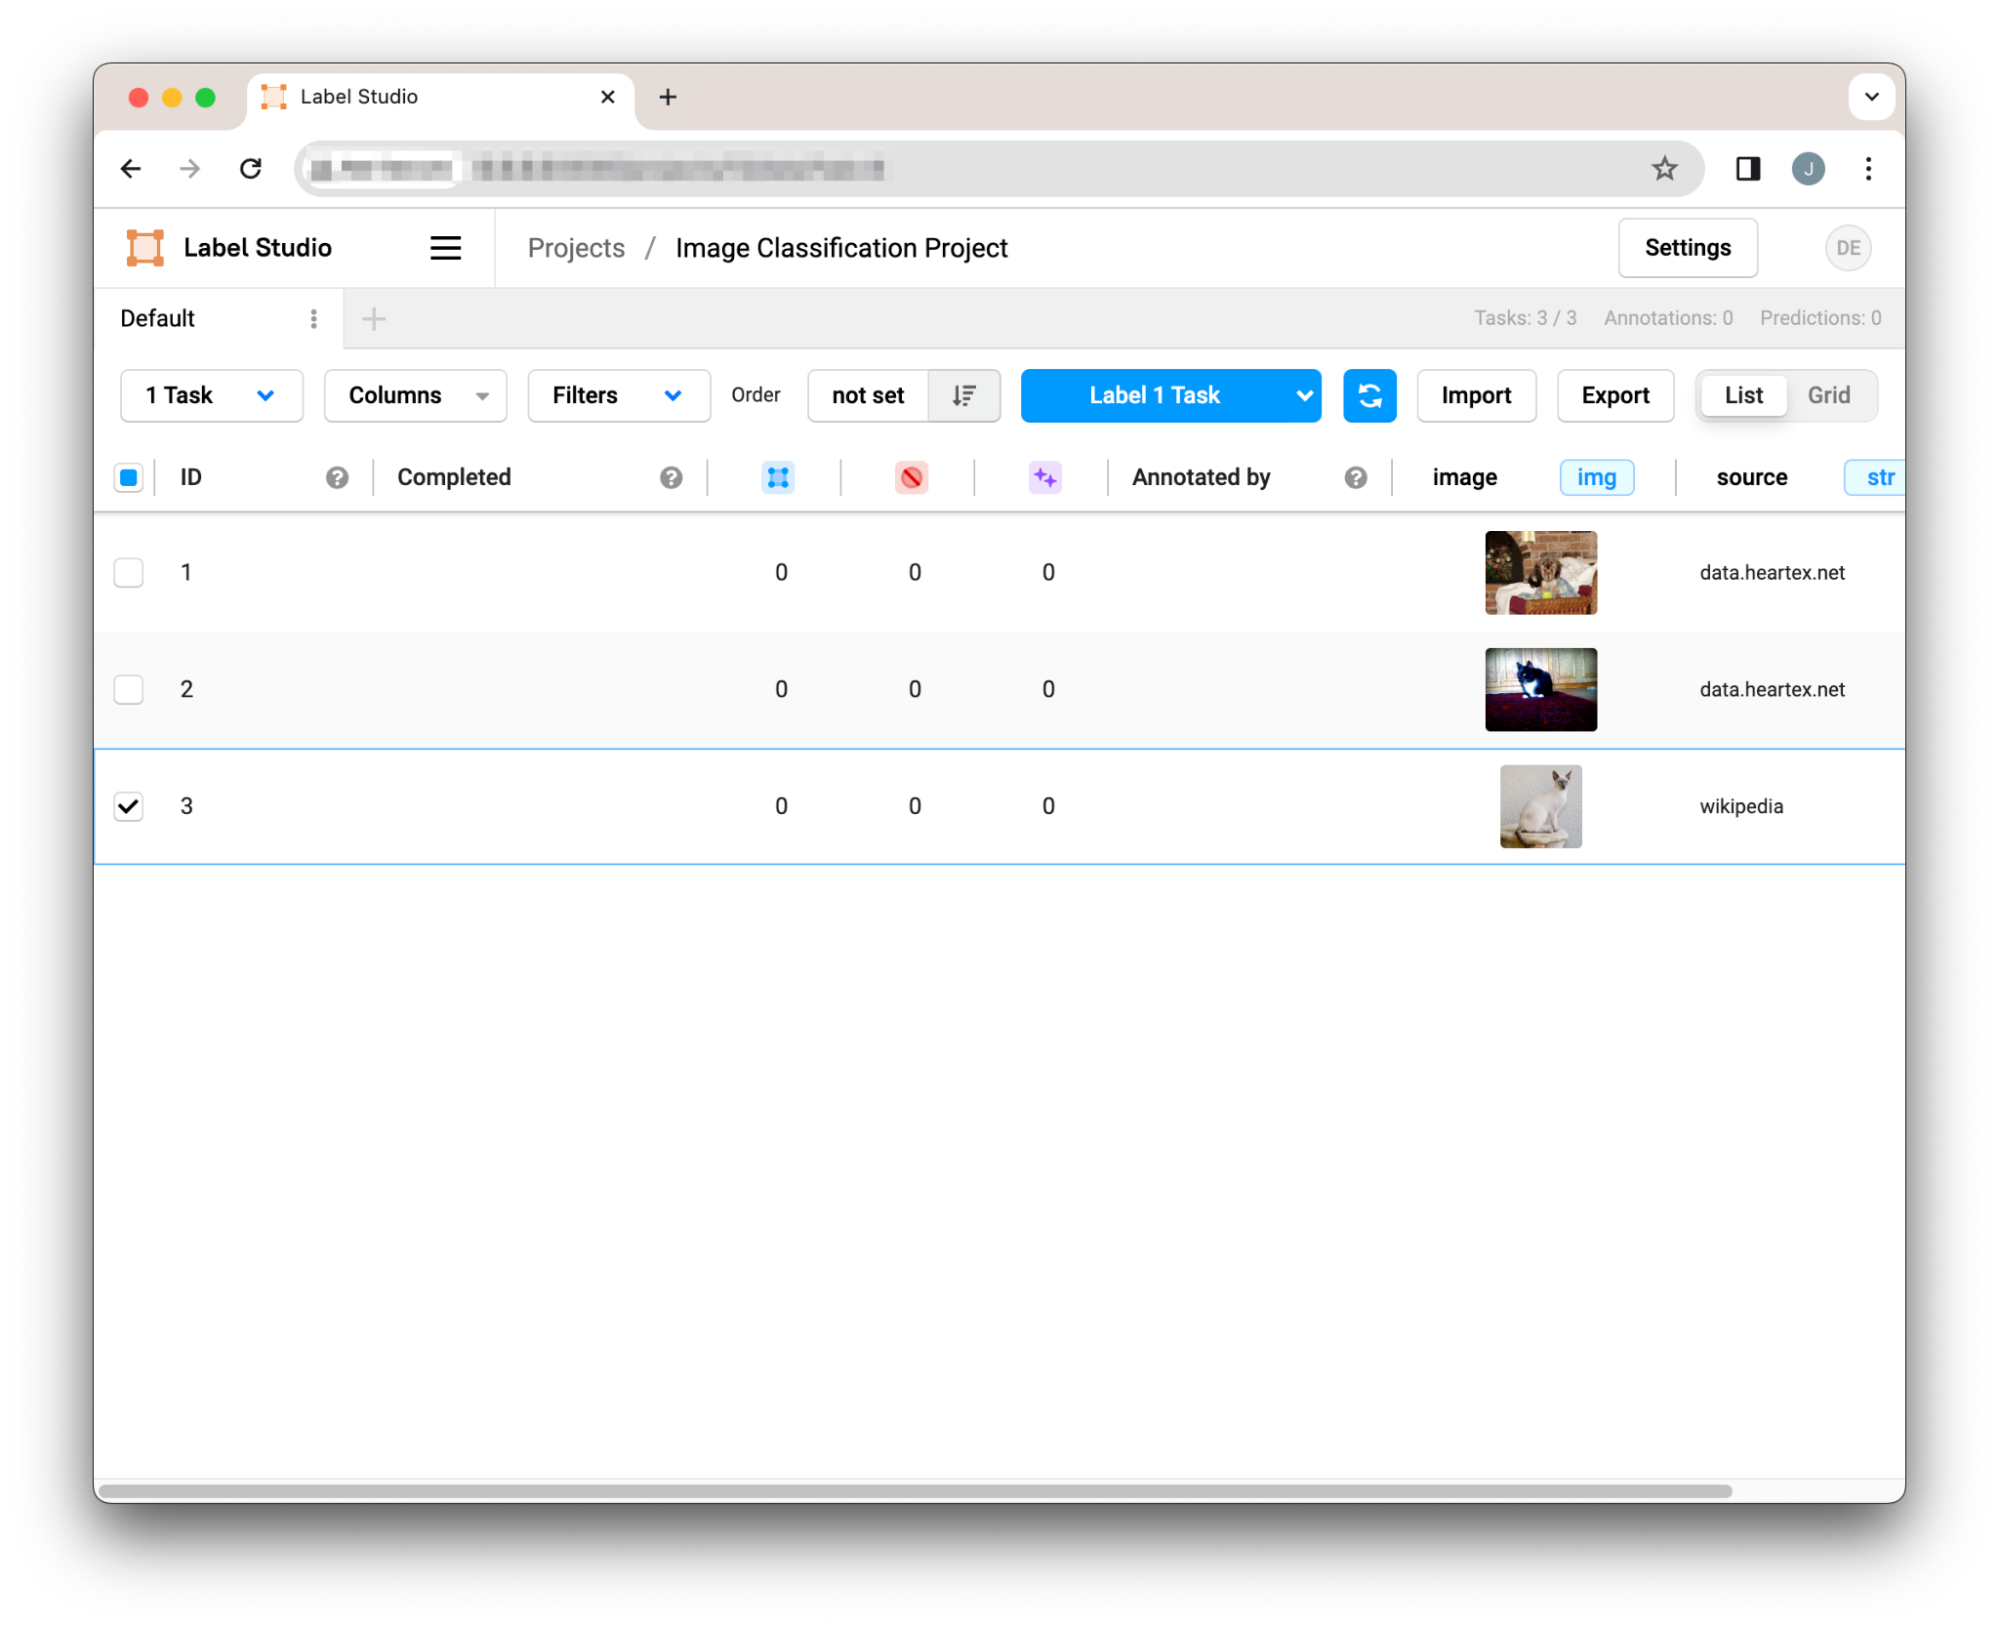
Simple Label Studio project after importing, adding a column, and backfilling data.
These steps demonstrate the ease with which you can manage your data labeling projects using the Label Studio SDK, streamlining the import and management of tasks to save time and reduce manual errors.
Tip 5: Bulk Data Exports
In machine learning, managing large datasets efficiently is pivotal. The Label Studio SDK offers an effective approach for bulk data exports, addressing common challenges like extended processing times and web request timeouts.
- Creating a Snapshot for Export: Begin by generating a snapshot of your project, which will serve as the basis for the export.
client.projects.exports.create(
    id=PROJECT_ID,
    title="My snapshot"
)- Monitoring Snapshot Status: Keep track of your snapshot's readiness by listing the available snapshots for your project.
print(client.projects.exports.list(id=PROJECT_ID,))- Downloading the Snapshot: When the snapshot is prepared, proceed to download it.
from pathlib import Path
from label_studio_sdk import LabelStudio
from label_studio_sdk.core.api_error import ApiError
from label_studio_sdk import LabelStudio

BASE_URL   = "http://localhost:8080"  # replace with your LS URL
API_KEY    = "YOUR_API_KEY" # Use legacy or personal access token
PROJECT_ID = 1 # Replace with your project ID.
EXPORT_ID = 1 # Replace with the export ID. This was returned in the response in the example above

client = LabelStudio(base_url=BASE_URL, api_key=API_KEY)

# Optional: ensure the snapshot is completed
job = client.projects.exports.get(id=PROJECT_ID, export_pk=EXPORT_ID)
if job.status != "completed":
    raise ApiError(status_code=409, body=f"Export not ready: {job.status}")

# Download JSON snapshot
out_path = Path(f"project_{PROJECT_ID}_export_{EXPORT_ID}.json")
with open(out_path, "wb") as f:
    for chunk in client.projects.exports.download(
        id=PROJECT_ID,
        export_pk=EXPORT_ID,
        export_type="JSON",           # change to CSV/COCO/YOLO if you already converted
        request_options={"chunk_size": 1024},
    ):
        f.write(chunk)

print(f"Saved to: {out_path}")This approach allows asynchronous downloading of large datasets, facilitating a seamless and uninterrupted export process. These snapshots can also be tailored using filters, adding to their utility. For example, you might want to export only the newly added data since your last export for ongoing training. This level of customization in data exports makes the SDK a powerful tool in your machine-learning arsenal.
For a deeper script example, see Export and Convert Snapshots.
Conclusion
These five tips for using Label Studio's API and SDK demonstrate the powerful capabilities and flexibility these tools offer for managing data labeling projects. From efficient project creation and task imports to advanced configurations and bulk data exports, Label Studio provides a comprehensive and streamlined approach suitable for beginners and advanced users. We hope these tips enhance your workflow, save time, and ensure high-quality data preparation for your machine-learning projects. Whether you're dealing with large datasets or require specific configurations, these strategies will empower you to utilize Label Studio's full potential, making your data labeling process more efficient and effective.
Related Content
-

The 5 Metrics That Actually Move AI Into Production
A practical framework for turning AI metrics into clearer decisions about what to fix, ship, and scale.

Sheree Zhang
April 15, 2026
-

Scaling AI Data Quality: Best Practices for Onboarding and Evaluating Annotators
A practical workflow for onboarding and evaluating annotators with clear instructions, calibration, quality gates, reviewer feedback, and dashboards that keep labeling consistent as volume grows.

Alec Harris
March 12, 2026
-
How to Create a Prompt Generator with Label Studio and RLVR
In this article, you'll learn how to apply an RLVR-based score verifier and use an LLM as a prompt optimizer to enhance your prompts.

Label Studio Team
March 2, 2026