Content Moderation Labeling with Label Studio
In the ever-connected world that we live in, it’s important to be able to monitor the conversations that are happening all around us. From comments on social media to real time conversations in chat on various platforms, keeping tabs on what users are saying is key to upholding the community standards that many environments put in place to keep users safe from many types of harm.
We’ve put together a brief tutorial and template for you to get started with content moderation on your own platforms. This allows you to quickly classify your data as being harmful in one way or another, or could allow you to quickly audit the output of a model you already have. Keep reading for a full tutorial on how to implement content moderation in Label Studio. If you’re interested in just the template, you can find it here.
Getting Started: Prepare your moderation data
First, you’ll need to organize your data. For this example, we expect a text column that contains the text that you’re looking to moderate. You can either have this column in a CSV and upload the whole CSV, or you can use the JSON below to upload this data programmatically through the SDK. For more on using the SDK to import data, you can check out our documentation here.
{
  "data": {
    "text": "This text contains harmful content."
  }
}Let’s go ahead and create a new Label Studio project by clicking on the blue “Create” button on the upper right hand corner of the screen. You can give the project a name and include any extra information you’d like to have in the description.
On the next screen, you can upload the CSV you created before (the only requirement being that there is a column called “text” that contains the text you’d like to moderate). You’re welcome to include other metadata columns that might be helpful for you down the line in the CSV as well, but we won’t use them here.
Adding Your Labeling Config
Next, you’ll add your labeling config. Click on the link for “custom template” on the bottom left of the modal window and copy the following labeling config into the box.
<View>
<HyperText name="text" value="$text" clickableLinks="true" inline="true"/>
<Choices name="content_moderation" toName="text" choice="multiple" showInline="false">
<Choice value="Toxic" background="red"/>
<Choice value="Severely Toxic" background="brown"/>
<Choice value="Obscene" background="green"/>
<Choice value="Threat" background="blue"/>
<Choice value="Insult" background="orange"/>
<Choice value="Hate" background="grey"/>
</Choices>
<View style="margin-top: 2em; box-shadow: 2px 12px 15px #999; padding: 30px; border-radius: 5px; background-color: #F0FFF0;">
<Header value="Please provide additional comments"/>
<TextArea name="comments" toName="text" required="false"/>
</View>
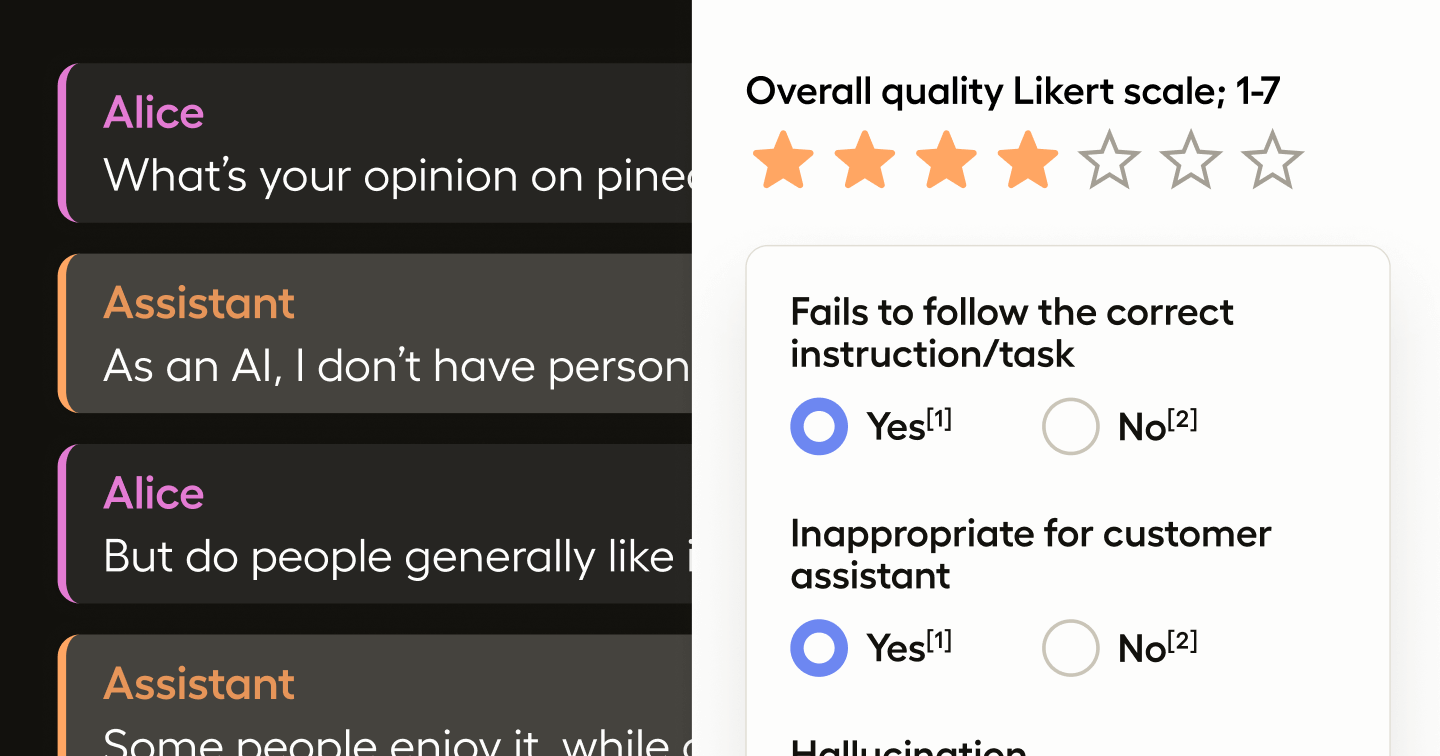
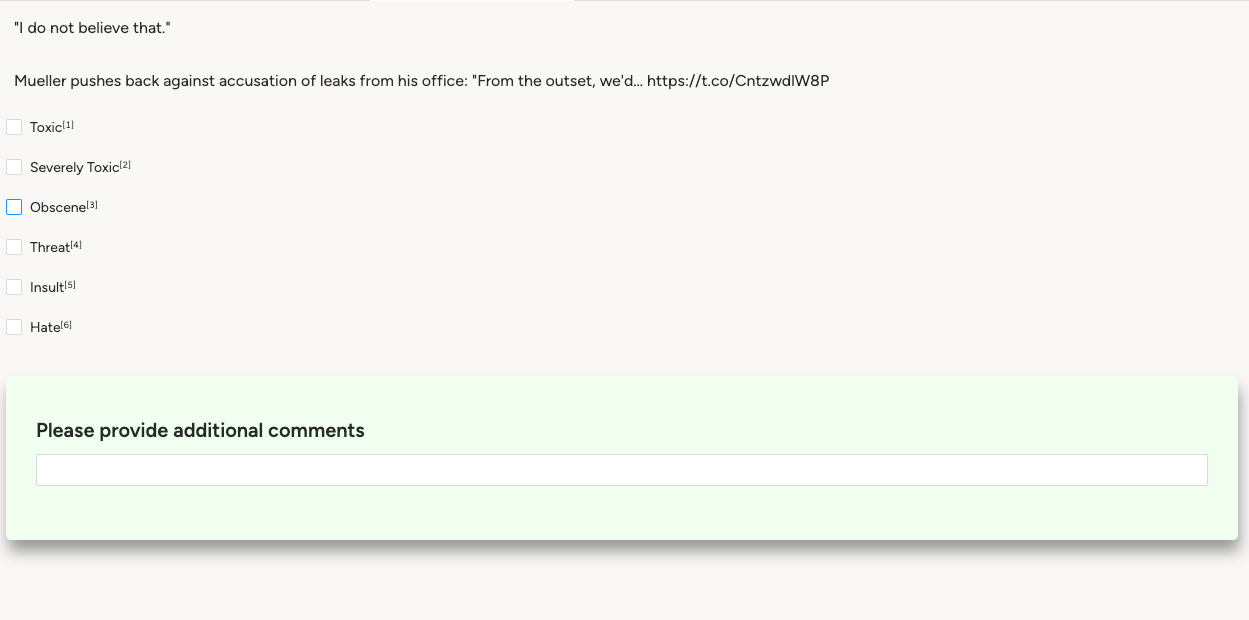
</View>In this labeling config, we first provide the text that is to be analyzed. Then, using the Choices tag, we provide a selection of things that you might want to the text as – toxic, severely toxic, obscene, threat, insult, or hate. Finally, we provide a text box where the annotator can provide any additional information that might be relevant to the choices that they made.
Labeling Your Data
Now, you’re ready to label! Simply click into one of the tasks in the Data Manager, or click the “Label All Tasks” button at the top of the screen. You’ll see the text to be labeled at the top, with the Choices and TextArea sections below it. When you’re done, you can click Submit to save your work.
And that’s it!
Jumpstart Your Content Moderation Labeling
With Label Studio, labeling your text data for content moderation is easy. Happy Labeling! (Read on for more ways to jumpstart your content moderation.)
Related Content
-

The 5 Metrics That Actually Move AI Into Production
A practical framework for turning AI metrics into clearer decisions about what to fix, ship, and scale.

Sheree Zhang
April 15, 2026
-
Scaling AI Data Quality: Best Practices for Onboarding and Evaluating Annotators
A practical workflow for onboarding and evaluating annotators with clear instructions, calibration, quality gates, reviewer feedback, and dashboards that keep labeling consistent as volume grows.

Alec Harris
March 12, 2026
-
How to Create a Prompt Generator with Label Studio and RLVR
In this article, you'll learn how to apply an RLVR-based score verifier and use an LLM as a prompt optimizer to enhance your prompts.

Label Studio Team
March 2, 2026