Evaluating Named Entity Recognition parsers with spaCy and Label Studio
This tutorial helps you evaluate accuracy of Named Entity Recognition (NER) taggers using Label Studio. Gather predictions from standard spaCY language models for a dataset based on transcripts from the podcast This American Life, then use Label Studio to correct the transcripts and determine which model performed better to focus future retraining efforts.
Named Entity Recognition (NER) parsers turn unstructured text into structured content by classifying information like organizations, dates, countries, professions, and others in the text. After a model detects those entities, they can be tagged and classified to allow for further analysis. In order to choose the best NER parser for your data analysis, you want to evaluate model performance against a relevant dataset.
You can use off-the-shelf parsers and NER taggers to handle named entity parsing and tagging, but the tagging accuracy of these for a specialized or small text corpus can often be low. Because of that, in many real-world settings you need to evaluate the accuracy of various NER taggers and fine tune the most promising one for better accuracy for your data.
Before you start
This tutorial assumes that you're comfortable with basic natural language processing (NLP) and machine learning (ML) terminology, such as the technical meaning of evaluation and the basic function and results provided by NER taggers.
To follow along with this tutorial, you need to do the following:
- set up a local Python environment
- use pip to install packages
- run Python code to evaluate the results
Steps in this tutorial
- Download a podcast transcript dataset from data.world.
- Install spaCy, pandas and the relevant spaCy models.
- Parse the downloaded dataset with spaCy.
- Import the dataset predictions into Label Studio.
- Correct the predicted NER tags using Label Studio to create a gold standard data sample.
- Evaluate the model results and compare the predictions to the gold standard.
Download the dataset and install spaCy and pandas
Download the This American Life dataset from data.world. It contains transcripts of every episode since November 1995. You need a data.world account to download the dataset.
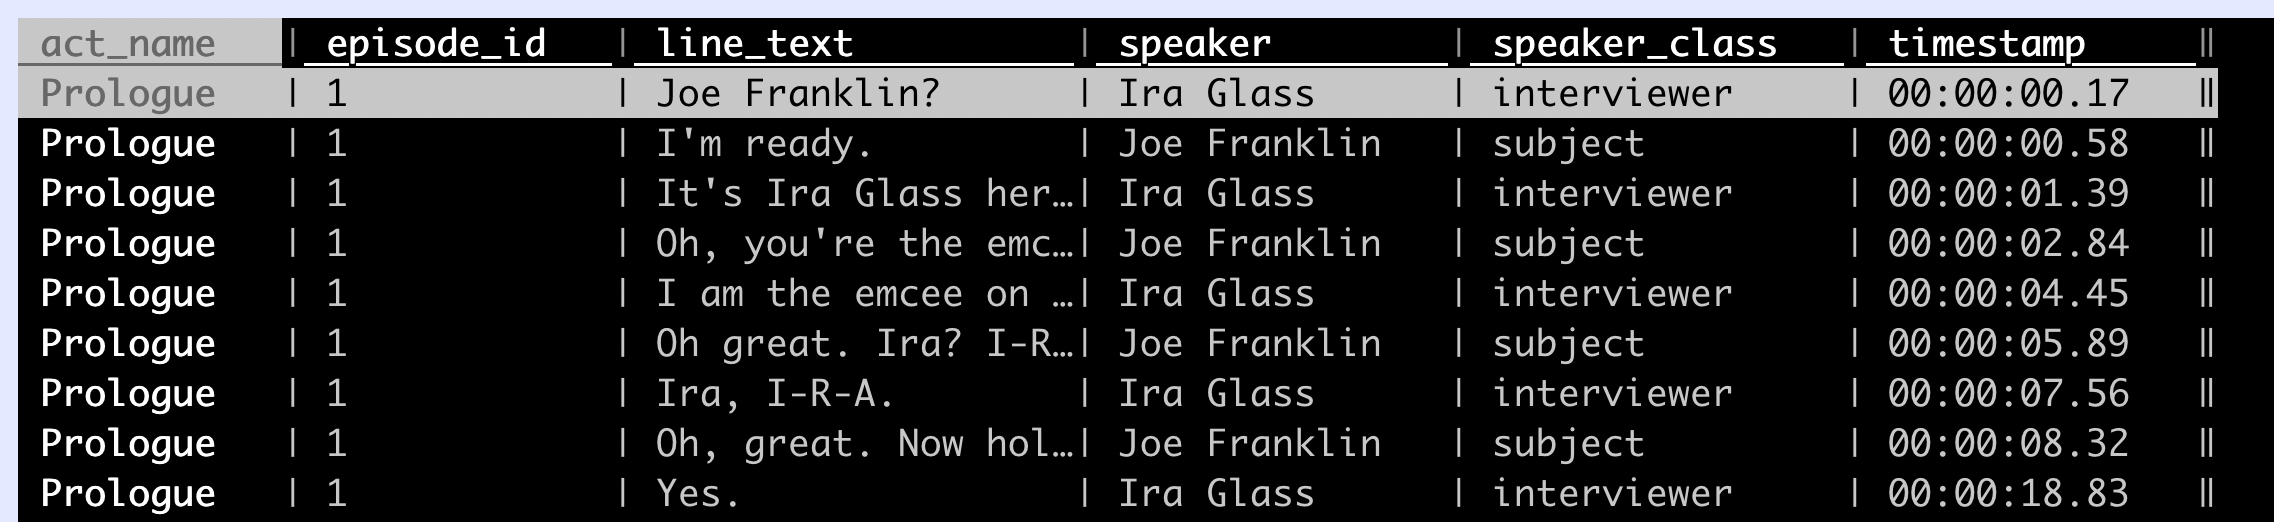
The text corpus is available in two files in CSV format. Download the lines_clean.csv version of the file, ordered by line of text. This file is formatted in a way that is easier to analyze the raw text of the podcast transcripts.
An excerpt of the file looks like the following:
Install spaCy and pandas
Before you install spaCy, make sure that pip is installed and has been updated recently. Type the following in the command line:
python -m pip install -U pip After you install or update pip, use pip to install the most recent spaCy version:
pip install -U spacy You also need to install pandas, which provides methods and data structures for dataset preprocessing to make spaCy processing possible. Use the following pip command:
pip install pandas Import pre-annotated data
In order to evaluate and correct spaCy model performance for the keyword "Easter", generate and import spaCy model predictions into Label Studio.
This tutorial compares the prediction quality of the small and large English NER spaCy models, trained on written text from the web, for the podcast transcript dataset.
Run the following script to parse the dataset and output the spaCy model predictions as Label Studio tasks in JSON format:
import spacy
import pandas as pd
import json
from itertools import groupby

# Download spaCy models:
models = {
    'en_core_web_sm': spacy.load("en_core_web_sm"),
    'en_core_web_lg': spacy.load("en_core_web_lg")
}

# This function converts spaCy docs to the list of named entity spans in Label Studio compatible JSON format:
def doc_to_spans(doc):
    tokens = [(tok.text, tok.idx, tok.ent_type_) for tok in doc]
    results = []
    entities = set()
    for entity, group in groupby(tokens, key=lambda t: t[-1]):
        if not entity:
            continue
        group = list(group)
        _, start, _ = group[0]
        word, last, _ = group[-1]
        text = ' '.join(item[0] for item in group)
        end = last + len(word)
        results.append({
            'from_name': 'label',
            'to_name': 'text',
            'type': 'labels',
            'value': {
                'start': start,
                'end': end,
                'text': text,
                'labels': [entity]
            }
        })
        entities.add(entity)

    return results, entities

# Now load the dataset and include only lines containing "Easter ":
df = pd.read_csv('lines_clean.csv')
df = df[df['line_text'].str.contains("Easter ", na=False)]
print(df.head())
texts = df['line_text']

# Prepare Label Studio tasks in import JSON format with the model predictions:
entities = set()
tasks = []
for text in texts:
    predictions = []
    for model_name, nlp in models.items():
        doc = nlp(text)
        spans, ents = doc_to_spans(doc)
        entities |= ents
        predictions.append({'model_version': model_name, 'result': spans})
    tasks.append({
        'data': {'text': text},
        'predictions': predictions
    })

# Save Label Studio tasks.json
print(f'Save {len(tasks)} tasks to "tasks.json"')
with open('tasks.json', mode='w') as f:
    json.dump(tasks, f, indent=2)

# Save class labels as a txt file
print('Named entities are saved to "named_entities.txt"')
with open('named_entities.txt', mode='w') as f:
f.write('\n'.join(sorted(entities)))After running the script, you have two files:
- A
tasks.jsonfile with predictions from the large and small spaCy models to import into Label Studio. - A
named_entities.txtfile that contains the list of entities to use as labels.
Correct the predicted Named Entities in Label Studio
To classify named entities, you need to create a dataset with gold standard labels that are accurate for your use case. To do that, use the open source data labeling tool, Label Studio.
Install and start Label Studio
Install Label Studio in a virtual environment with pip using the following commands:
python3 -m venv env
source env/bin/activate
python -m pip install label-studioAfter you install Label Studio, start the server and specify a project name:
label-studio start ner-tagging Open Label Studio in your web browser at http://localhost:8080/ and create an account.
Set up your Label Studio project
Open the ner-tagging project and do the following:
- Click Import to add data.
- Upload the
tasks.jsonfile.

Next, set up the labeling interface with the spaCy NER labels to create a gold standard dataset.
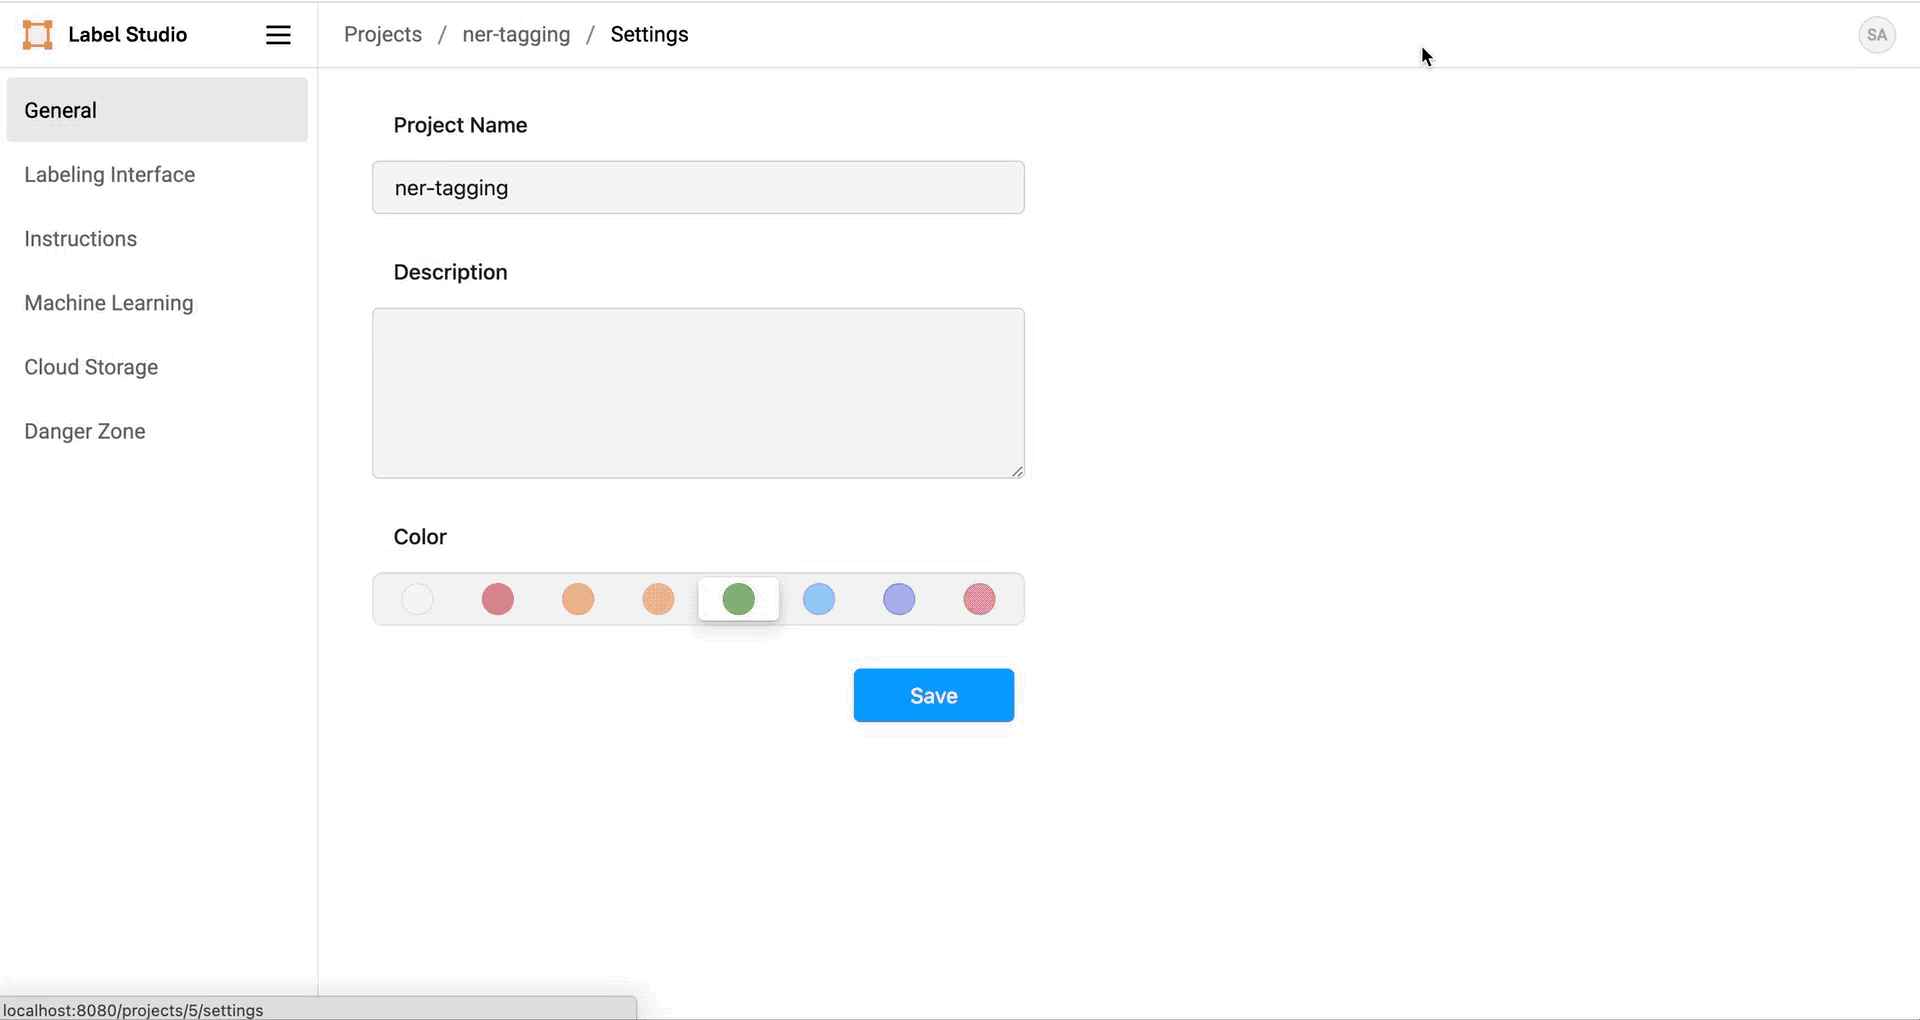
- From the project in Label Studio, click Settings and click Labeling Interface.
- Select the Named Entity Recognition template and paste the contents of the
named_entities.txtas the labels for the template. - Click Save to save the configuration and return to the project data.
Label your gold standard dataset in Label Studio
Click Label to start correcting the labeled instances of "Easter" in your data. As with all human-in-the-loop data labeling projects, the correct tag for "Easter" can be subjective and contextual. Some instances of "Easter" might be labeled with EVT to indicate an event, and others might be PER if the Easter Bunny is being discussed. Choose the labels that make the most sense for your use case.
- For each task, review the model predictions and if needed, correct the label for the word "Easter". You can use the keyboard shortcuts to select the correct label, then highlight the word Easter in the text to label it.
- Click Submit to save the new annotation and label the next task.
- Continue until you've labeled all the tasks.
Export your data to prepare to evaluate model accuracy
After you finish labeling the instances of Easter in the dataset manually, export the annotated data so that you can evaluate the model accuracy and determine which spaCy model you might want to retrain.
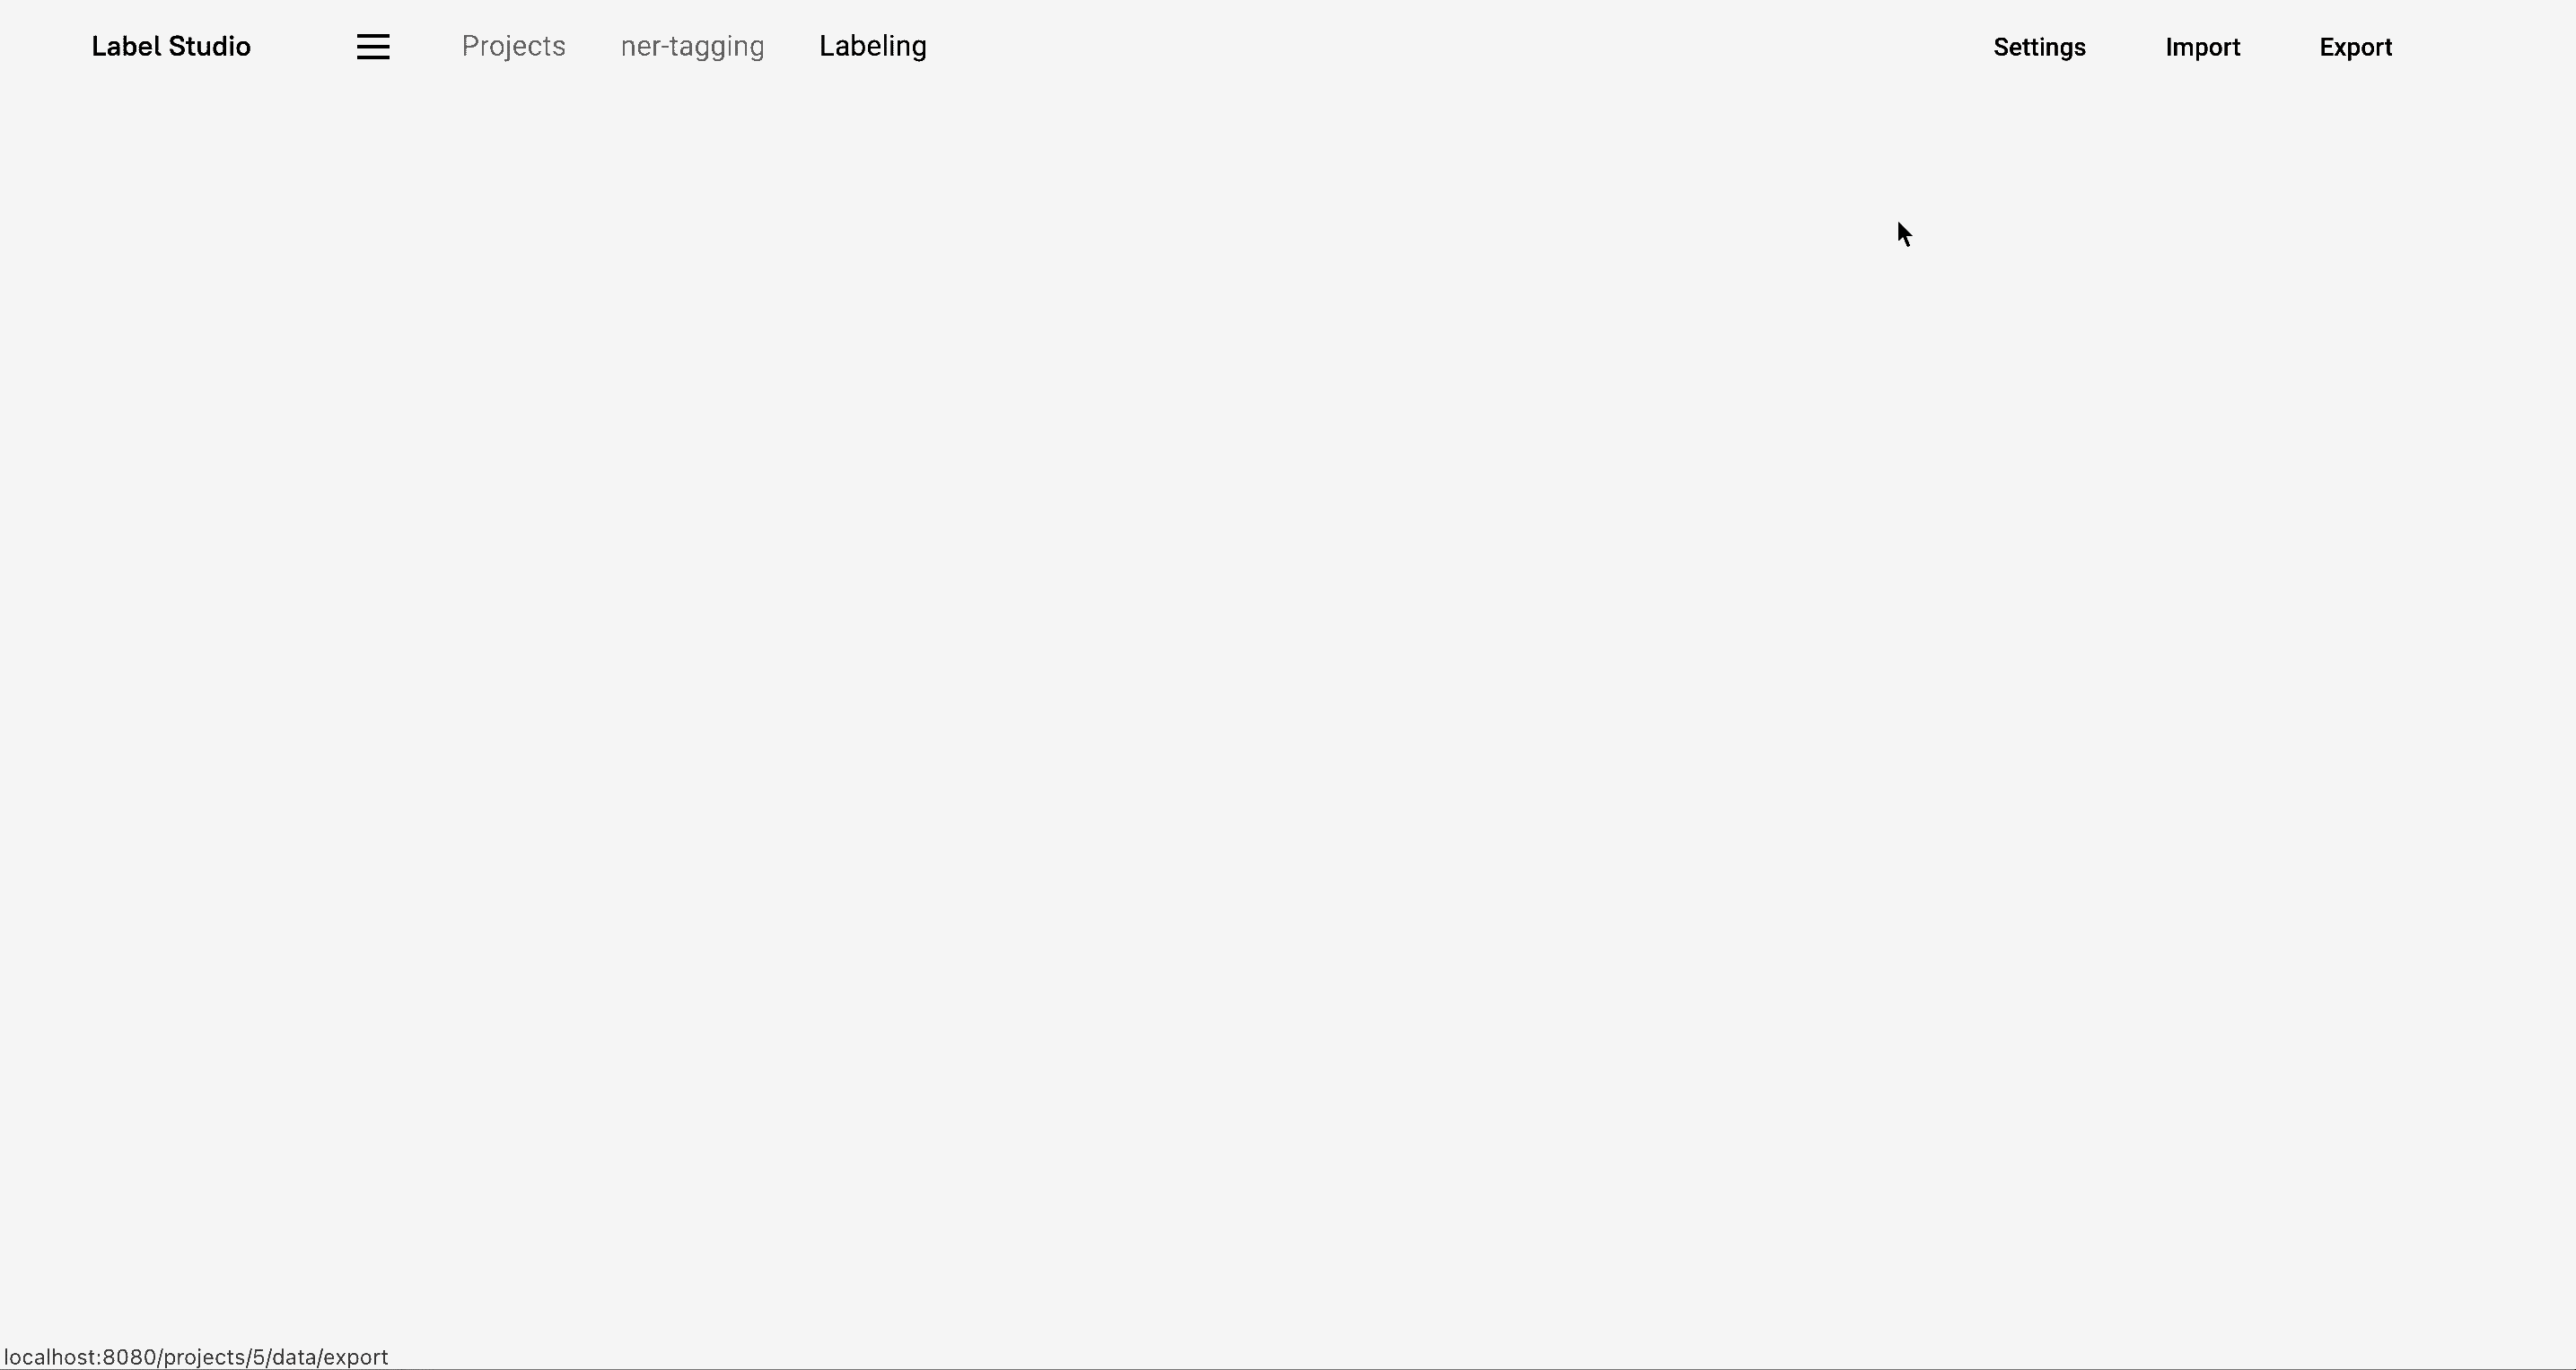
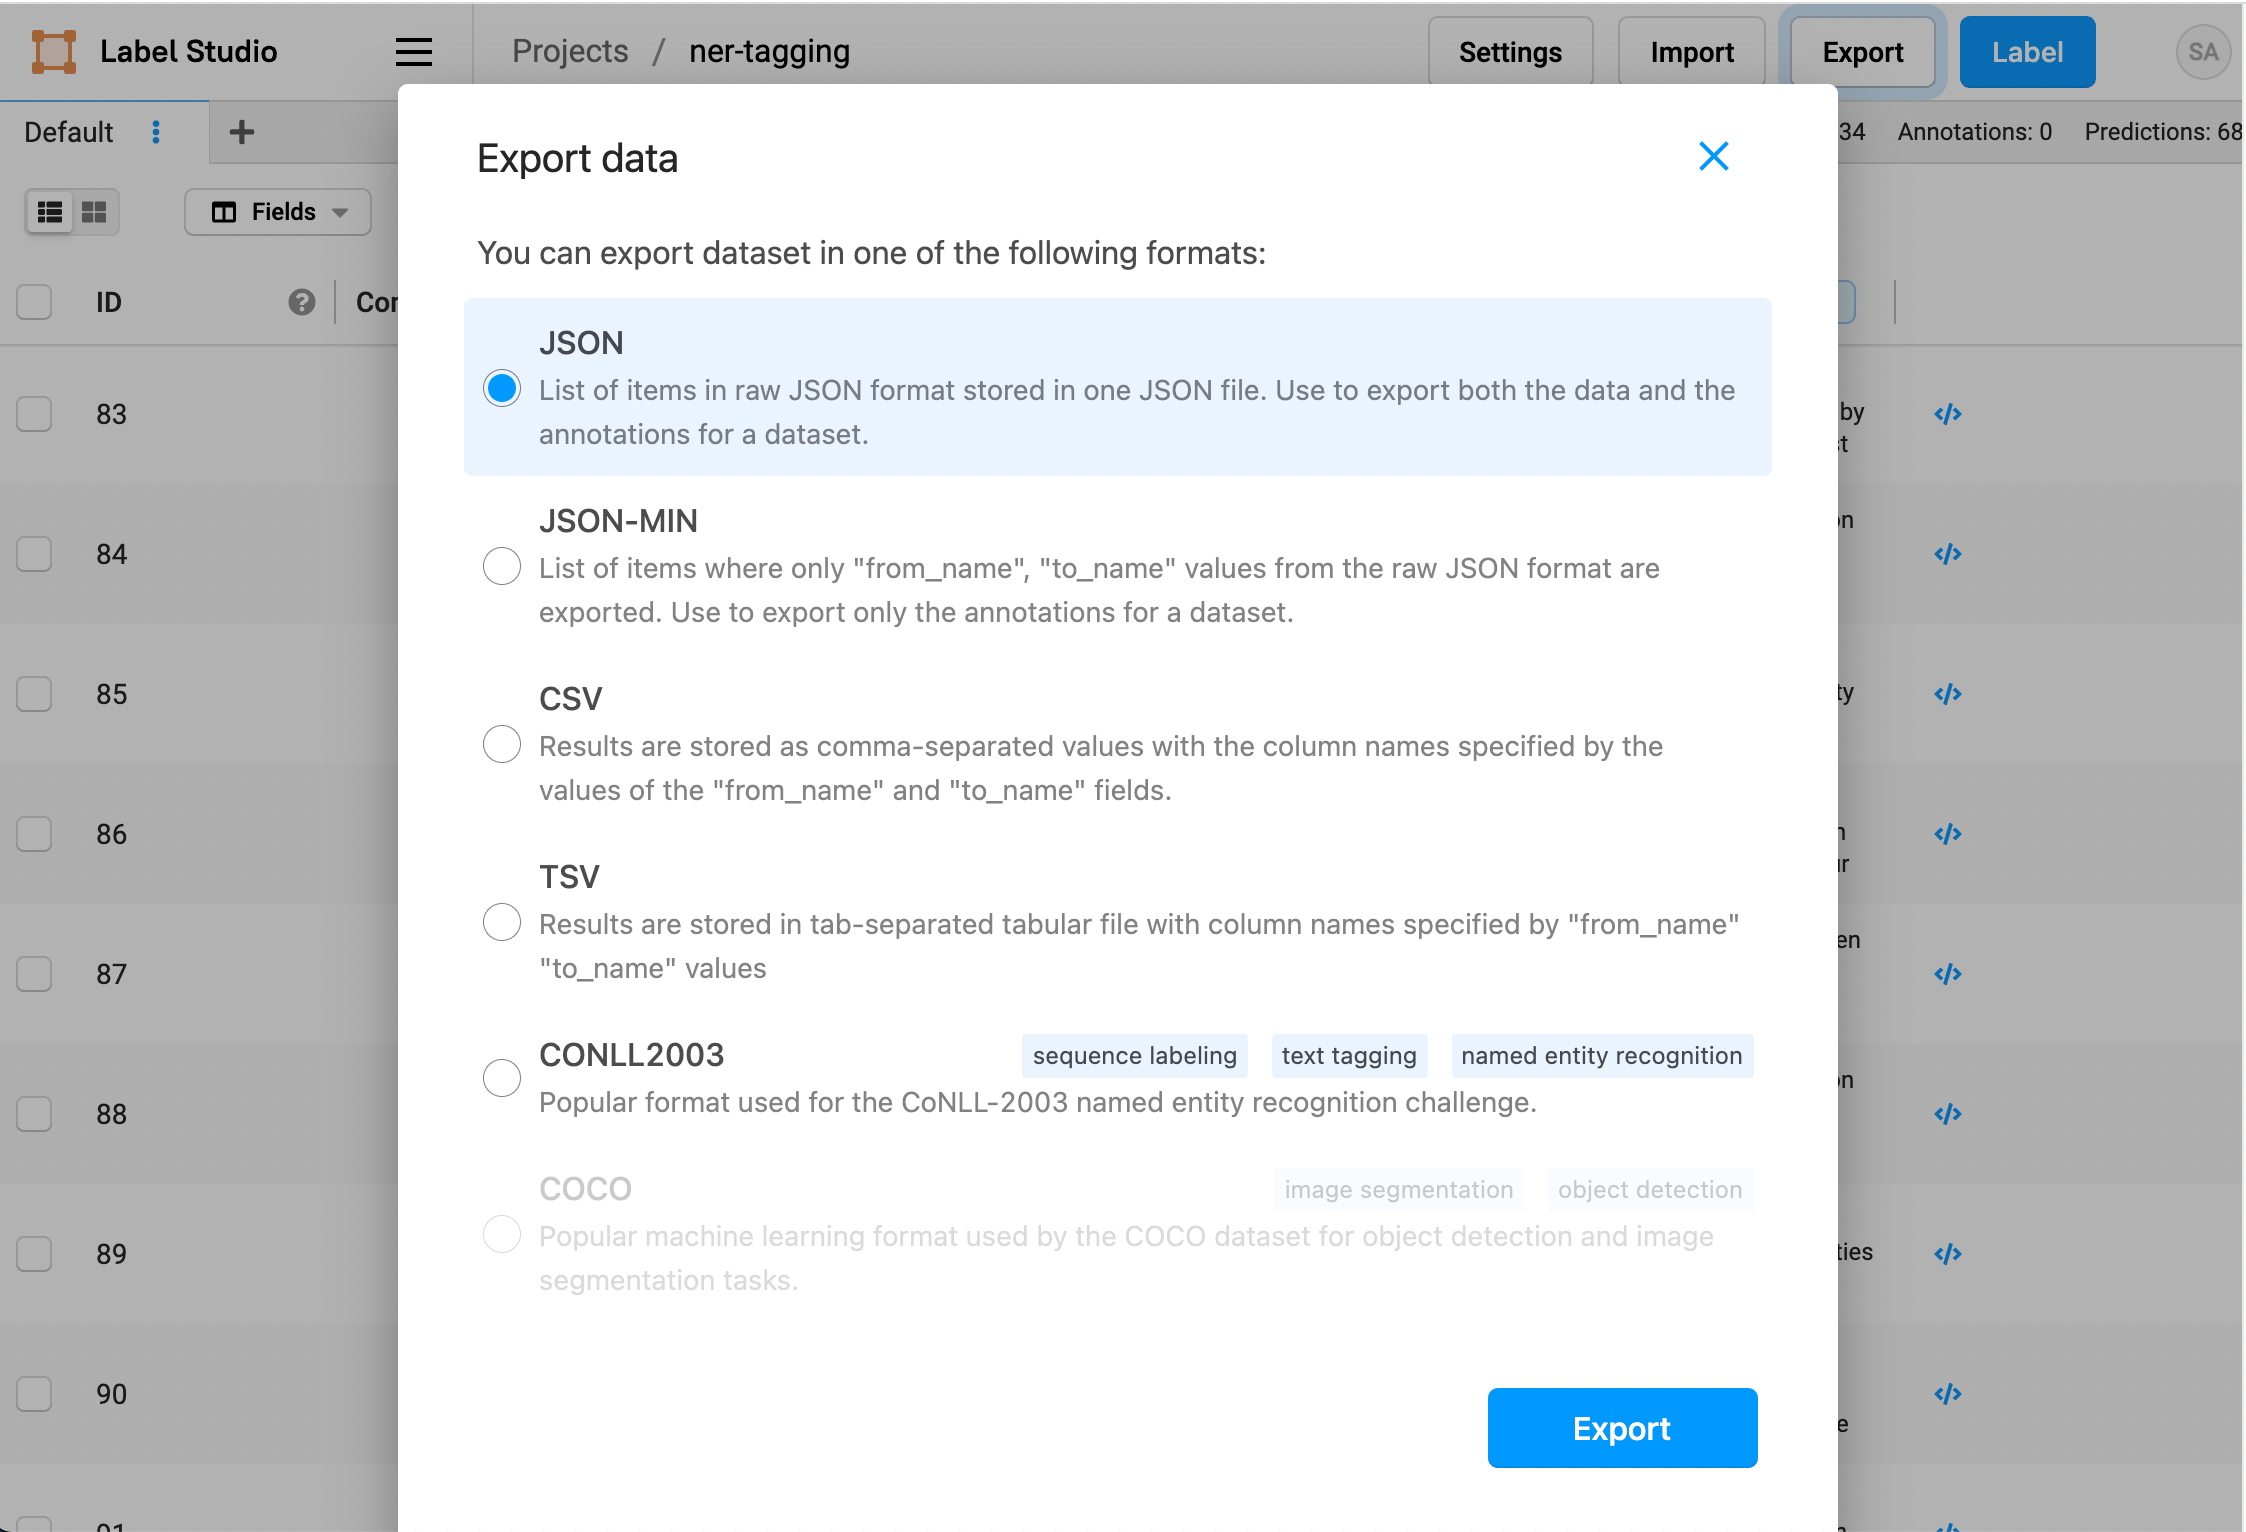
- From your Label Studio project, click Export.
- Select the JSON file format and download the data and annotations.
- Rename the downloaded file
annotations.json.
Compare the spaCy model with the gold standard dataset
After you correct the predictions from the spaCy models and create a new gold standard dataset, you can compare the accuracy of each model programmatically against the gold standard you created.
Run this script to evaluate the exported annotations against the spaCy models:
import json
from collections import defaultdict

tasks = json.load(open('annotations.json'))
model_hits = defaultdict(int)

for task in tasks:
    annotation_result = task['annotations'][0]['result']
    for r in annotation_result:
        r.pop('id')
    for prediction in task['predictions']:
        model_hits[prediction['model_version']] += int(prediction['result'] == annotation_result)

num_task = len(tasks)
for model_name, num_hits in model_hits.items():
    acc = num_hits / num_task
print(f'Accuracy for {model_name}: {acc:.2f}%')The script produces something like the following output:
Accuracy for en_core_web_sm: 0.03%
Accuracy for en_core_web_lg: 0.41% Both models rarely predicted the Easter keyword correctly, so the accuracy percentage is quite low. However, it's still clear that the larger spaCy convolutional neural network (CNN) model performed significantly better than the smaller spaCy model in this case.
With these steps, it's clear that you can evaluate the performance results of two different models with just a few minutes of annotation, without spending too much time building complex evaluation pipelines with static datasets.
What's next?
This is a simple example using only one specific corner case based on the Easter keyword. You can extend this example to monitor more complex semantics, and assess more than 2 models at once. In a real-world use case, after correcting the labels for a large amount of data relevant to a project, you could then retrain spaCy's models based on this new dataset.
You could also use the gold standard dataset to evaluate changes to models and determine the optimal parameters to use for a specific model to fine tune accuracy for a specific type of data. For example, evaluate and correct the predictions for one model against the gold standard dataset, then create a second model with a different set of parameters and evaluate that one against the gold standard dataset. Whichever model performs better is likely the better model for your data and use case.
Review the example tutorials for creating a machine learning backend with Label Studio to see how you can go further with automating model retraining and using Label Studio in your model development pipeline.
Related Content
-
Building A Labeling Config in Label Studio Enterprise
How do you build the right labeling interface in Label Studio? This video walks through a practical progression: start with templates, customize with XML tags, extend with React Code, and standardize workflows with plugins.
-
Learn how to connect YOLO26 to a Label Studio project using the YOLO ML Backend so annotators can start from model predictions and focus on review and correction instead of drawing boxes from scratch.

Micaela Kaplan
February 12, 2026
-
Getting started with Label Studio
Everything you need to know about Label Studio to get started, from downloading and installing the tool to creating your first project, adding new members, and more!