Data Labeling with GPT-4 in Label Studio: ML Backend Integration
Introduction
Data quality is the cornerstone of any machine learning project. This process, traditionally dominated by labor-intensive data labeling, can frequently devolve into a time-consuming and expensive task. But what if we could leverage the latest advancements in large language models (LLMs) to transition from data labeling, to label review?
Enter GPT-4. With over 100 million users, ChatGPT (built on GPT-4) is one of the most popular state-of-the-art language models available. Its ability to understand and generate human-like text has made waves in the natural language processing (NLP) community.
In a prior article, we demonstrated how GPT-4 can jumpstart the labeling process by pre-annotating our data. This approach enables us to load a pre-labeled dataset primed for review instead of undergoing the tedious process of starting from zero. This article builds on that prior work, showing you how to incorporate GPT-4 with Label Studio’s machine learning backend.
Using the Label Studio ML Backend, you can label data directly within Label Studio, allowing your focus to shift from the time-intensive task of data labeling to the far more efficient and effective process of reviewing and refining the preliminary labels, significantly accelerating your workflow.
Label Studio ML Backend
The Label Studio ML Backend serves as a bridge between machine learning models and the Label Studio interface. It allows you to integrate any model into Label Studio as long as it can return predictions in a specific format and update its state based on the annotations received. This flexibility makes it an ideal tool for incorporating calls to OpenAI APIs into your data labeling workflow.
Connecting the ML Backend to GPT-4, is relatively straightforward. We can wrap our API calls inside the `LabelStudioMLBase` class and this will handle all of the web serving code for us. You can see an outline of wrapping this class below.
Fine-tuning your model can also be a powerful way to improve the model quality by exposing it to more in-domain data. Although we won’t be incorporating fine-tuning in this blog for reasons we’ll discuss later, this can be an incredibly useful feature if you’re using your own model.
from label_studio_ml.model import LabelStudioMLBase

class OpenAIPredictor(LabelStudioMLBase):

    def predict(self, tasks, **kwargs):
        # Predict on tasks passed to the predict function
        for task in tasks:
            predictions.append(model.predict(task))
return predictionsOpenAI’s API
Interacting with GPT-4 requires the use of the OpenAI API. This API facilitates sending prompts to GPT-4 and receiving the generated text as responses. Manipulating these prompts to elicit specific outputs from the model is an art known as prompt engineering. We can often tune our prompts to have them return data in a JSON or another format that can be consumed and structured for Label Studio.
Let’s take a look at extracting sentiment analysis predictions. In this example, we’re using OpenAI’s API, and a little prompt engineering, to generate a response using the GPT-4 model.
import openai
import re

openai.api_key = "<your_api_key>"

input_text = "I had a wonderful time at the party last night!"
prompt = f"Respond in the json format: {{'response': sentiment_classification}}\nText: {input_text}\nSentiment (positive, neutral, negative):"
response = openai.ChatCompletion.create(
  model="gpt-4",
  messages=[
  {"role": "user", "content": prompt}
  ],
  max_tokens=40,
  n=1,
  stop=None,
  temperature=0.5,
)
response_text = response.choices[0].message['content'].strip()
print("Result\n",f"{response_text}")Integrating this into the Label Studio ML Backend is relatively straightforward, requiring you to wrap the OpenAI API call in the predict function.
Running the Example
This section will guide you through the steps to get our example up and running. We've tried to simplify the process as much as possible, and we've also provided the full implementation here.
Installation
Firstly, we will use Docker Compose to deploy and connect the servers required for this project. If you haven't installed Docker Compose yet, you can find it on the Docker website. Follow the installation guide suitable for your operating system.
OpenAI API Key
Our application uses OpenAI's GPT-4 model to generate predictions. To use this API, you'll need an OpenAI account. Here are the steps to create one:
- Visit the OpenAI website.
- Click on 'Sign Up' and fill in your details to create an account.
- Once created, you can generate an API Key.
The API Key is an essential part of securing your API calls to GPT-4. Please store it in a secure place and never expose it in any public repository or website.
Configure Docker Compose
Once you've obtained your OpenAI API Key, add it to the Docker Compose configuration file. Look for the OPENAI_API_KEY environment variable in your docker-compose.yml file and replace <your_openai_key> with your actual API Key.
Starting the Service
With our configuration complete, we’ll first start Label Studio according to the Quick Start in Label Studio Docs.
Now, we’ll start the ML Backend service. In your terminal, navigate to the directory containing the docker-compose.yml file, and run the following command:
docker-compose up Docker Compose will start all necessary services as defined in the docker-compose.yml file.
It starts Machine Learning backend service at http://localhost:9090. Once this is up and running, we can connect to Label Studio at http://localhost:8080. If everything has been set up correctly, you should see the Label Studio user interface.
A Fresh Installation of Label Studio
Connecting the ML Backend to Label Studio
Next we’ll need to connect the ML Backend service to Label Studio, but first we will create a new sentiment analysis project in Label Studio and add some data. This data is unlabeled, but we’ll use GPT-4 to add some labels momentarily.
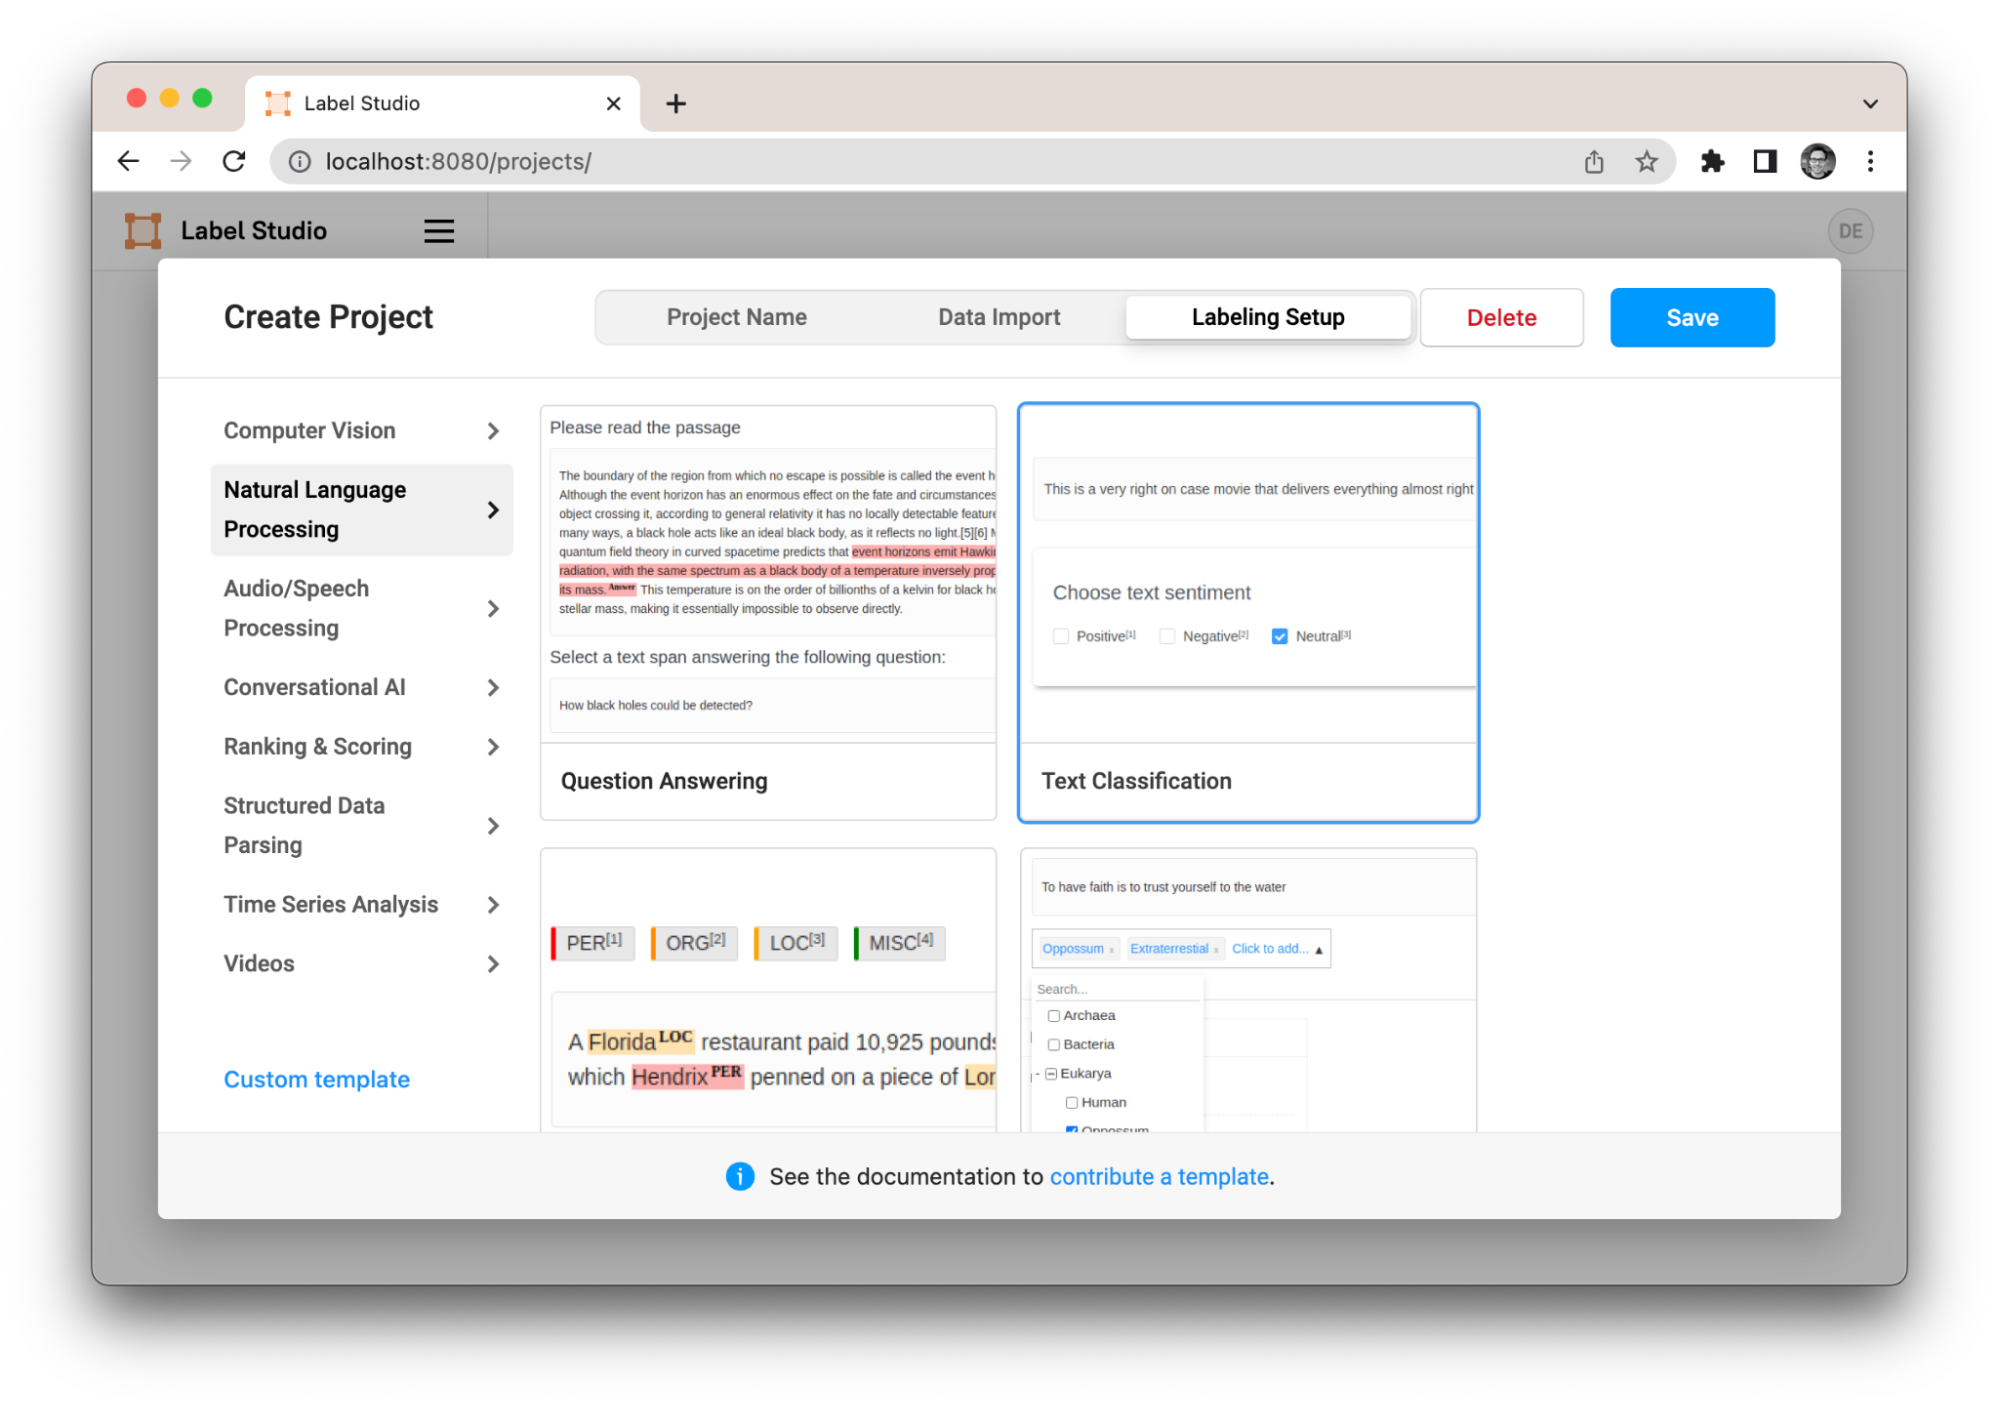
Creating a new project
Next, we will point our project to our Machine Learning (ML) Backend with the following steps:
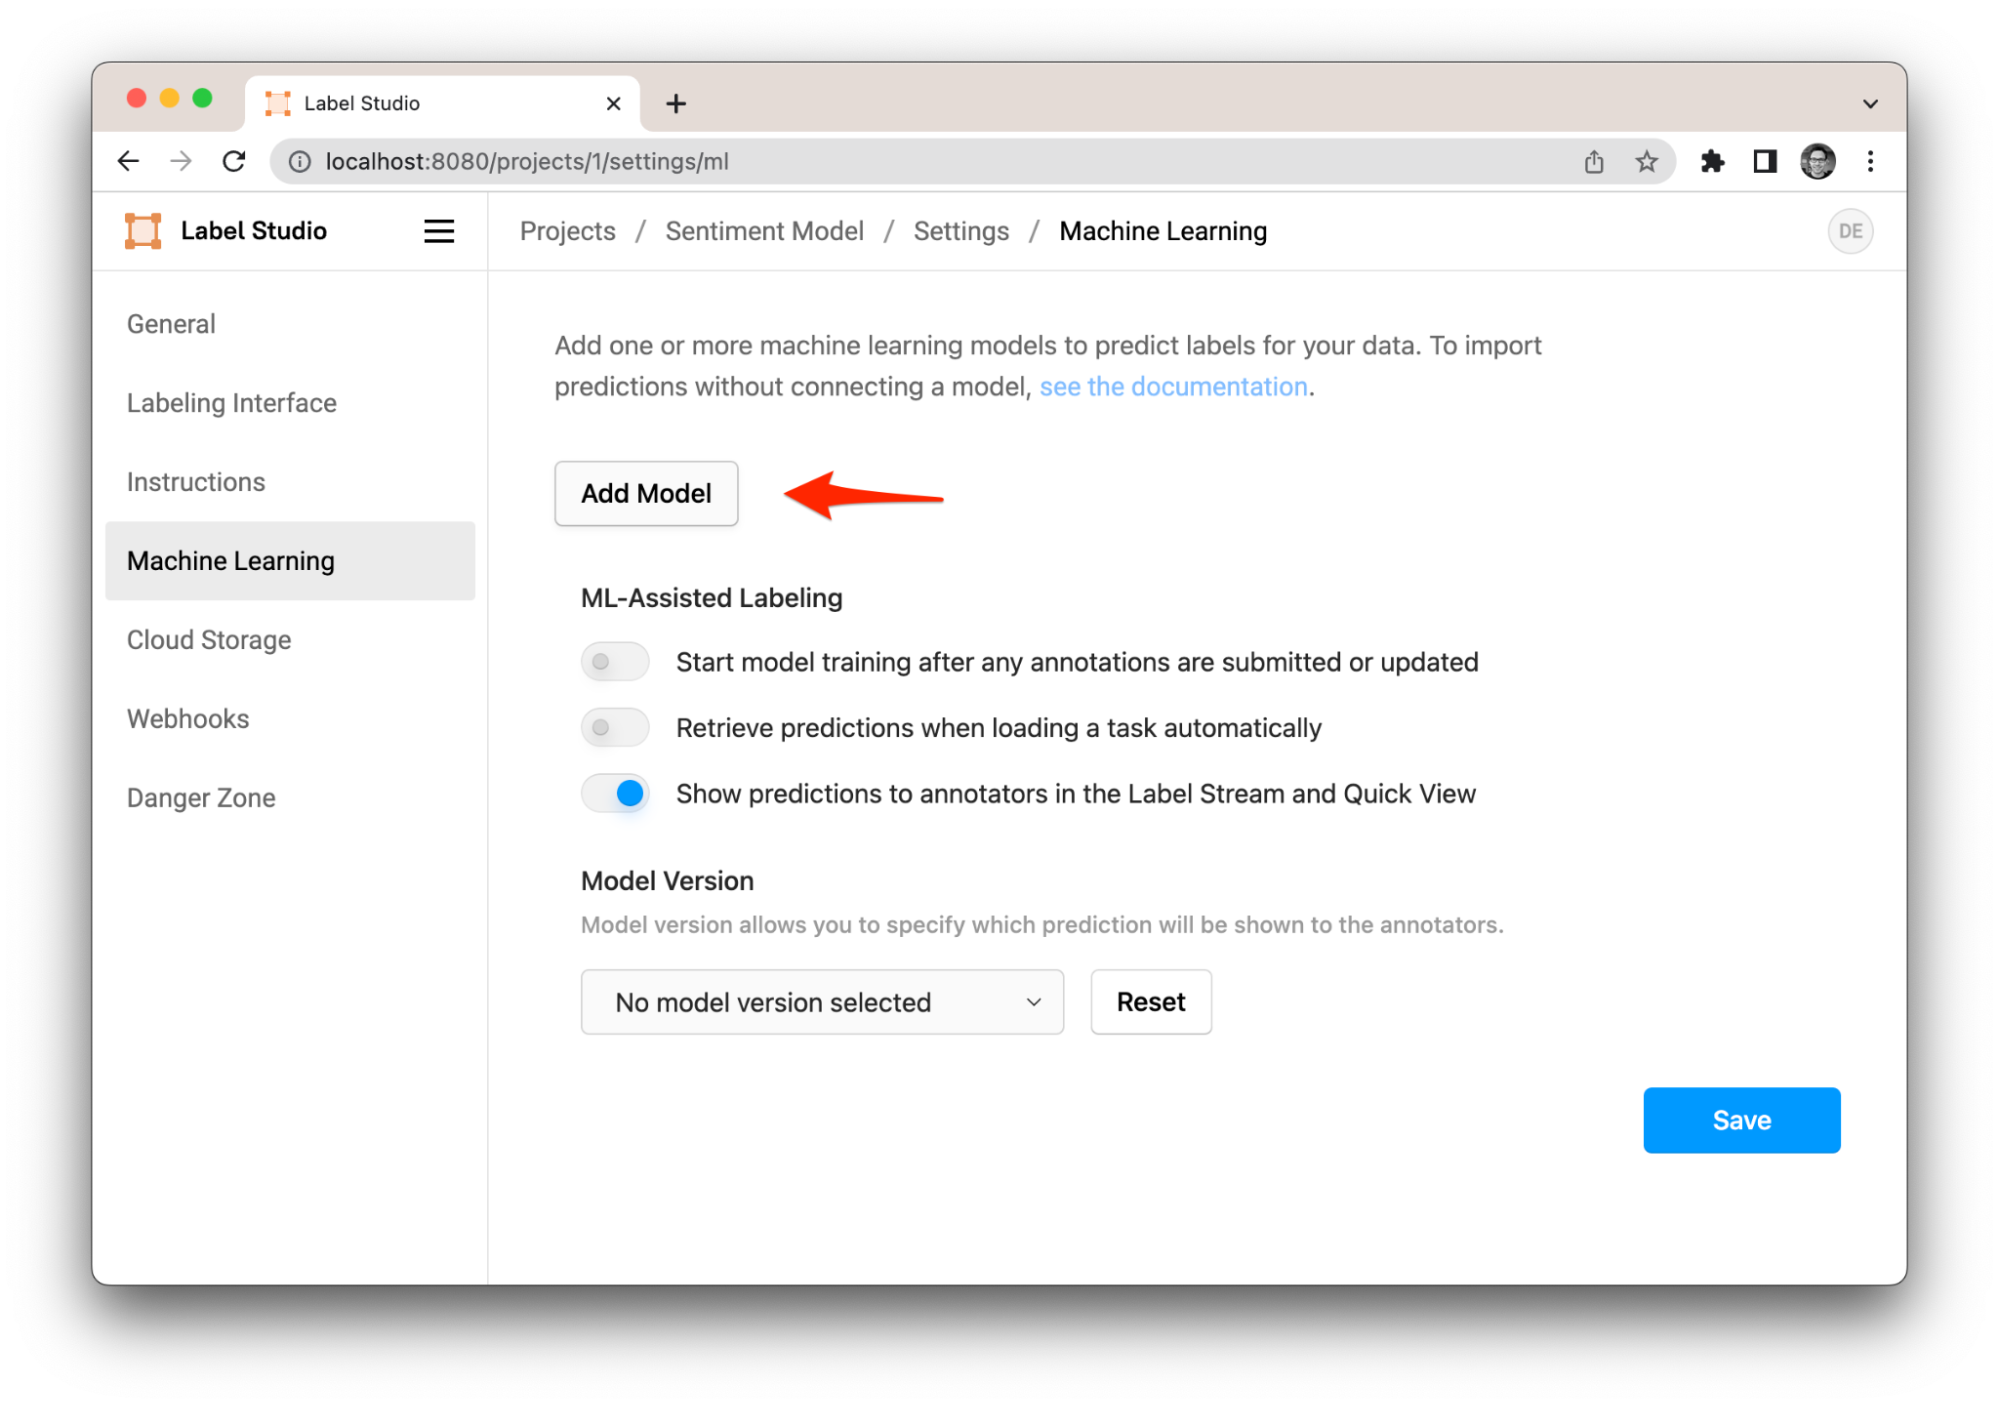
Adding a new ML model
- Click on 'Settings' in the top right corner.
- Scroll down to 'Machine Learning'.
- Click on 'Add Model'.
- In the 'URL' field, enter the address of the ML backend,
http://localhost:9090(in the default Docker Compose setup). - Click on 'Validate and Save'.
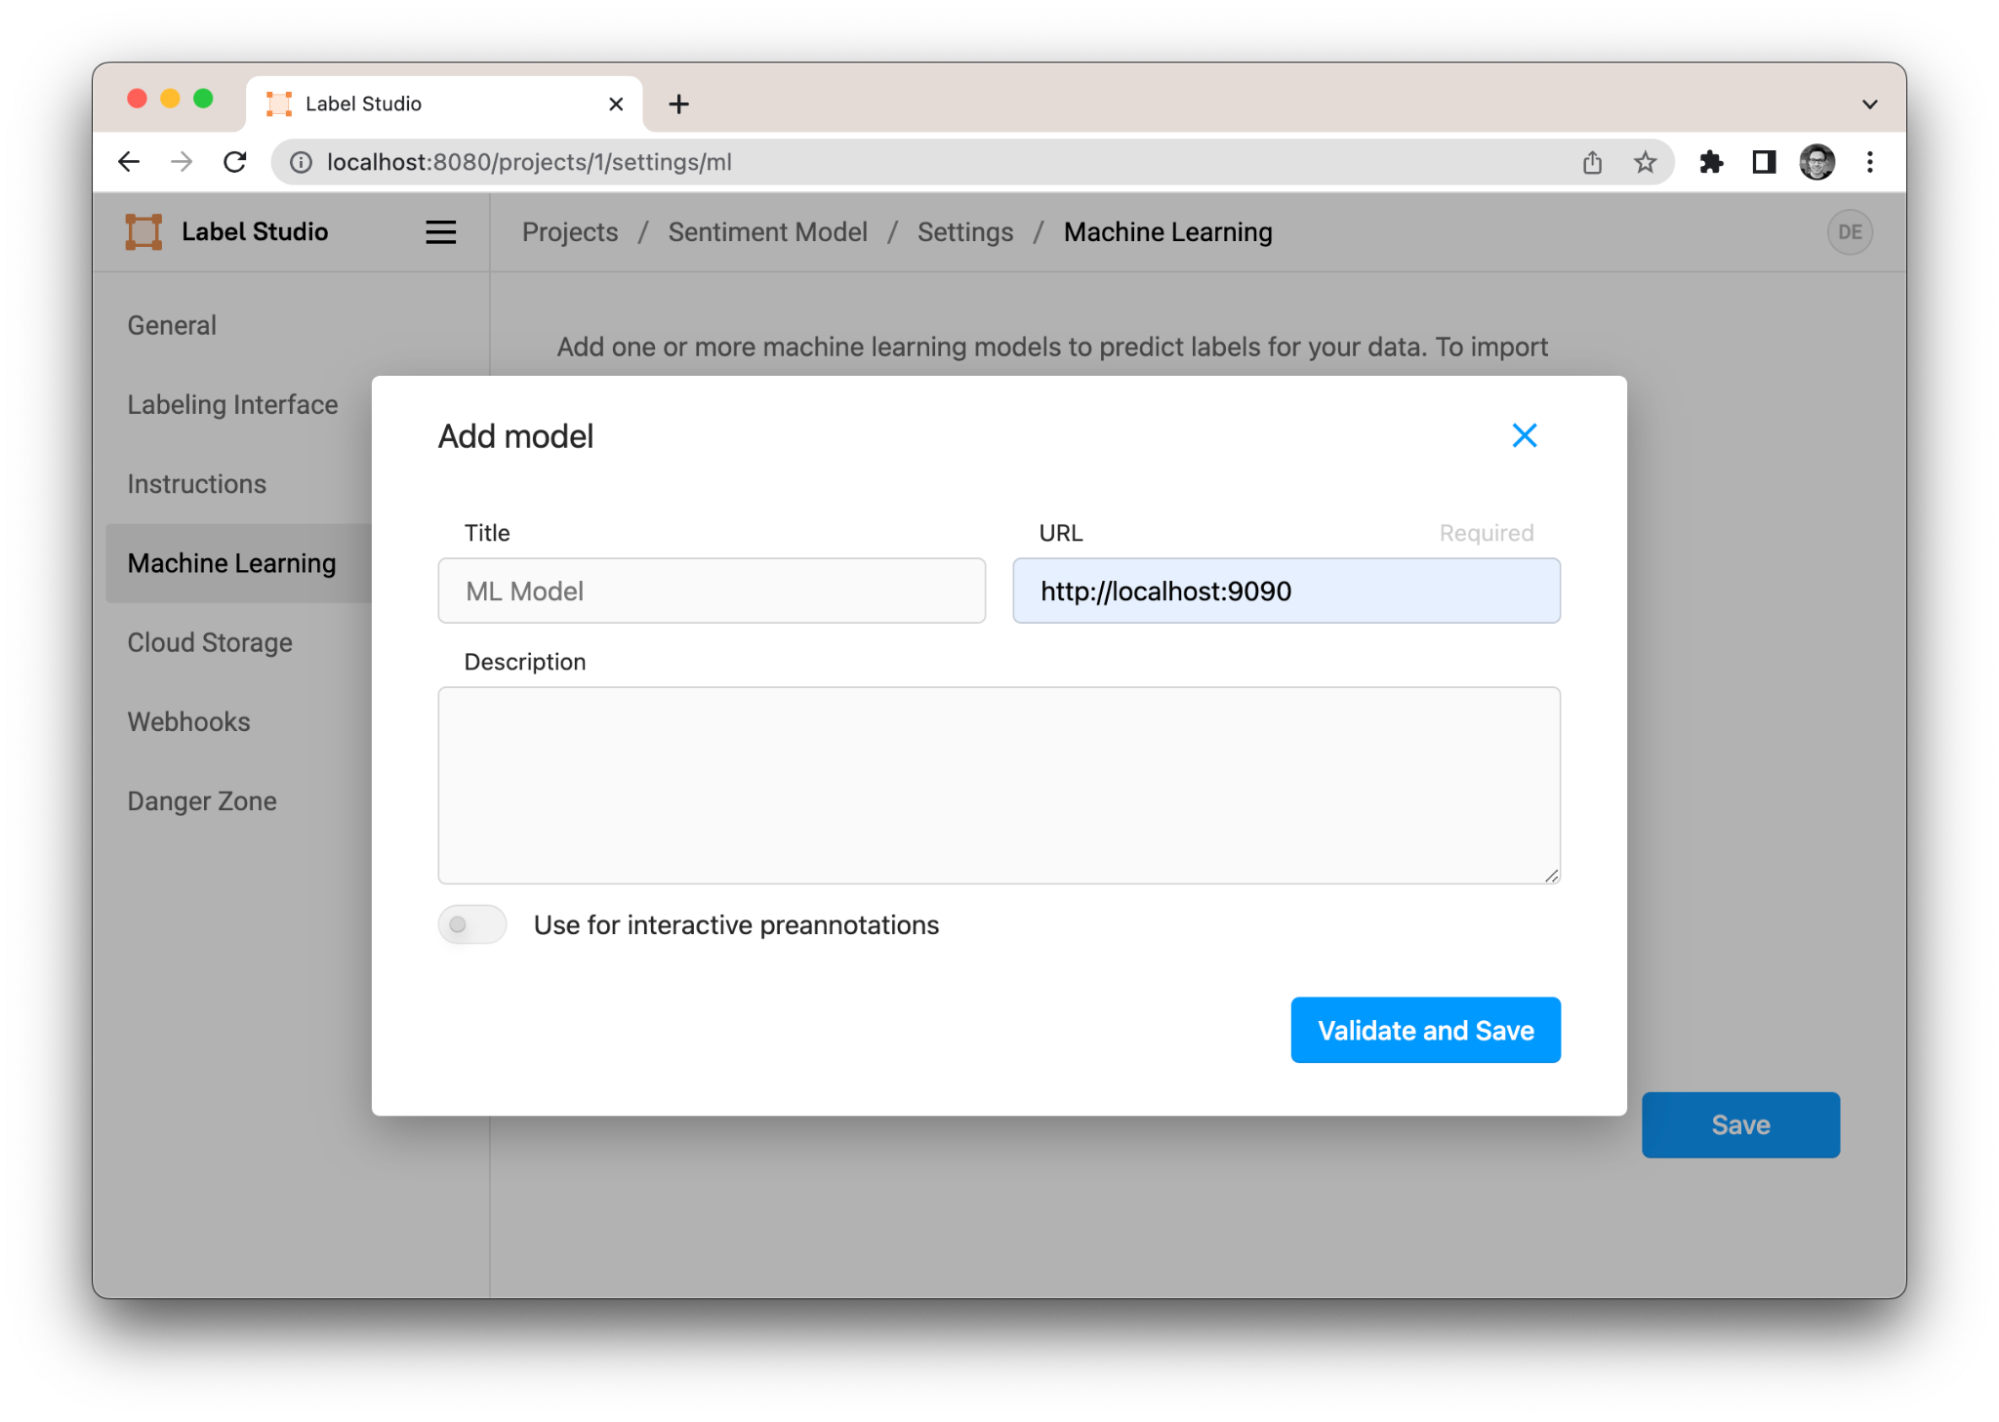
Configuring the server in the add model dialog
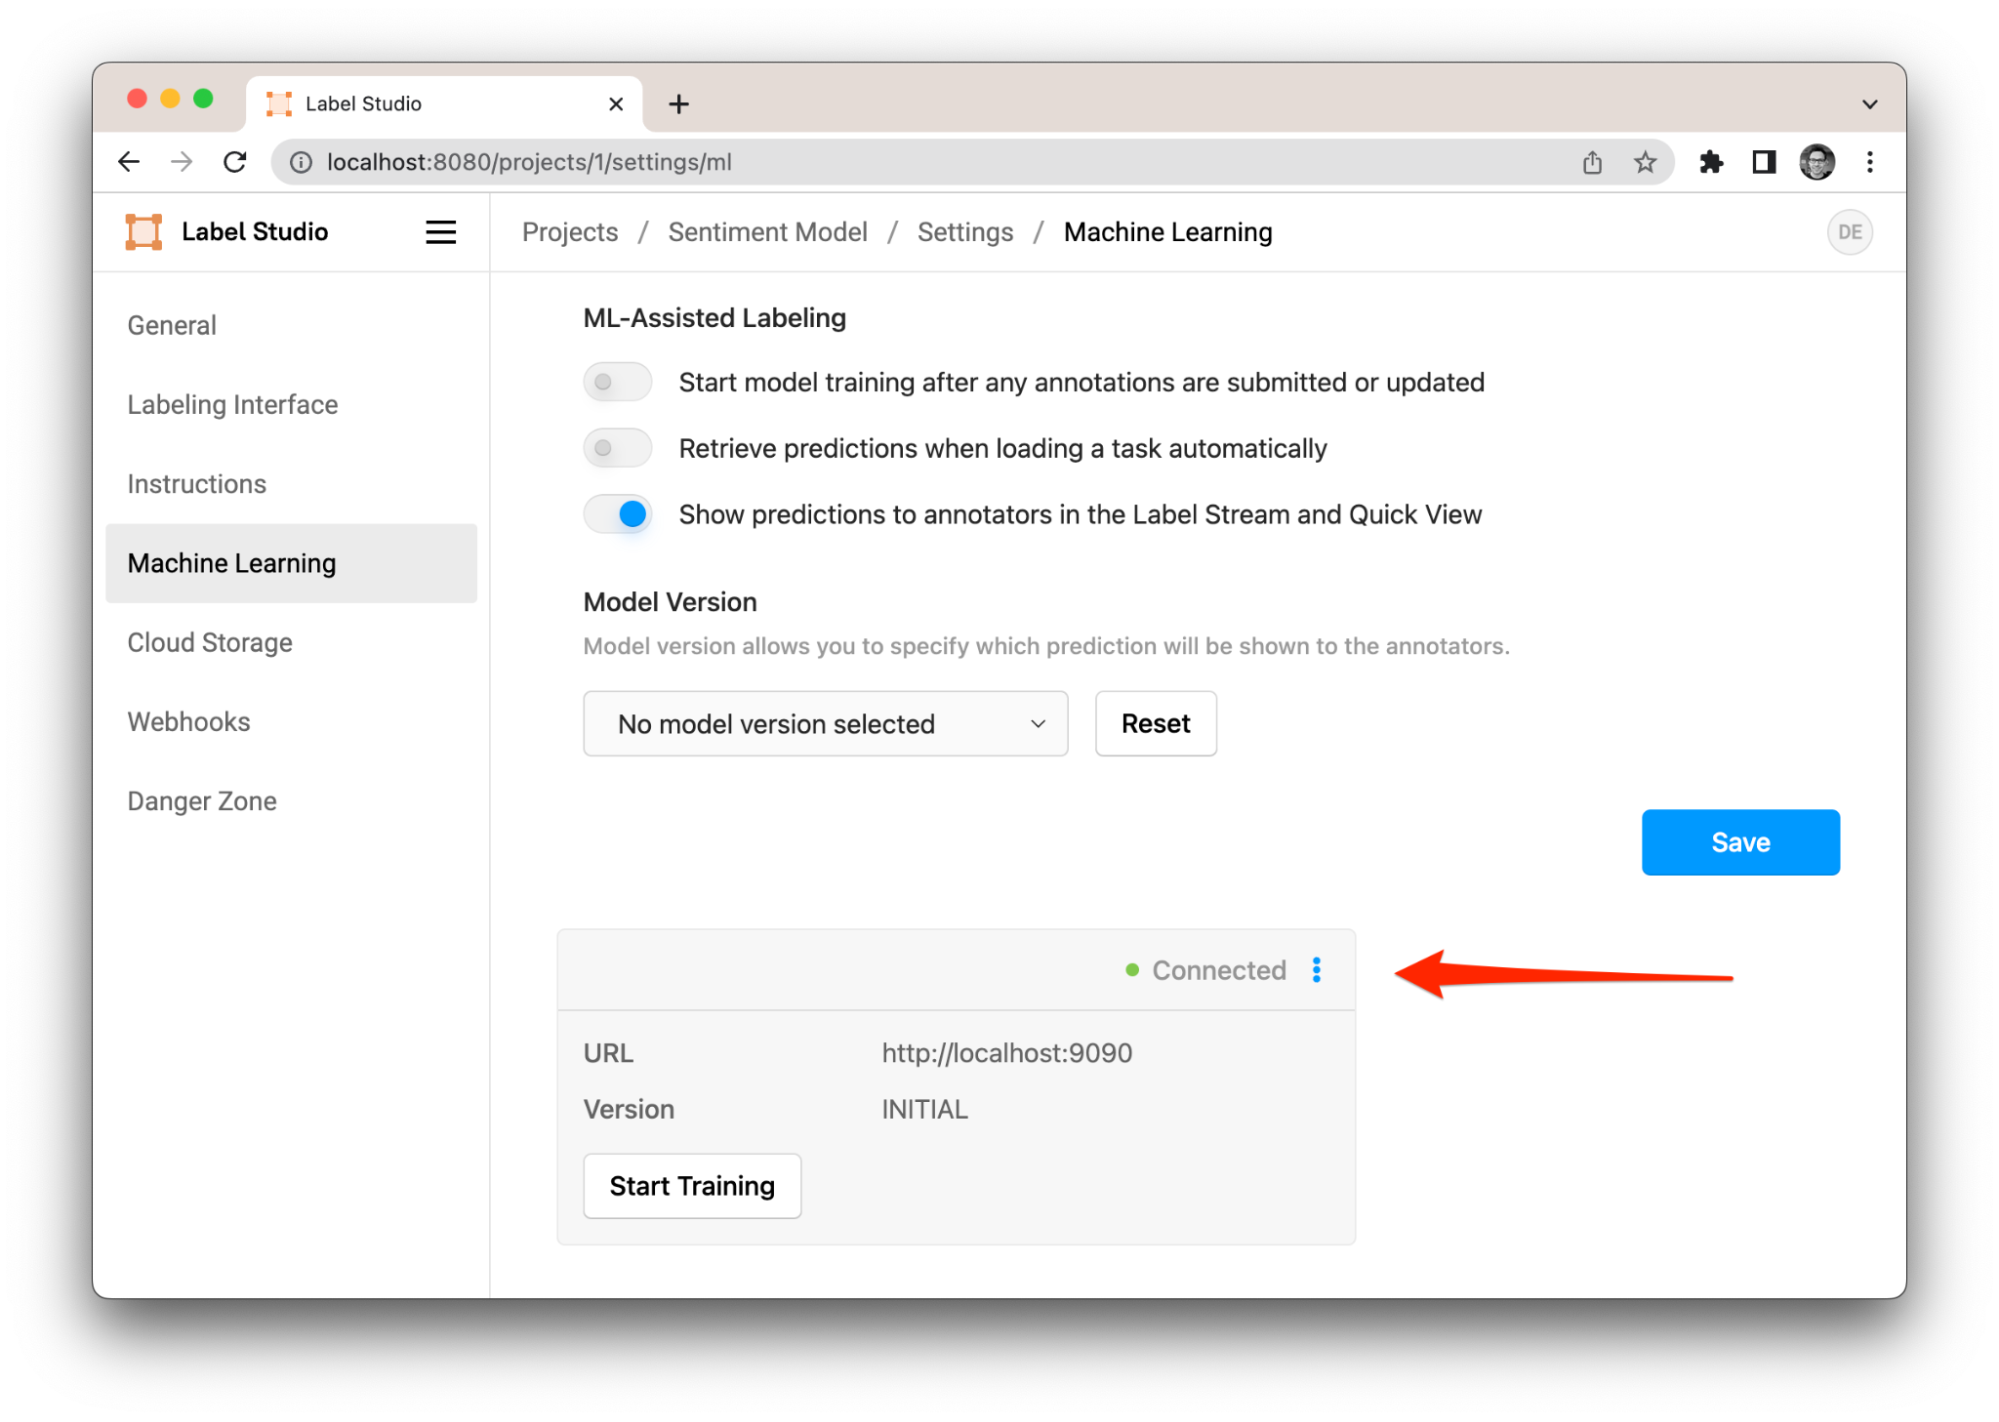
Model validated and connected
We should see the confirmation that we successfully connected to the ML Backend and it’s ready to be used.
Returning Predictions
We're now ready to use the prediction feature in Label Studio to retrieve predictions from GPT-4 for our tasks. To make a prediction, perform the following steps:
- Click on 'Tasks' in the sidebar.
- Select the task you want a prediction for.
- Click on the 'Retrieve Predictions' button at the top of the task.

Retreiving predictions from the ML model
The predictions from GPT-4 will then be displayed. You can move straight to reviewing predictions rather than starting from scratch, manually labeling everything.
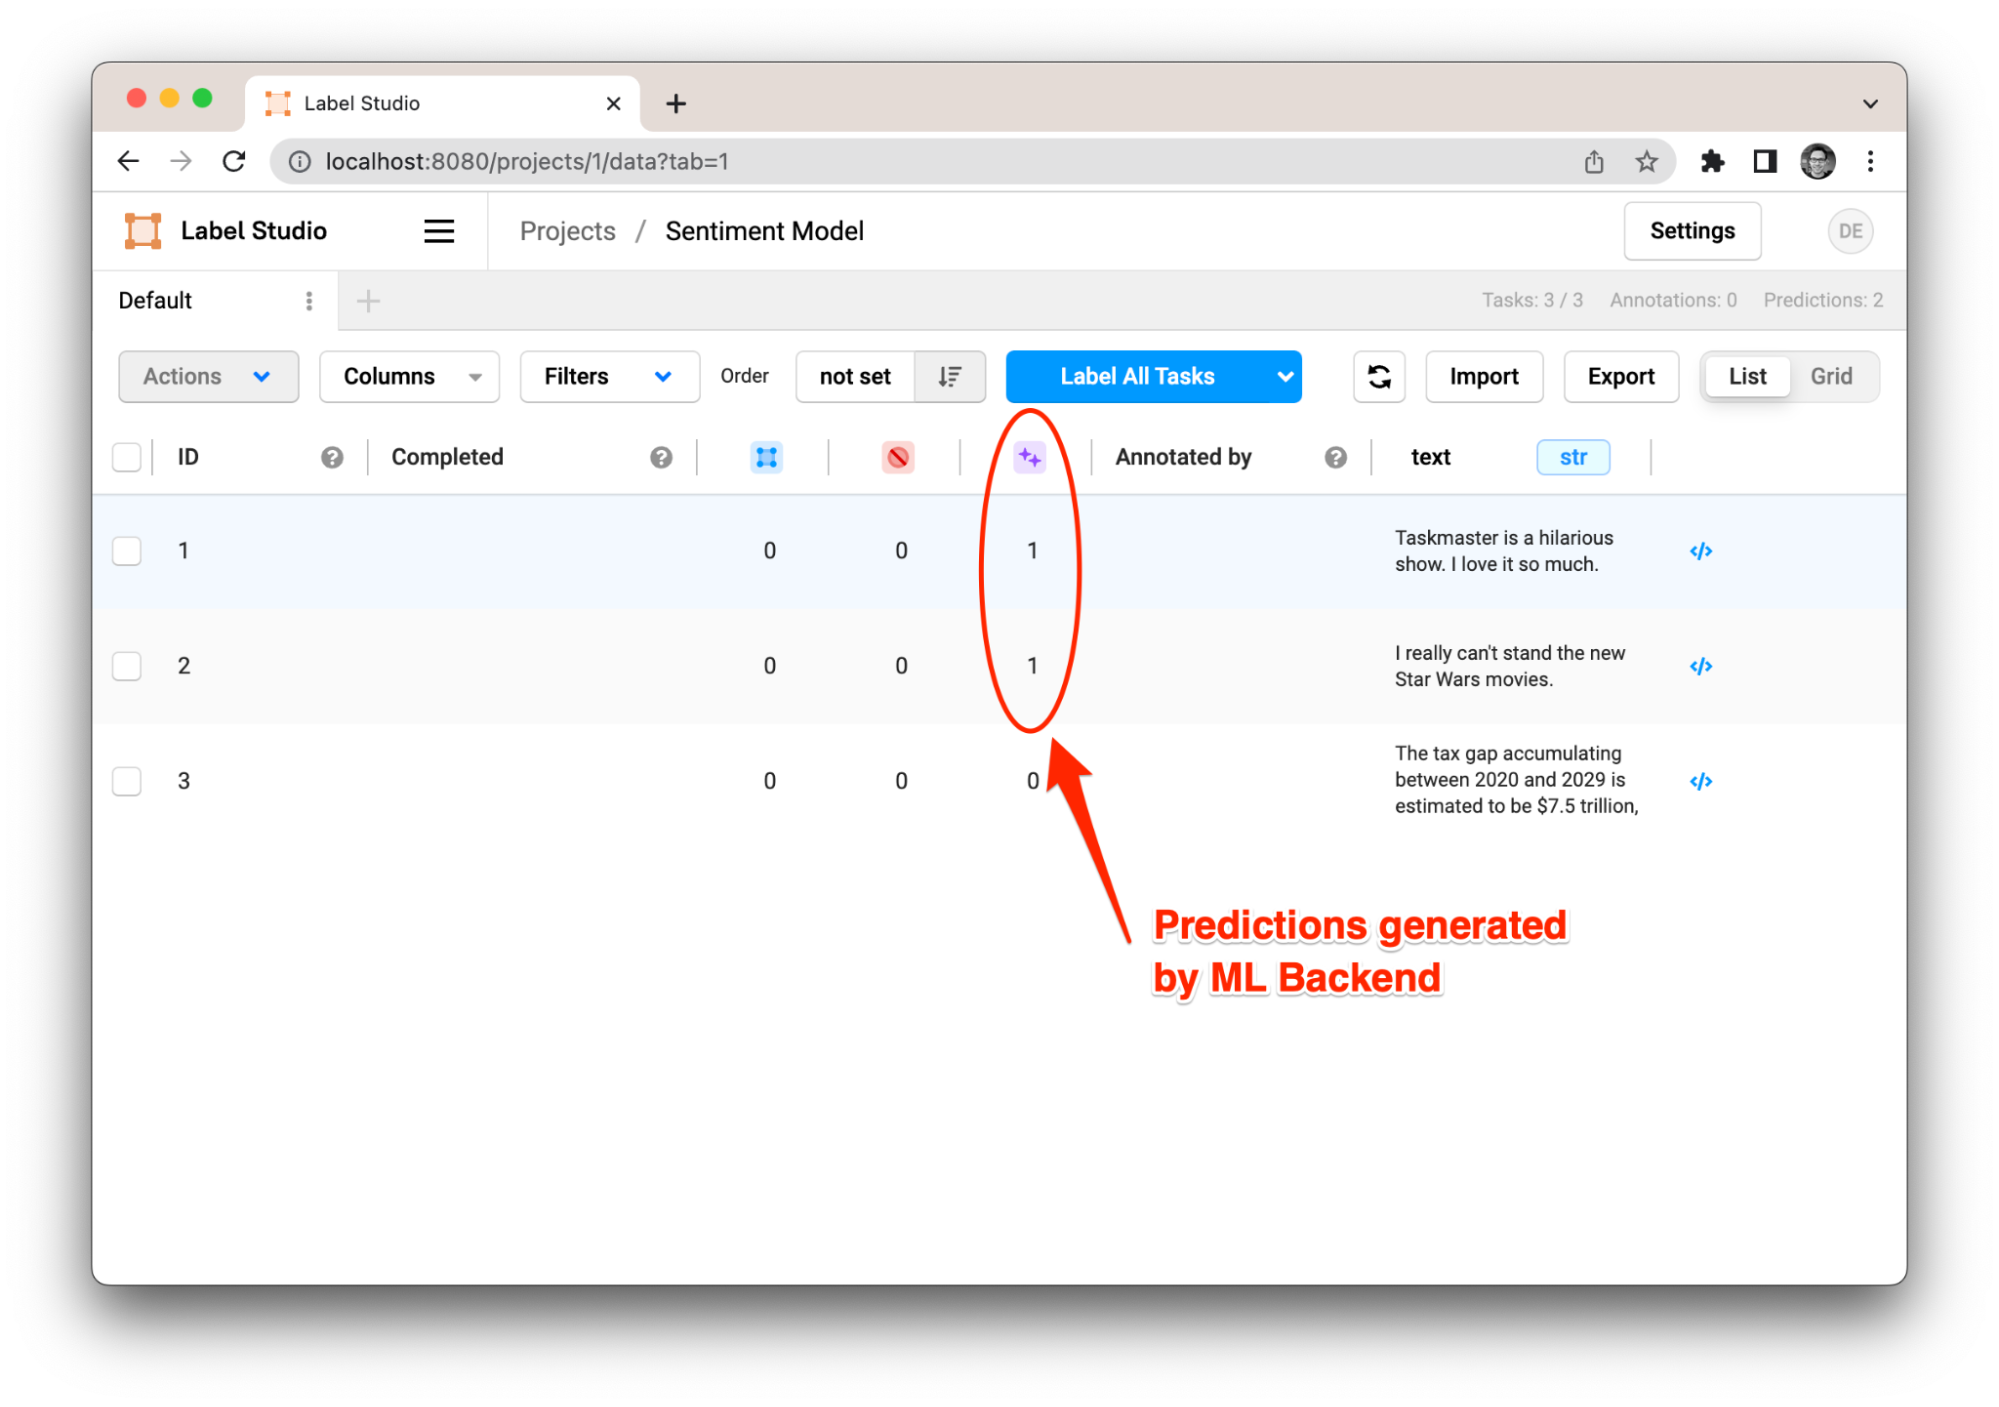
Review predictions from ML backend
Check out the ML Backend examples for full details, or follow along the ML Backend Tutorial for more information on how the backend works and how to build your own custom integrations.
Perform any text classification
If you want to go beyond a simple example with sentiment-based text classification, it is very straightforward with the generalization power of LLMs. Go to the model directory and modify the prompt in default_prompt.txt file:
Classify text into different categories. Start each category prediction in a new line.
Text: {text}
Categories: {labels} Feel free to modify the instruction, and change {text} label to whatever matches your data structure, including input texts and optionally metadata. You can explicitly define the set of labels or use {labels} placeholders to match target labels from your Label Studio project.
Now define variables in docker-compose.yml to use this default prompt:
DEFAULT_PROMPT=default_prompt.txt
USE_INTERNAL_PROMPT_TEMPLATE=0
Discussion
As we reach the end of this blog, it’s important to consider that the convenience and capabilities of using OpenAI comes with its own set of caveats. Understanding them is essential to make informed decisions about incorporating AI into your workflow.
Training and Fine-tuning
Fine-tuning is a common machine learning technique to customize models for specific needs. However, it isn't a one-size-fits-all solution. In the case of OpenAI models, the powerful GPT-3 and GPT-4 versions currently do not support fine-tuning, which means we can't tweak them for specific applications, and we must utilize their pre-trained configurations.
On the other hand, the Davinci model allows fine-tuning, but it comes with its own challenges. If not handled with expertise, it can potentially lead to lower performance outcomes. Therefore, for the purposes of this project, we have chosen not to engage in fine-tuning. Nevertheless, its potential for improving model performance is acknowledged, and we see it as a promising direction for future research and exploration.
Data Security Considerations
One crucial point is that this example system should not be used for highly sensitive and private data. It's important to remember that the data you submit is transferred to OpenAI’s services. This implies that your data could potentially be used for training purposes.
It's not just about privacy, but also about control over your data. When you send your data to third-party services, you may relinquish direct control over that information. Depending on the nature and sensitivity of your data, this might be an unacceptable risk. At some point, you may want to consider moving to in-house models instead.
Conclusion
In this blog, we’ve explored how GPT-4 can be integrated with Label Studio’s ML Backend to help move from the labor-intensive task of data labeling to a more streamlined review process. This can introduce a new level of efficiency, leveraging the power of the world’s leading LLM to pre-annotate your data.
We also considered some of the limitations of this approach, such as data privacy and model quality, noting that it may not be suitable for all applications. But while the GPT approach is not always a panacea, we believe that integrating AI technologies such as GPT-4 into the labeling process will continue to open up many opportunities in the future.
Check out the full example on GitHub!
If you want to learn more about Label Studio and its machine learning integrations, or have your own integration to share, join the Label Studio Slack community, where you can find thousands of other data annotation professionals.
Related Content
-
Building A Labeling Config in Label Studio Enterprise
How do you build the right labeling interface in Label Studio? This video walks through a practical progression: start with templates, customize with XML tags, extend with React Code, and standardize workflows with plugins.
-
Learn how to connect YOLO26 to a Label Studio project using the YOLO ML Backend so annotators can start from model predictions and focus on review and correction instead of drawing boxes from scratch.

Micaela Kaplan
February 12, 2026
-
Getting started with Label Studio
Everything you need to know about Label Studio to get started, from downloading and installing the tool to creating your first project, adding new members, and more!