Interactive OCR with Tesseract and Label Studio
In the last two years, Foundation Models have exploded onto the scene with impressive zero-shot and generative capabilities that can be applied to various novel use cases. New muti-modal models combine image recognition with natural language processing to give us even more powerful tools for describing annotation processes (see, for example, our recent article on Grounding DINO).
However, despite these advances, more traditional deep-learning models still have a place in the modern machine learning and data science workflow. Image detection models like YOLO, named entity recognition models like Flair, and audio transcription libraries like NeMo have years of research backing them. They can be a fast and cost-effective way to accelerate your annotation pipeline. Traditional ML models are frequently less expensive to put into production, can run on commodity hardware, and provide results faster than higher-powered foundation models.
In this spirit, this post revisits one of the most popular Label Studio integrations: Tesseract OCR. Google describes Tesseract as “an open-source OCR engine developed at HP between 1984 and 1994.” It was open-sourced by Hewlett Packard in 2005, and Google has sponsored its development since 2006. It has proven to be a powerful OCR model, backed by over 20 years of research and development. Because of this, it’s become a popular first choice for OCR tasks, providing an excellent balance of speed and accuracy.
The Label Studio community recently updated its Tesseract OCR example backend, which now supports the latest version of Label Studio and includes a basic example of integrating cloud storage with the Label Studio Machine Learning Backend. The remainder of this post will walk you through how to get started with the Tesseract ML Backend.
Prerequisites
This example assumes that you are running Docker on your system. If you’re running MacOS or Windows, we suggest starting with Docker Desktop, “secure, out-of-the-box containerization software offering developers and teams a robust, hybrid toolkit to build, share, and run applications anywhere.” You can install Docker using your operating system package manager if running Linux. Docker ships with a specialized container management system called Docker Compose that we will use to configure and launch the machine learning backend and demonstrate a basic cloud storage connection using the open-source Minio object storage platform.
You must also install Git into your system to download the Label Studio Machine Learning Backend examples.
Launch Label Studio
Begin by installing Label Studio using Docker. You have two options for how you want to handle your image data. The first option is local file storage, where you upload the images directly to Label Studio and then serve the images to the Tesseract ML Backend directly from Label Studio. While this solution is an easy way to start working with your data immediately, it is recommended for something other than production usage. To use local file storage, start Label Studio with the following command:
docker pull heartexlabs/label-studio:latest

docker run -it \
    -p 8080:8080 \
    -v `pwd`/mydata:/label-studio/data \
    --env LABEL_STUDIO_LOCAL_FILES_SERVING_ENABLED=true \
    --env LABEL_STUDIO_LOCAL_FILES_DOCUMENT_ROOT=/label-studio/data/images \
heartexlabs/label-studio:latestThis will pull the latest image of Label Studio to your system, launch it inside Docker, and assign it to port 8080.
The second option is to use cloud storage, such as S3, GCP, or Azure. Cloud storage offers a secure connection, easy data management, automated task syncing, and integrates more easily into your machine learning pipeline. The Tesseract ML Backend example includes a simple local Minio installation that replicates the S3 API, allowing you to try things out without requiring you to configure a commercial cloud storage offering. If you opt to use cloud storage, you can start Label Studio with this command:
docker pull heartexlabs/label-studio:latest

docker run -it \
    -p 8080:8080 \
    -v `pwd`/mydata:/label-studio/data \
    heartexlabs/label-studio:latest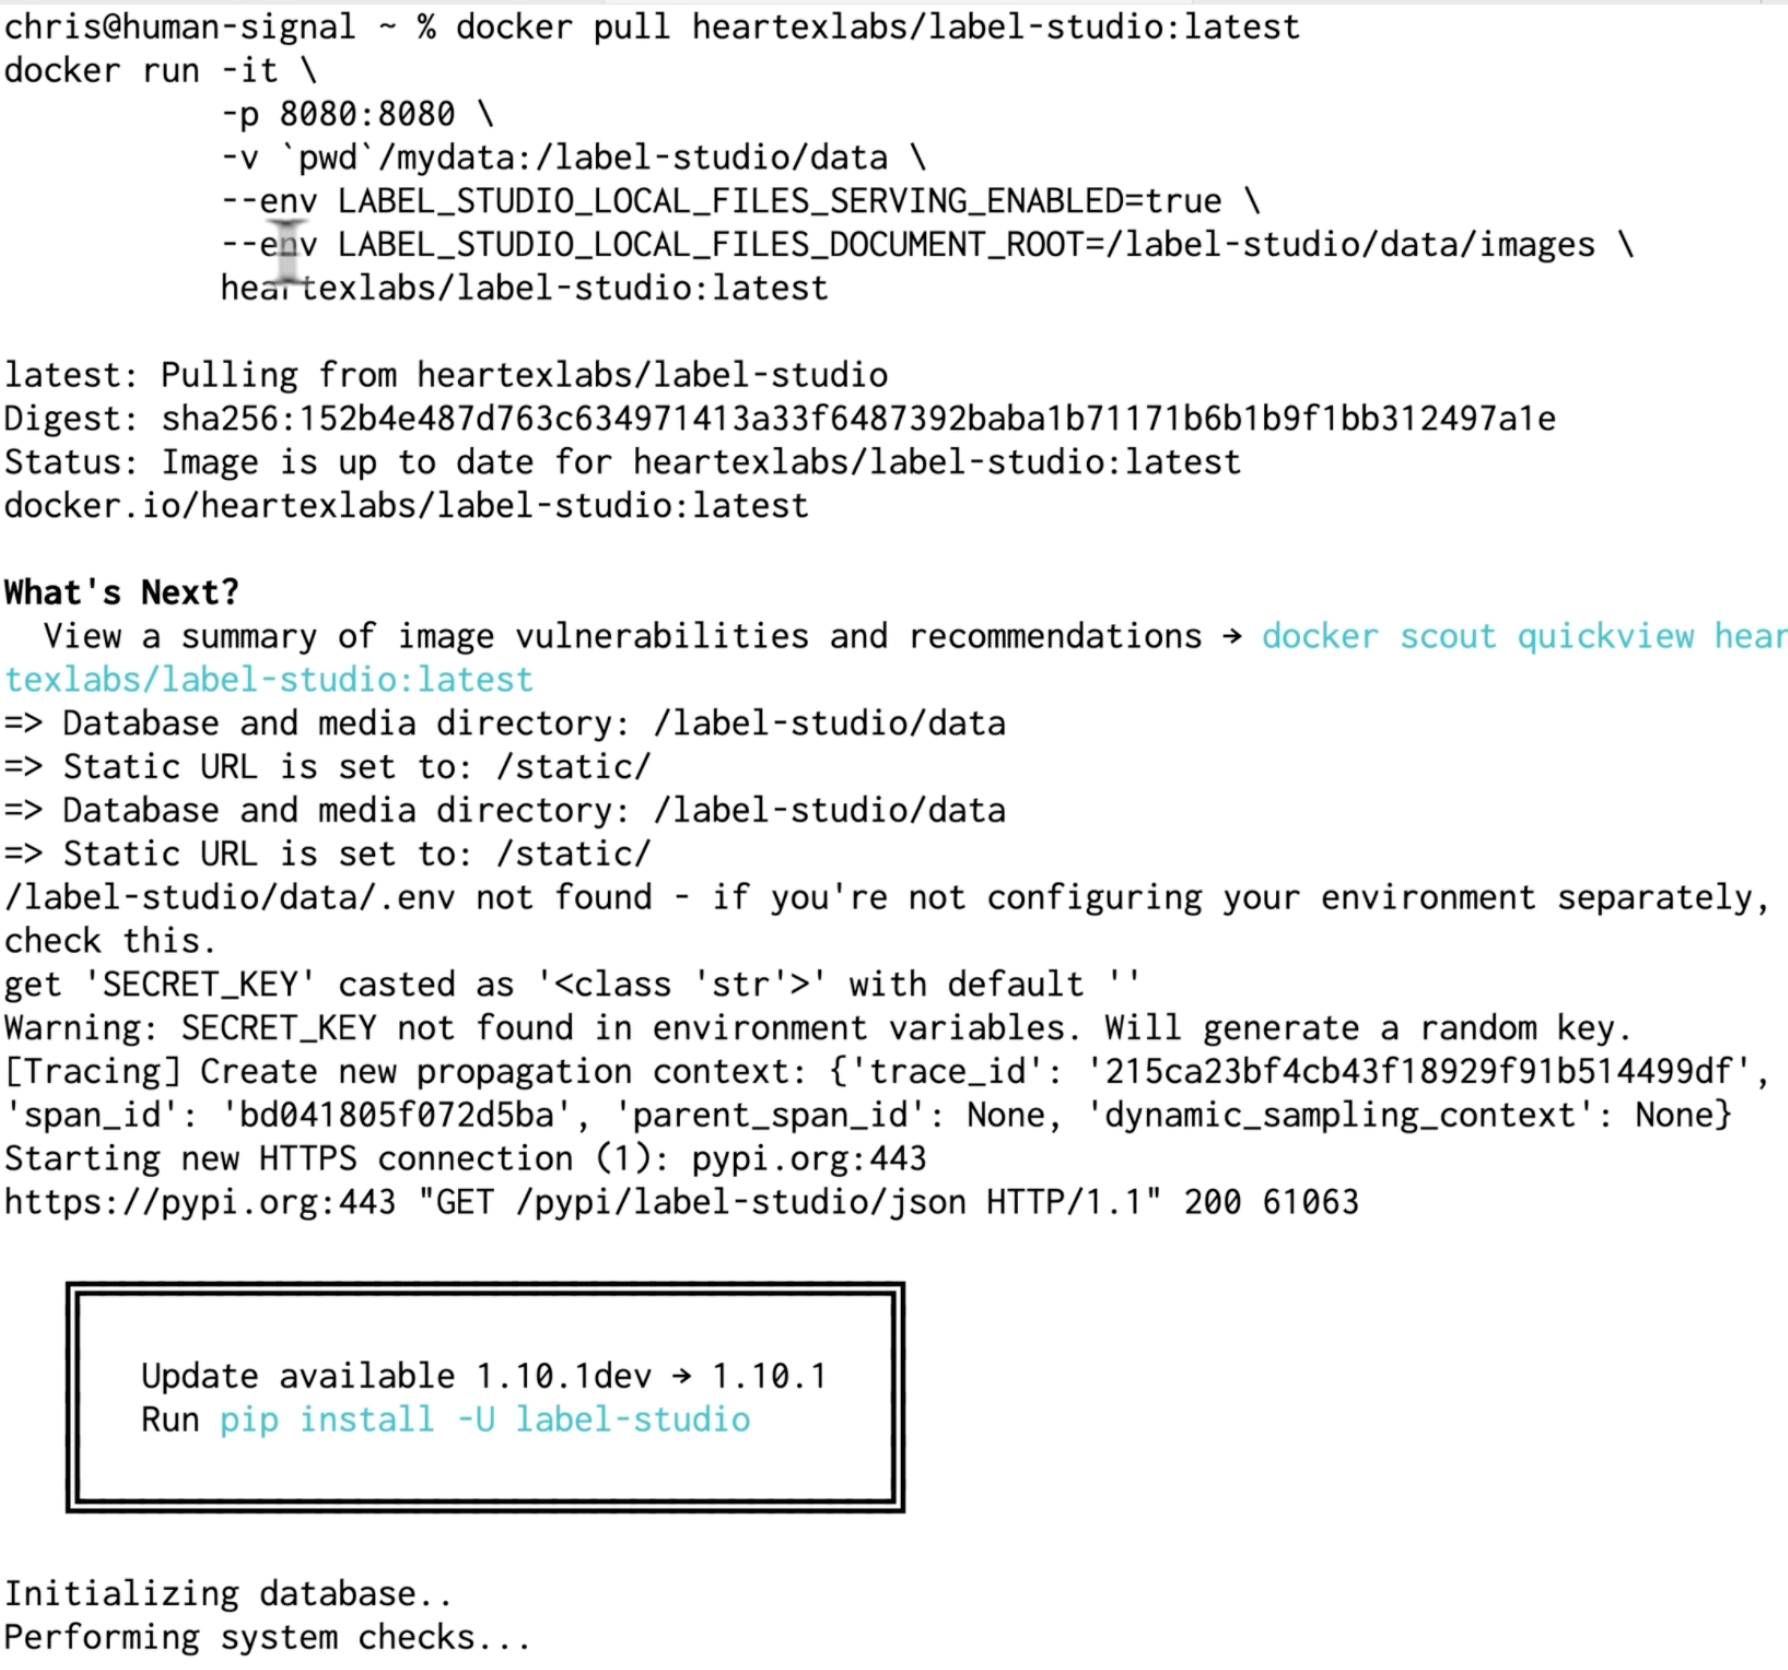
Installing and Running Label Studio using Docker
Set Up The OCR Project
Once Label Studio has launched, open your browser (we suggest using Chrome, as it provides the best compatibility with the Label Studio frontend) and navigate to http://localhost:8080. This will bring you to the Label Studio login page, where you can create a new account and log in to the Label Studio Platform.
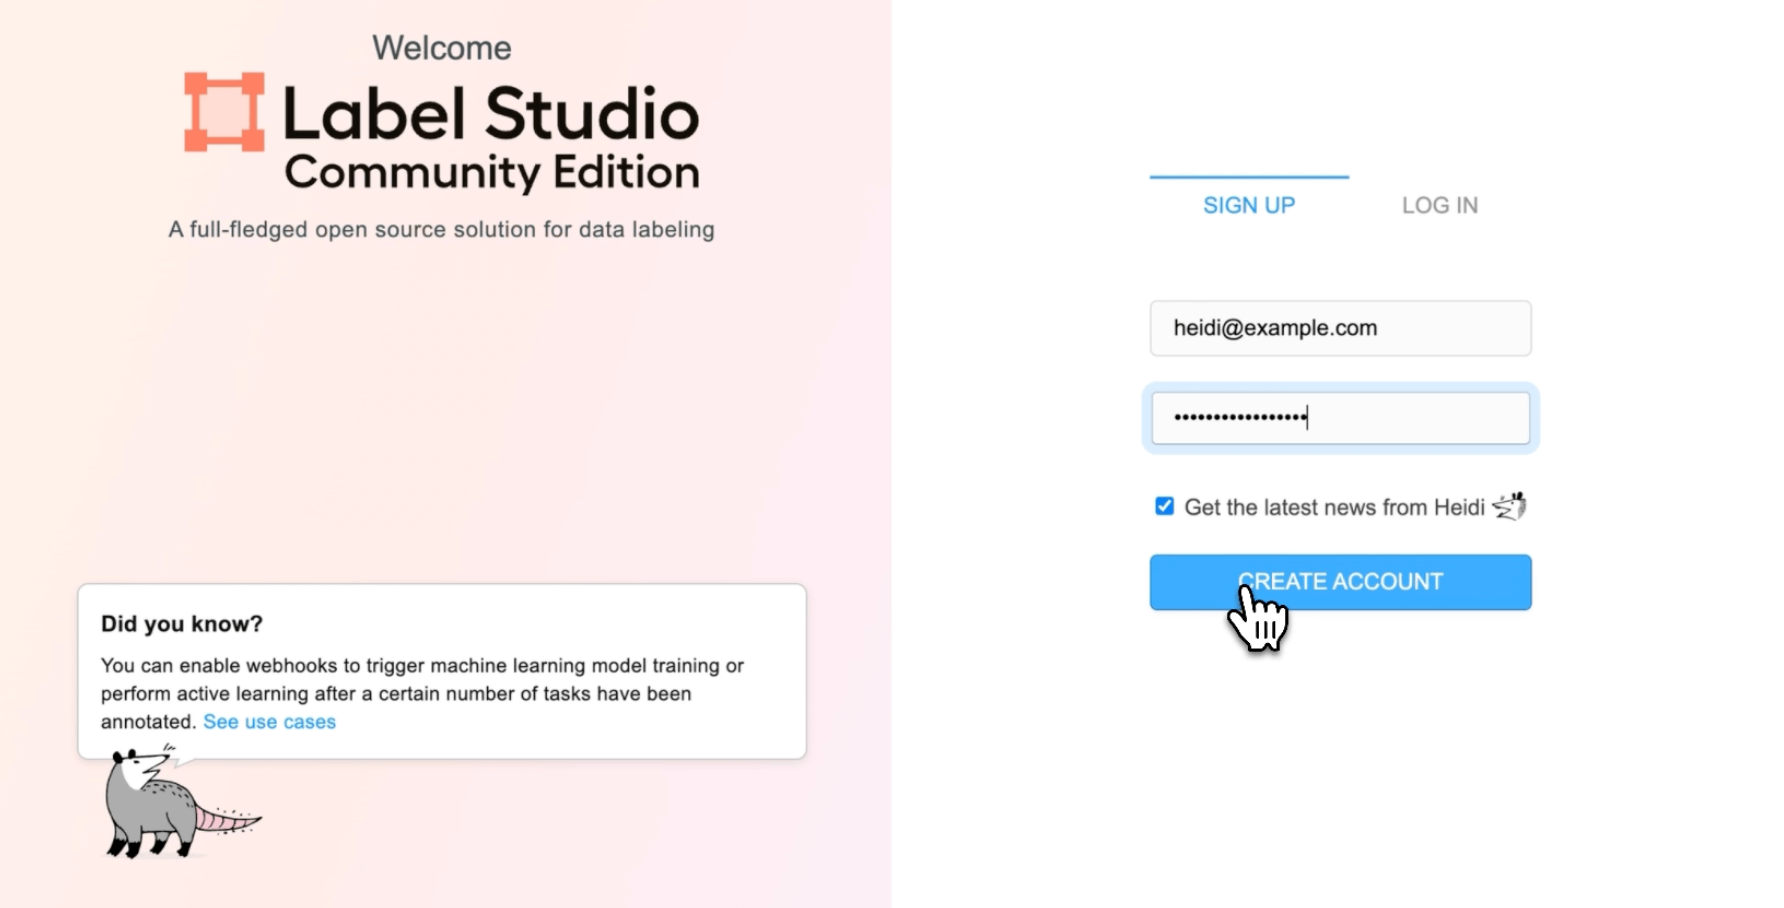
The Label Studio Login Screen
Select “Create” to start a new project.
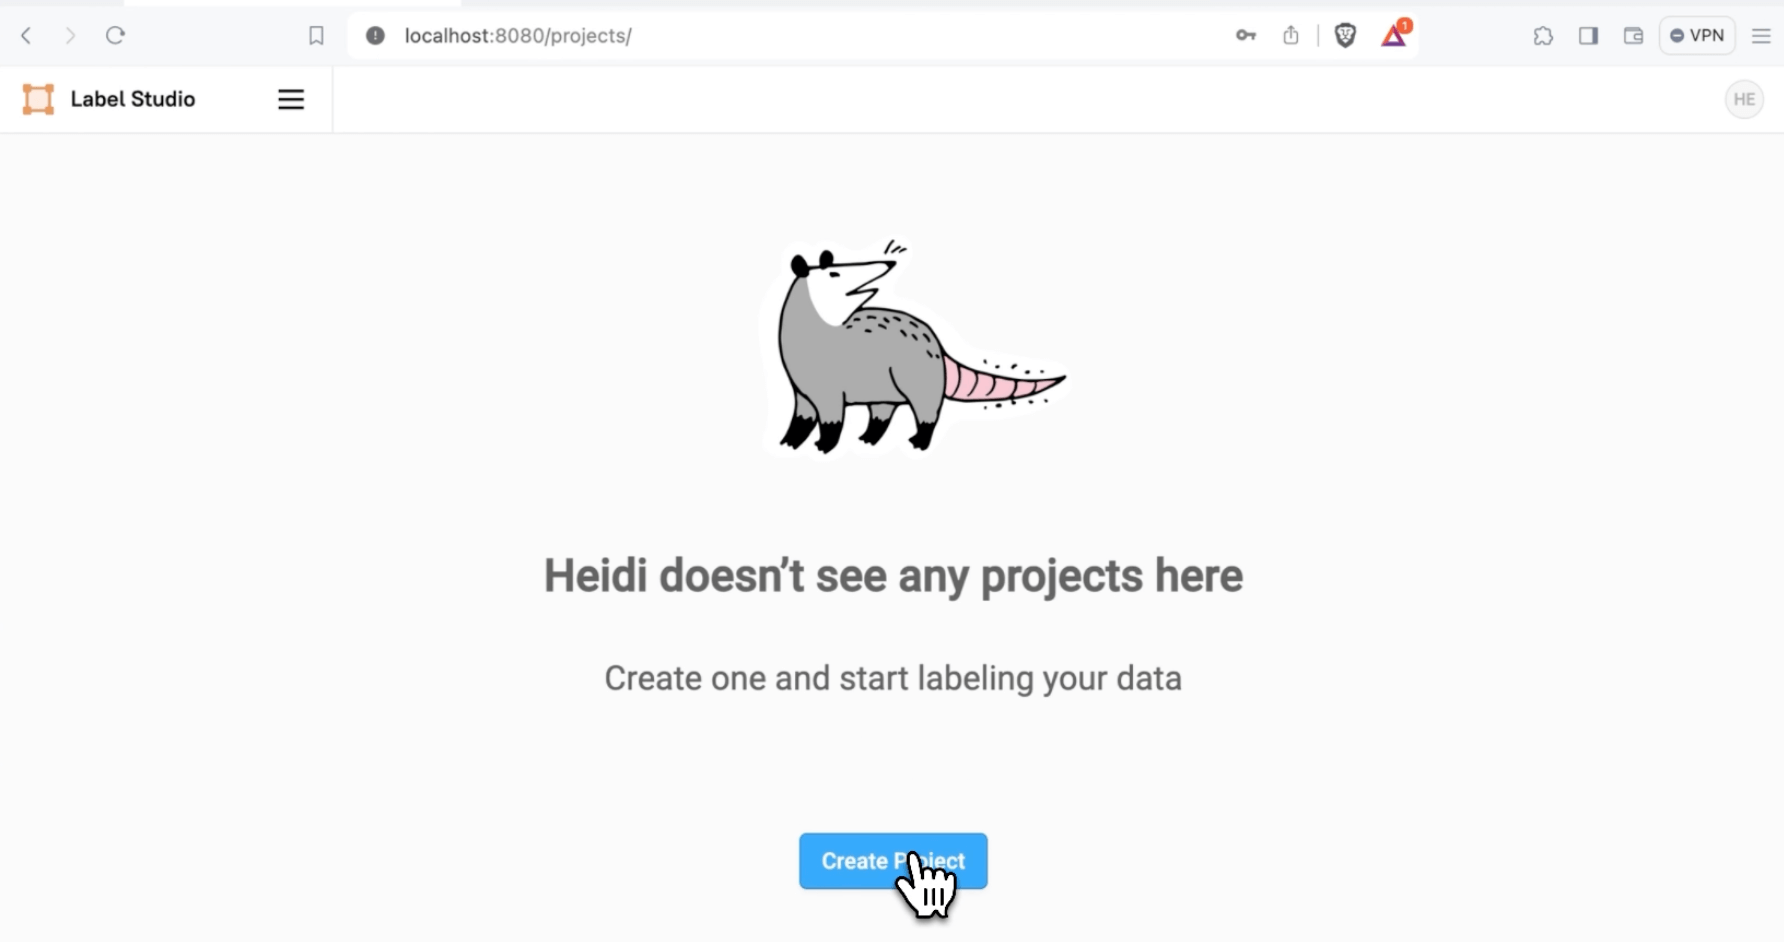
"Heidi doesn't see any projects here."
In the “Project Name” tab, name the project " Tesseract OCR. " If you’re using the local file storage option, you can upload your image data into the “Data Import” tab.
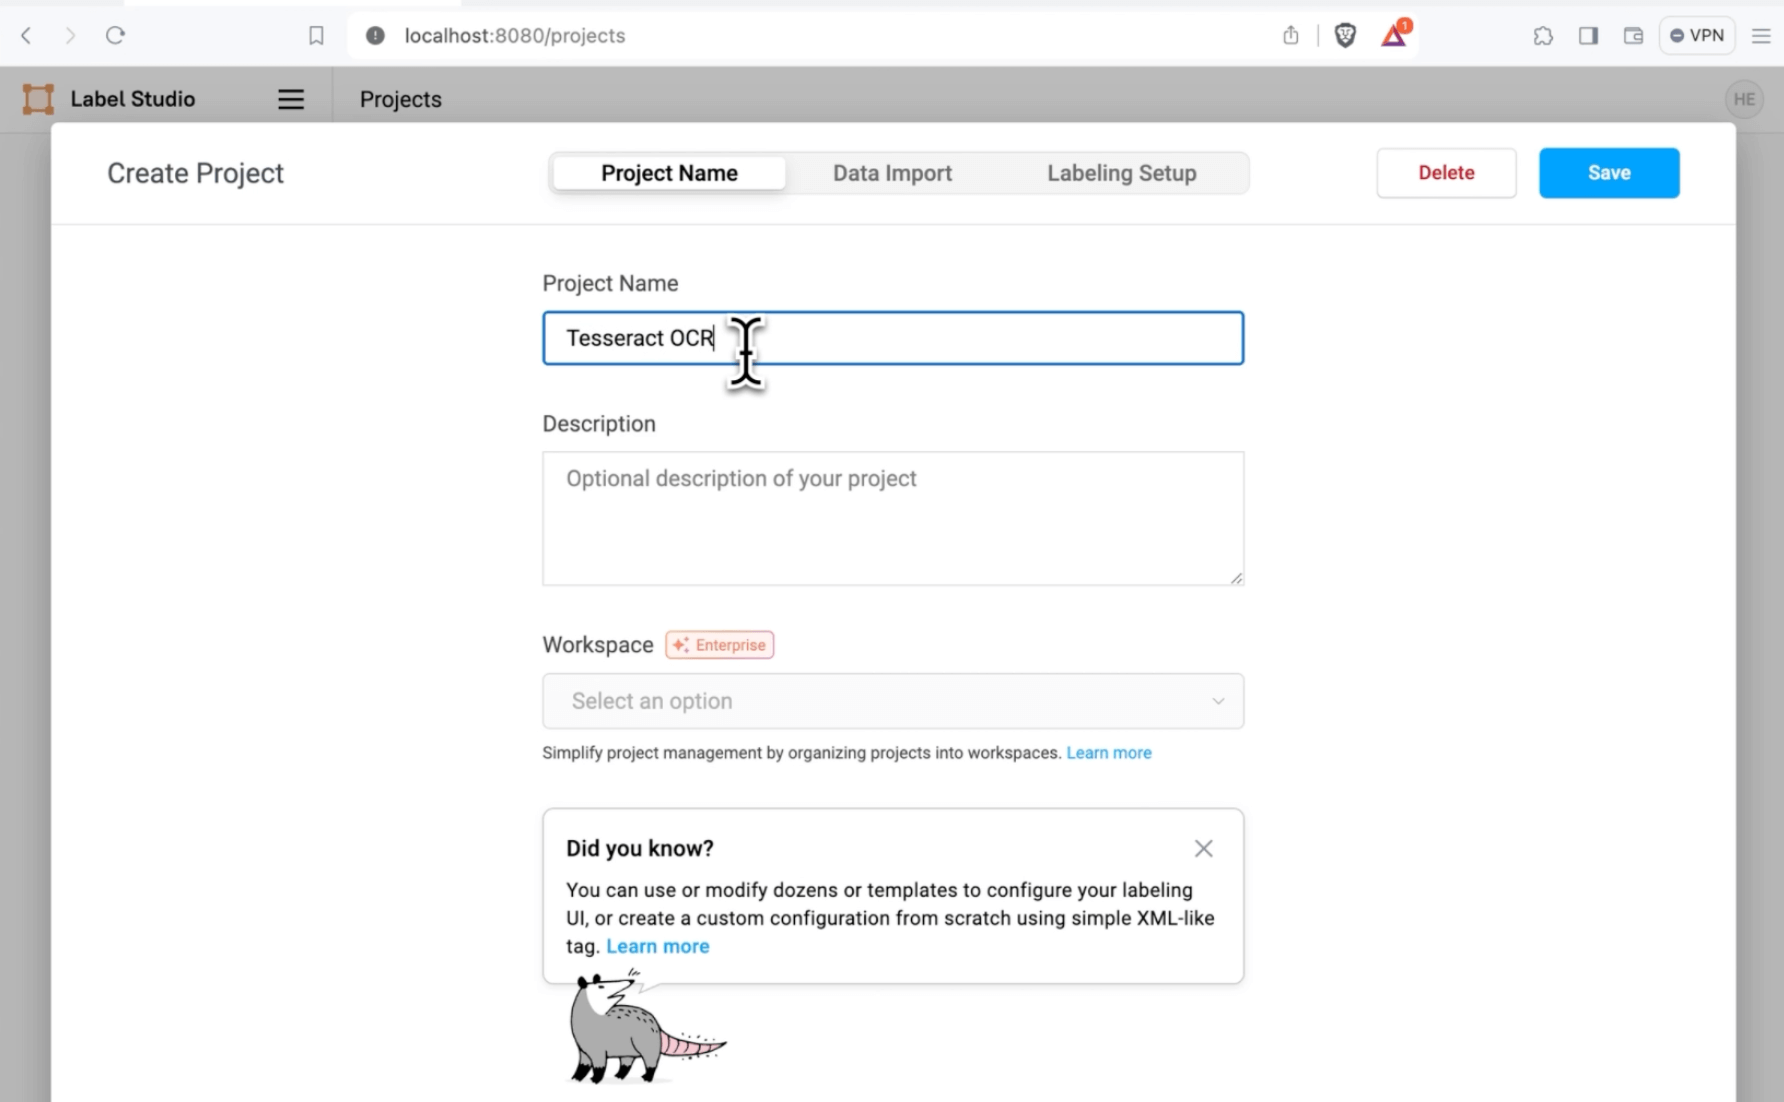
The New Project Dialog
In the Labeling Setup tab, choose “Custom template” and paste the following labeling interface, defined using XML, into the “Code” box.
<View>
   <Image name="image" value="$ocr" zoom="true" zoomControl="false"
         rotateControl="true" width="100%" height="100%"
         maxHeight="auto" maxWidth="auto"/>

   <RectangleLabels name="bbox" toName="image" strokeWidth="1" smart="true">
      <Label value="Label1" background="green"/>
      <Label value="Label2" background="blue"/>
      <Label value="Label3" background="red"/>
   </RectangleLabels>

   <TextArea name="transcription" toName="image"
   editable="true" perRegion="true" required="false"
   maxSubmissions="1" rows="5" placeholder="Recognized Text"
   displayMode="region-list"/>
</View>You will see a visual representation of the labeling interface. Select “Save,” and you’ll be taken to the data manager page for the project.
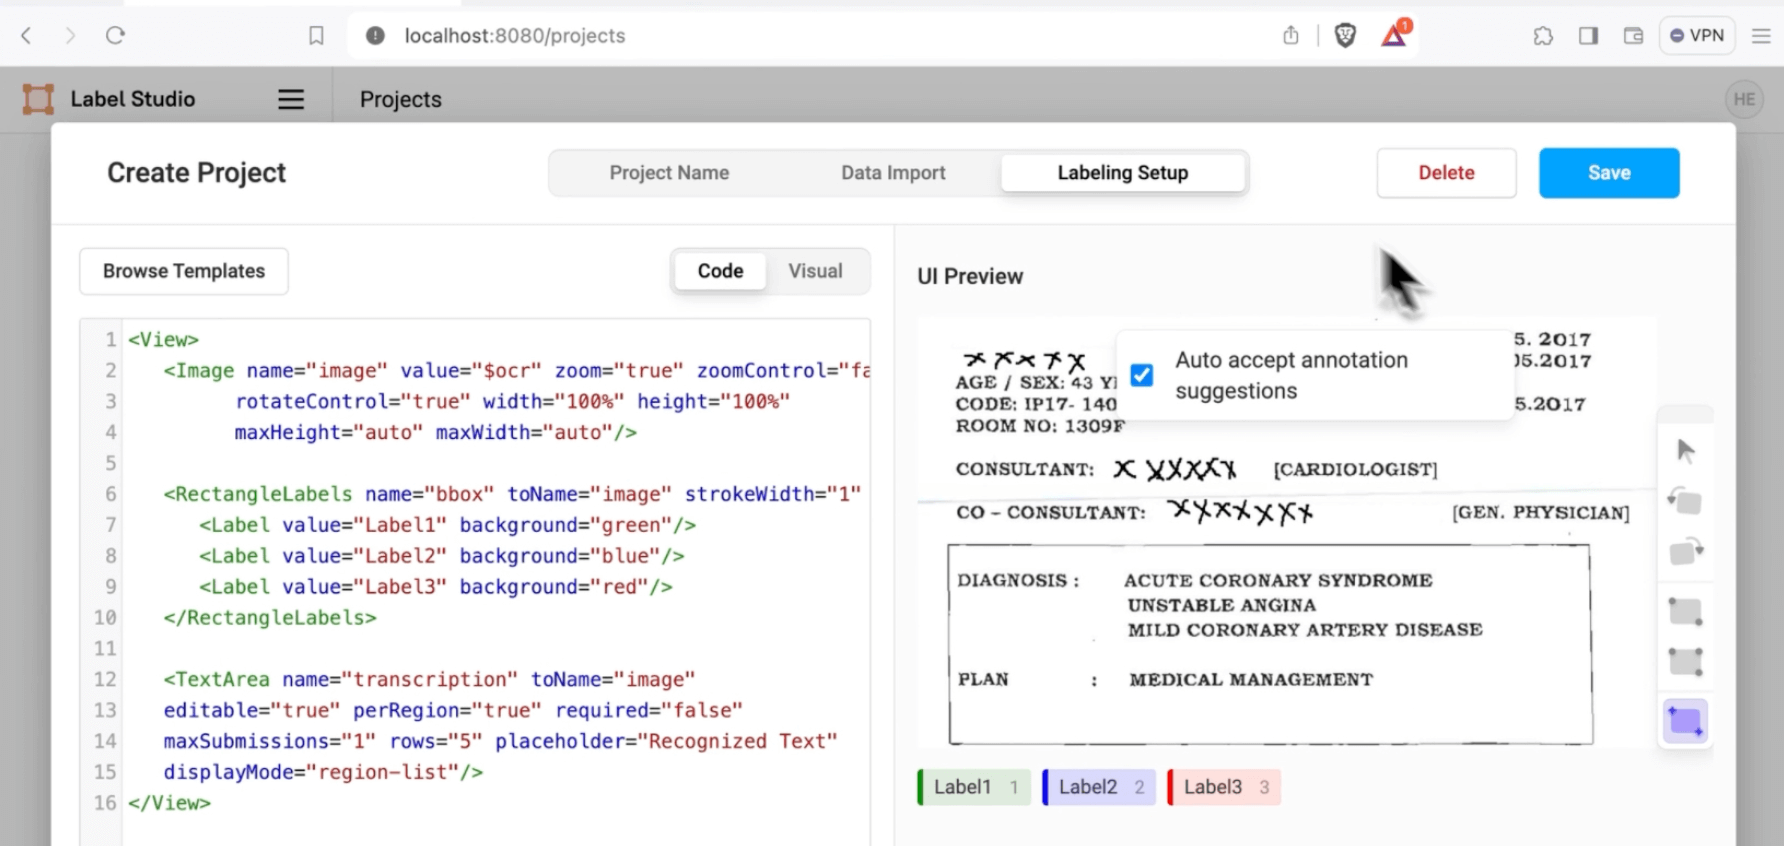
The Custom OCR Labeling Interface
If you’re using local file storage, select the user settings icon in the top–right corner of the interface, select “Accounts & Settings,” and copy the Access Token. You’ll need this to launch the model.
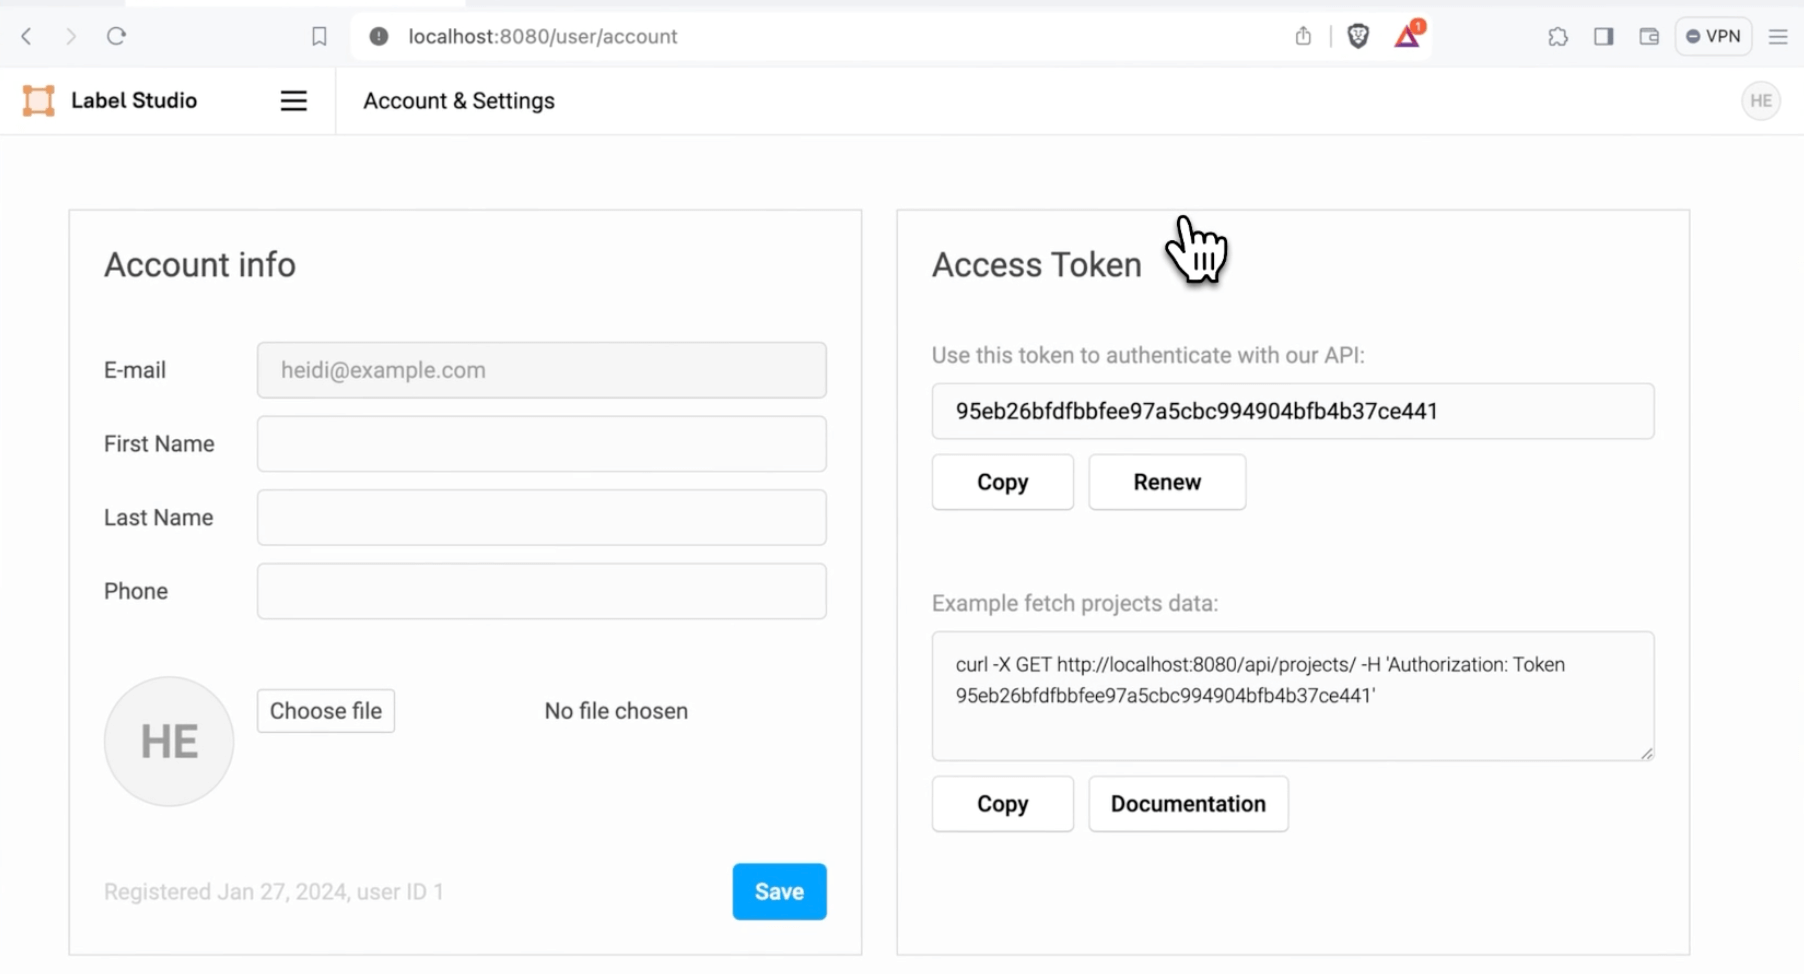
The Label Studio API Access Token
Download and Configure Label Studio ML Backend
Open up a terminal window, and download the Label Studio Machine Learning Backend repository:
git clone https://github.com/humansignal/label-studio-ml-backendNavigate to the Tesseract example directory.
cd label-studio-ml-backend/label_studio_ml/examples/tesseract Open the example.env file in your favorite text editor and fill in the required variables. If using local file storage, fill in the LABEL_STUDIO_ACCESS_TOKEN you copied from the previous step. If you’re setting up cloud storage using the Minio example, you must fill in the AWS access tokens and Minio credentials with your preferred username and password (the password must be at least eight characters long). When you’re done with the configuration, save and exit.
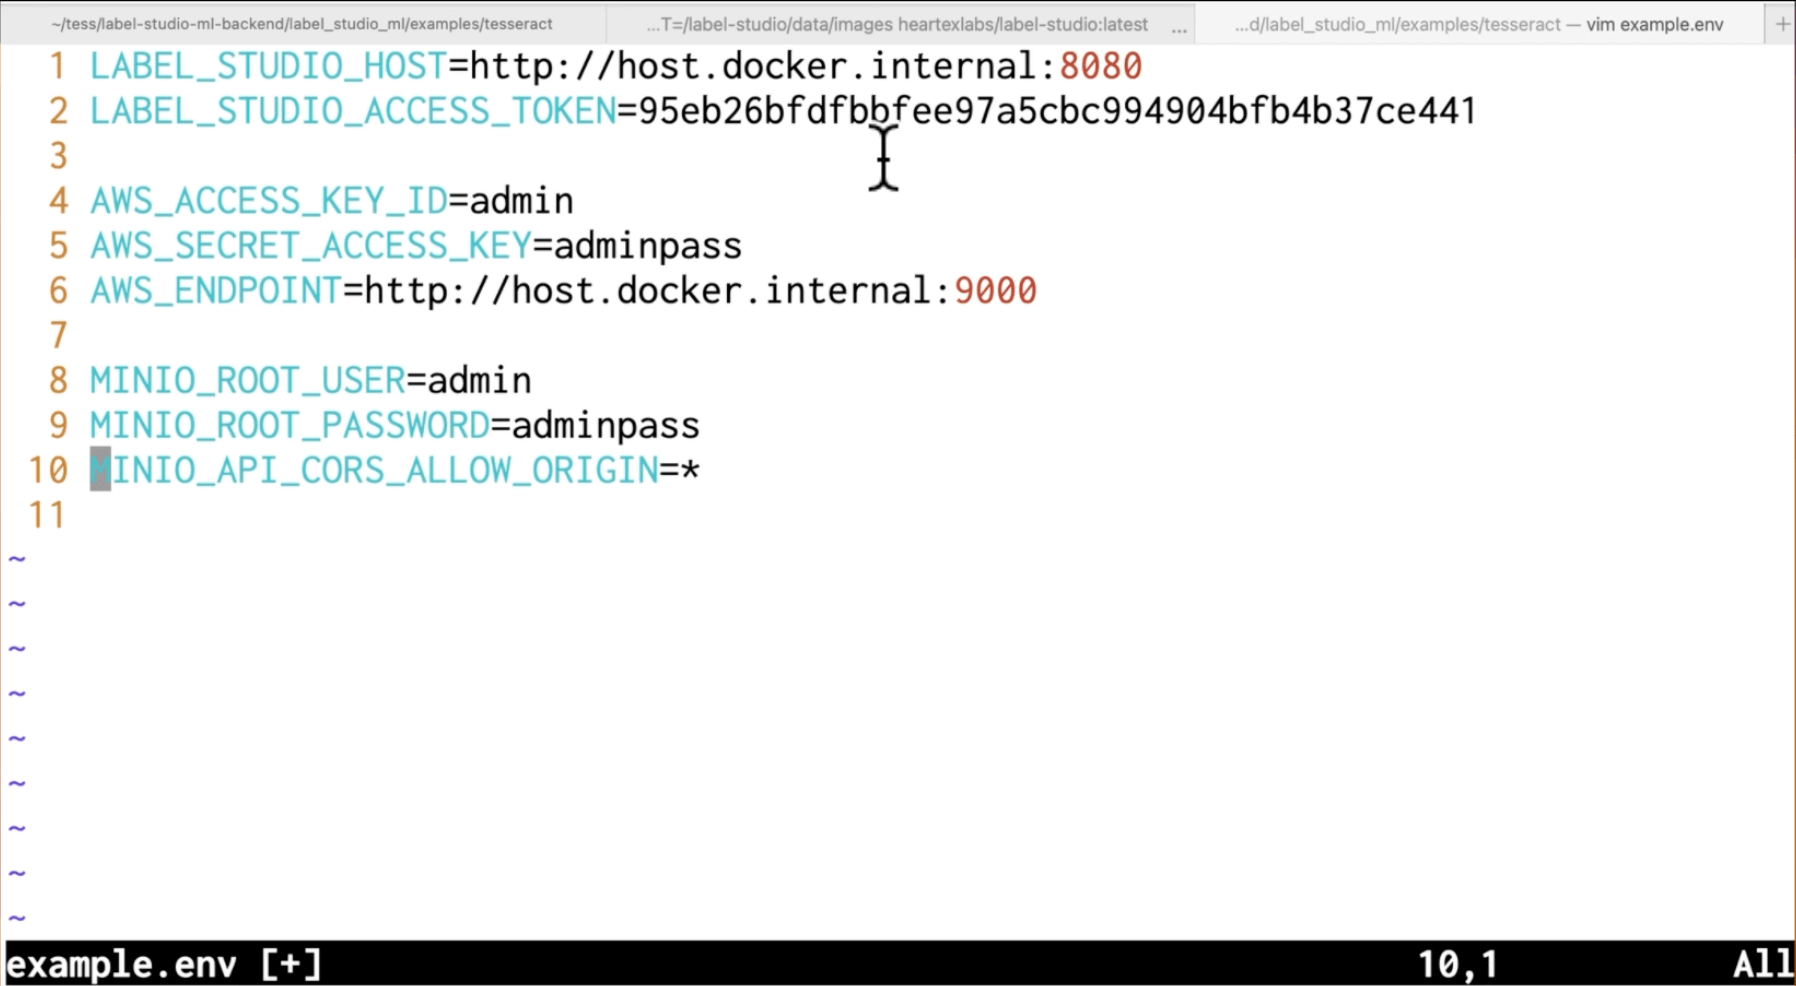
Configure the ML Backend and Minio
Launch the Tesseract ML Backend
You’re now ready to launch the Tesseract ML Backend. If you opted to use local storage, use the command:
docker compose up tesseract-backend This will launch both the Tesseract ML Backend. You can check that it is active by navigating to http://localhost:9090 and noting that it responds with the text {"model_class":"BBOXOCR","status":"UP"}.
If you opted to use the cloud storage example, run the command
docker compose upThis will launch both the Tesseract ML Backend and the Minio server. You can verify that the Minio console is running at http://localhost:9001/.
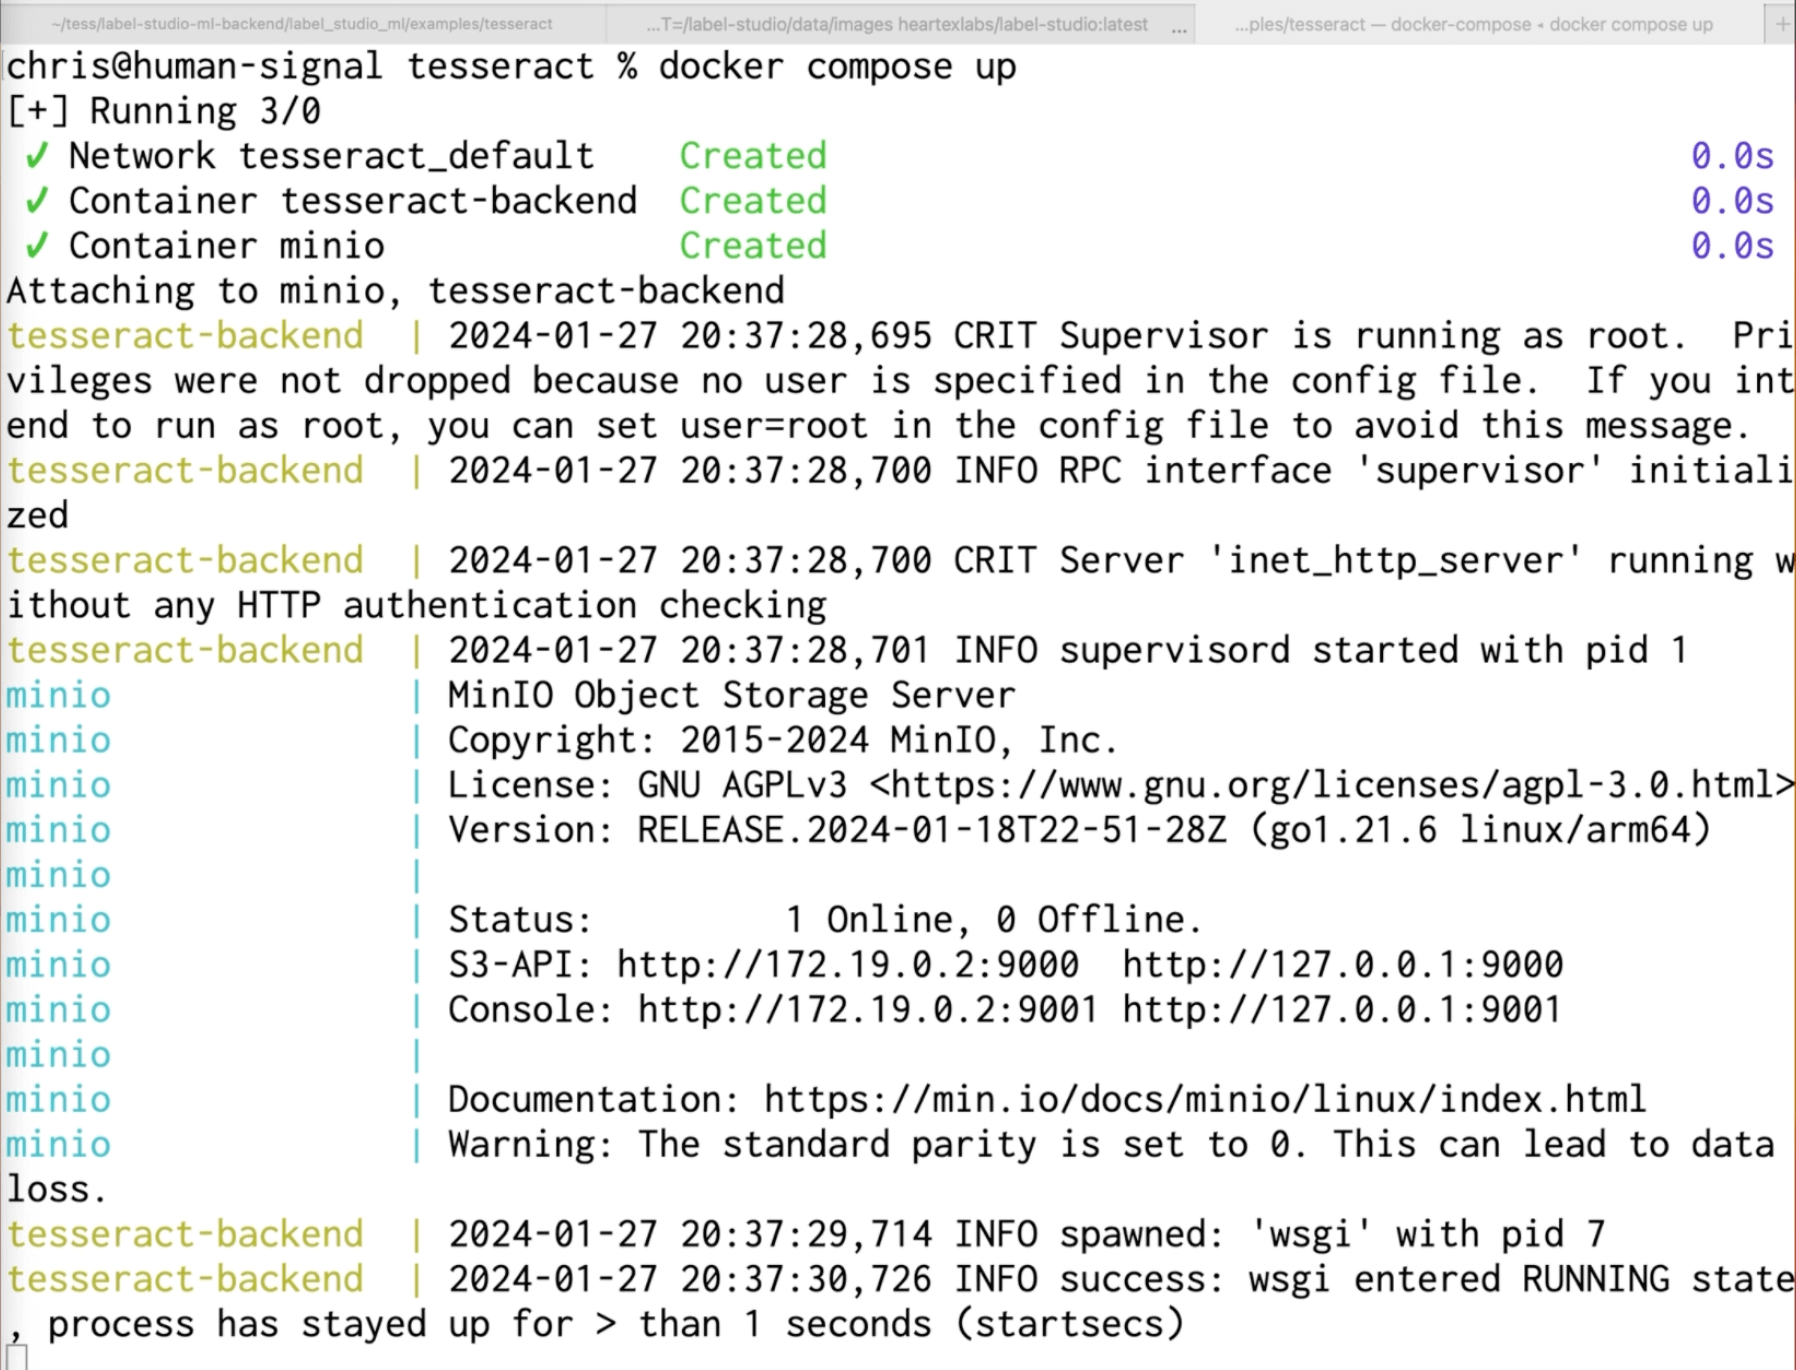
Starting Minio and the ML Backend
A Quick Note About Host URLs and Docker
When running services locally using Docker, it’s convenient to access them from your browser using the hostname localhost, which is used as a standard shorthand for the system address you’re accessing from. However, this convenience can break down when you want to direct Docker-hosted services to access other services on the same machine. When you use the localhost convention from inside a Docker container, it refers to the network address of the container itself rather than the host system.
This frequently leads to errors where you configure Label Studio to access a machine learning backend using the hostname localhost. If you’re running Label Studio in Docker, this will lead to errors, as Label Studio’s interpretation of localhost differs from yours.
Thankfully, there are two easy workarounds to this problem. The first is to use your computer's IP address. This tells Label Studio the direct address of where the ML backend containers are located.
The second is to use a Docker-provided hostname that connects to the host machine: host.docker.internal. For this post, we will use the host.docker.internal convention. In some instances (usually when running Docker on Linux), this convenience may not be available, and we suggest you fall back to using the direct IP if you’re running into errors.
Upload Images to Cloud Storage
If you opted to use cloud storage, log into the Minio console at http://localhost:9001.
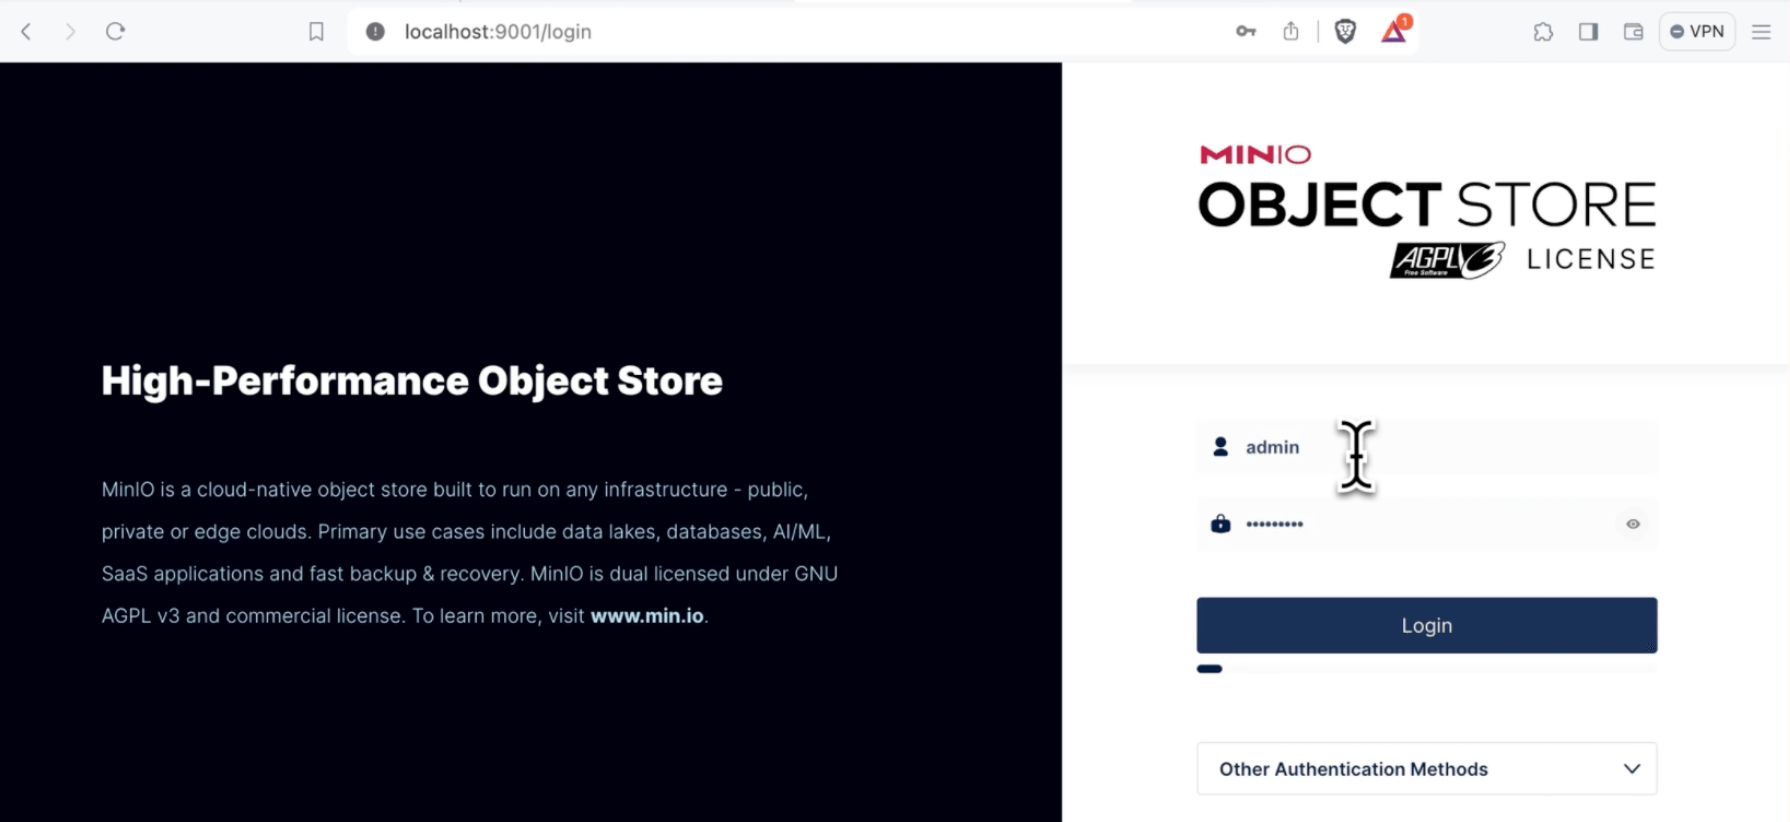
The Minio Login Screen
Create a new bucket with the name “tesseract.”
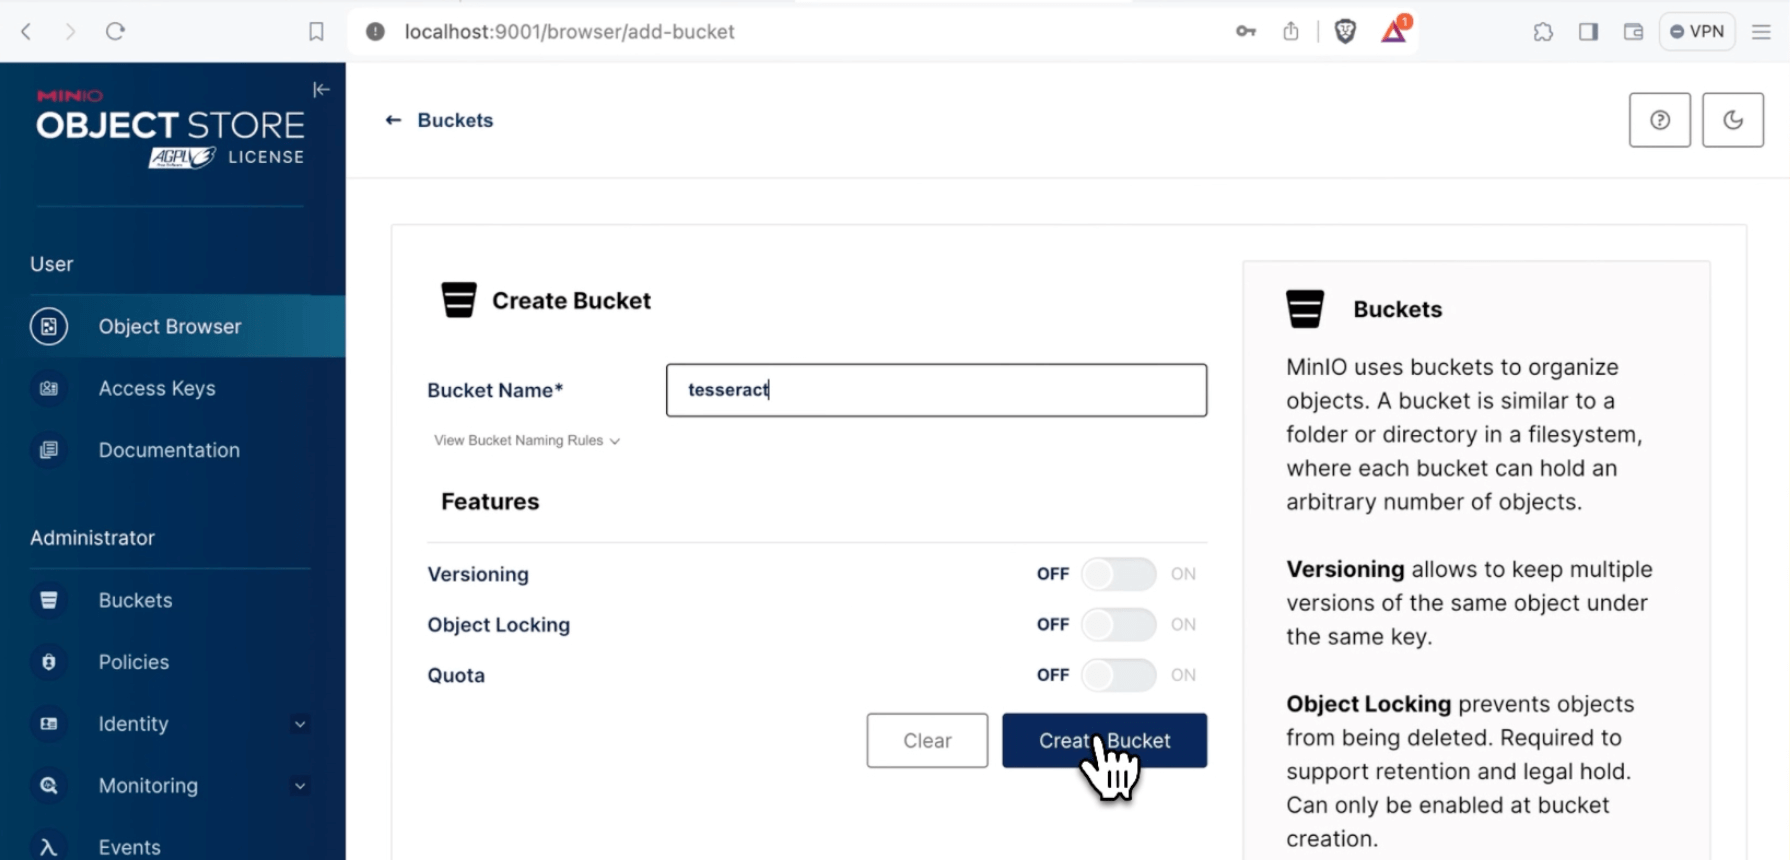
Creating a Bucket
Select “browse bucket, " upload your files to the cloud storage, and return to the Label Studio interface.
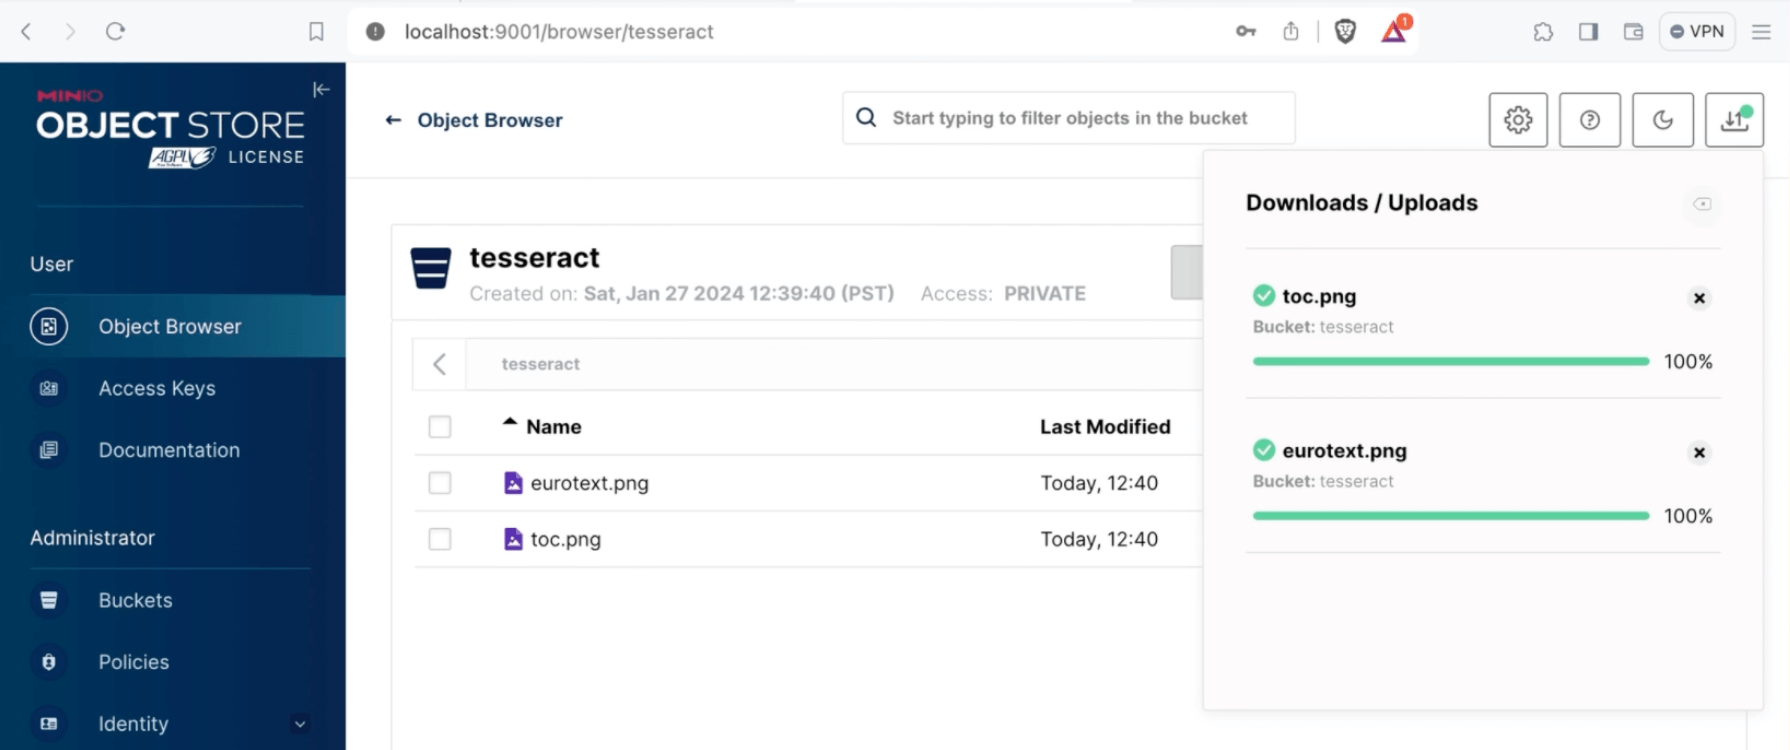
Uploading Files to the Bucket
Navigate back to the Tesseract OCR project, then select “Settings.” Select the “Cloud Storage” tab, then “Add Source Storage.” In the “Bucket Name” field, enter the name you set in the previous step, “tesseract.” For the S3 endpoint, use the address http://host.docker.internal:9000. Set the Access Key ID to your Minio username and the “Secret Access Key” to your Minio password. Toggle “Treat every bucket object as a source file,” toggle “Use pre-signed URLs” to off, and select “Check Connection.” The dialogue should say, “Successfully connected!” Select "Add Storage.”
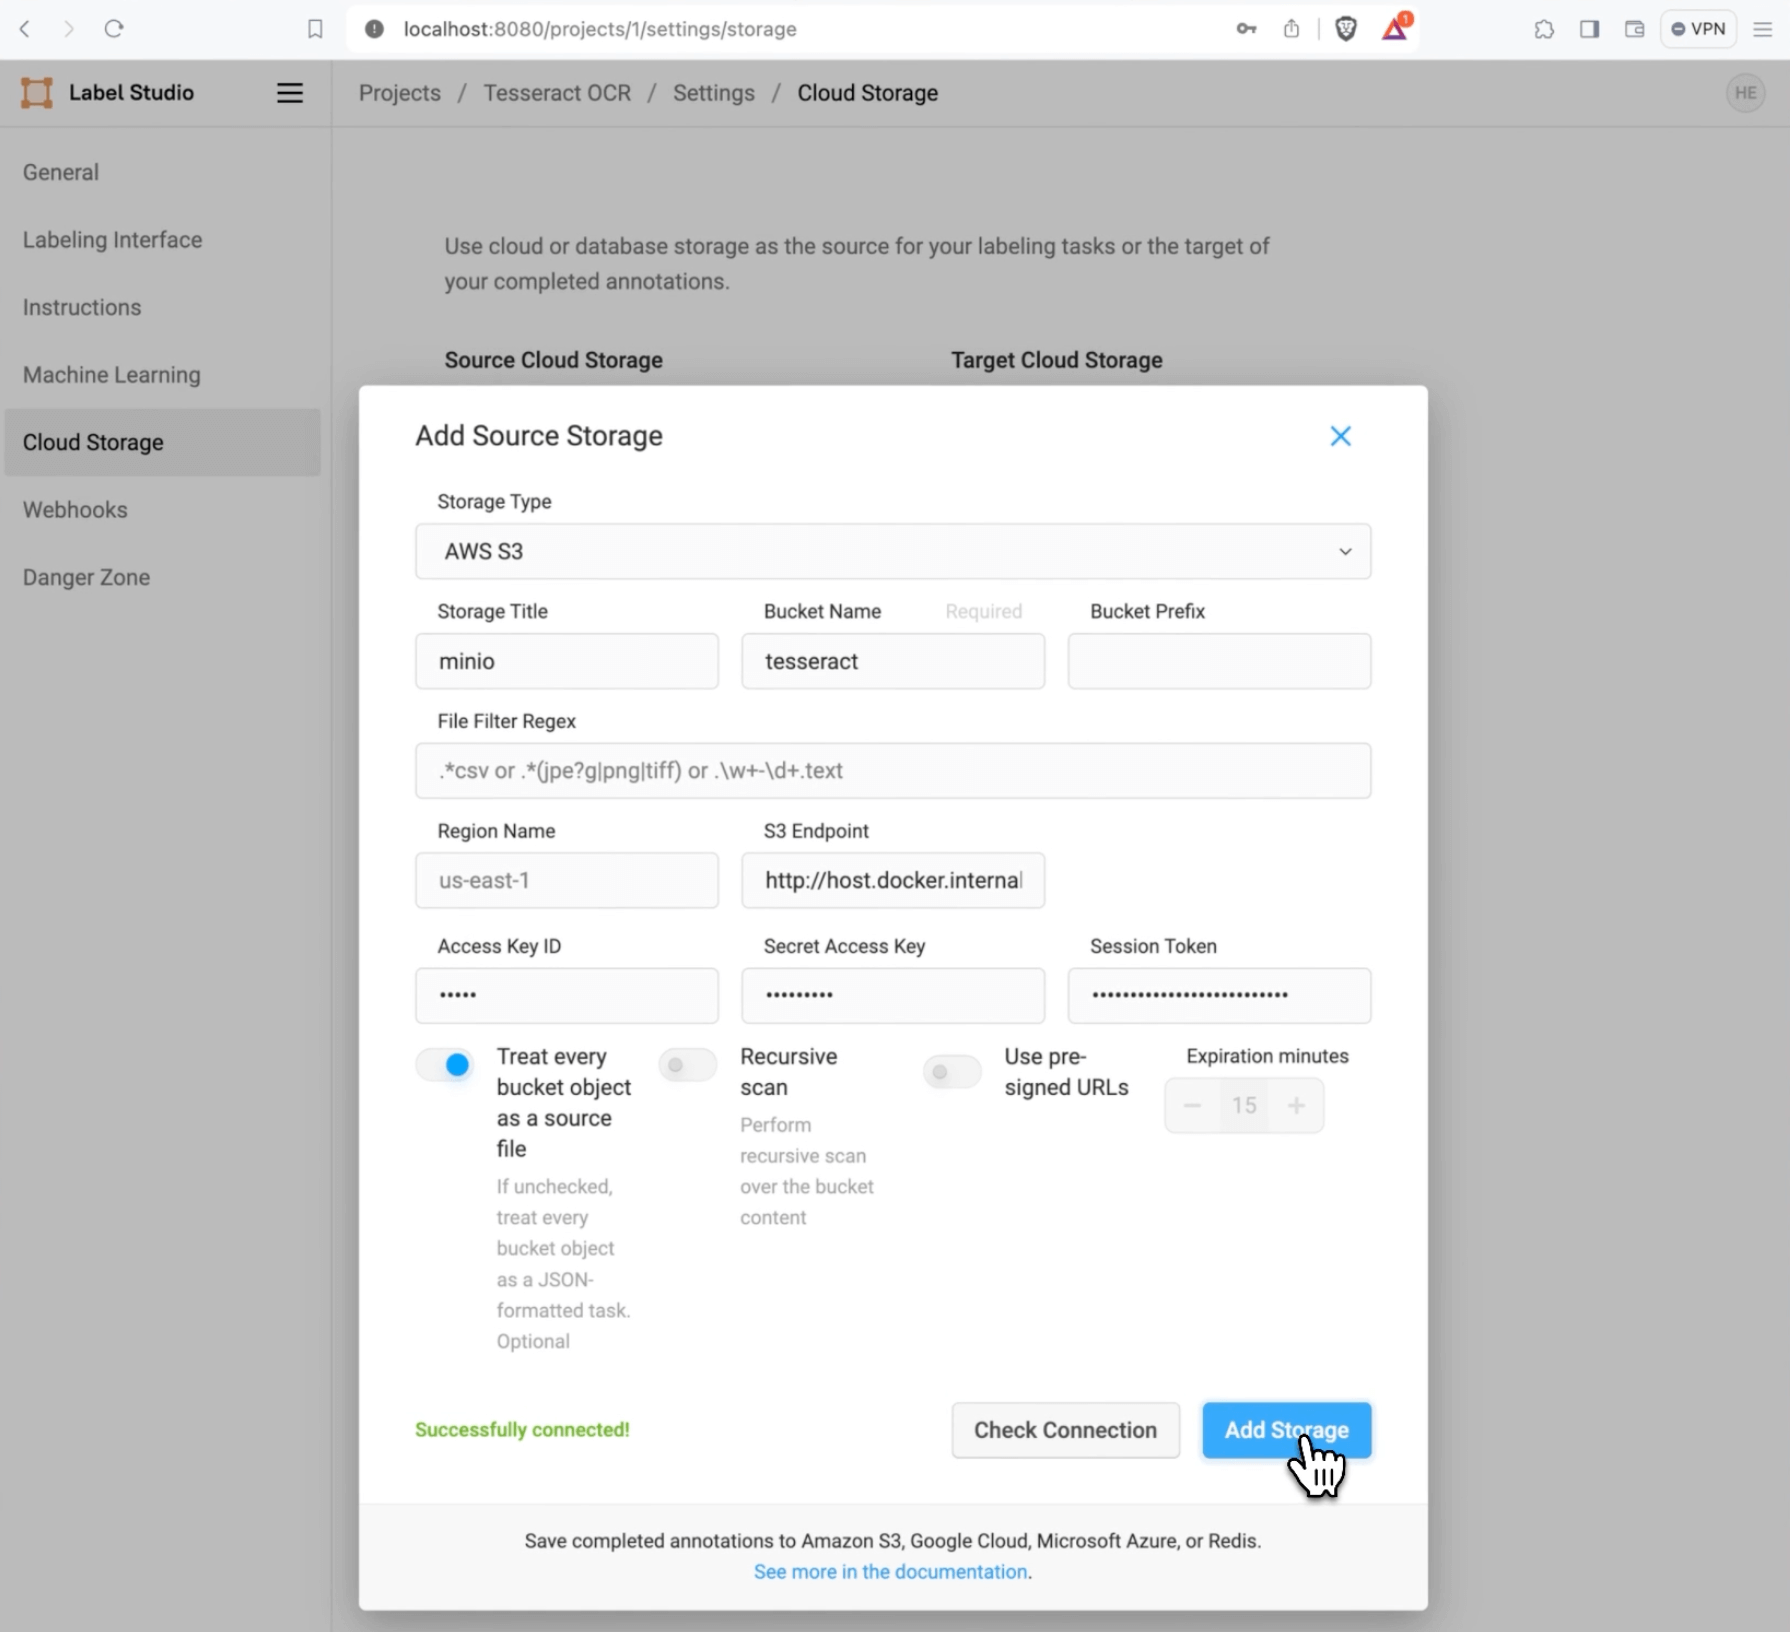
Adding Cloud Storage to Label Studio
Finally, select “Sync Storage,” and you will see that your tasks have been imported into Label Studio.
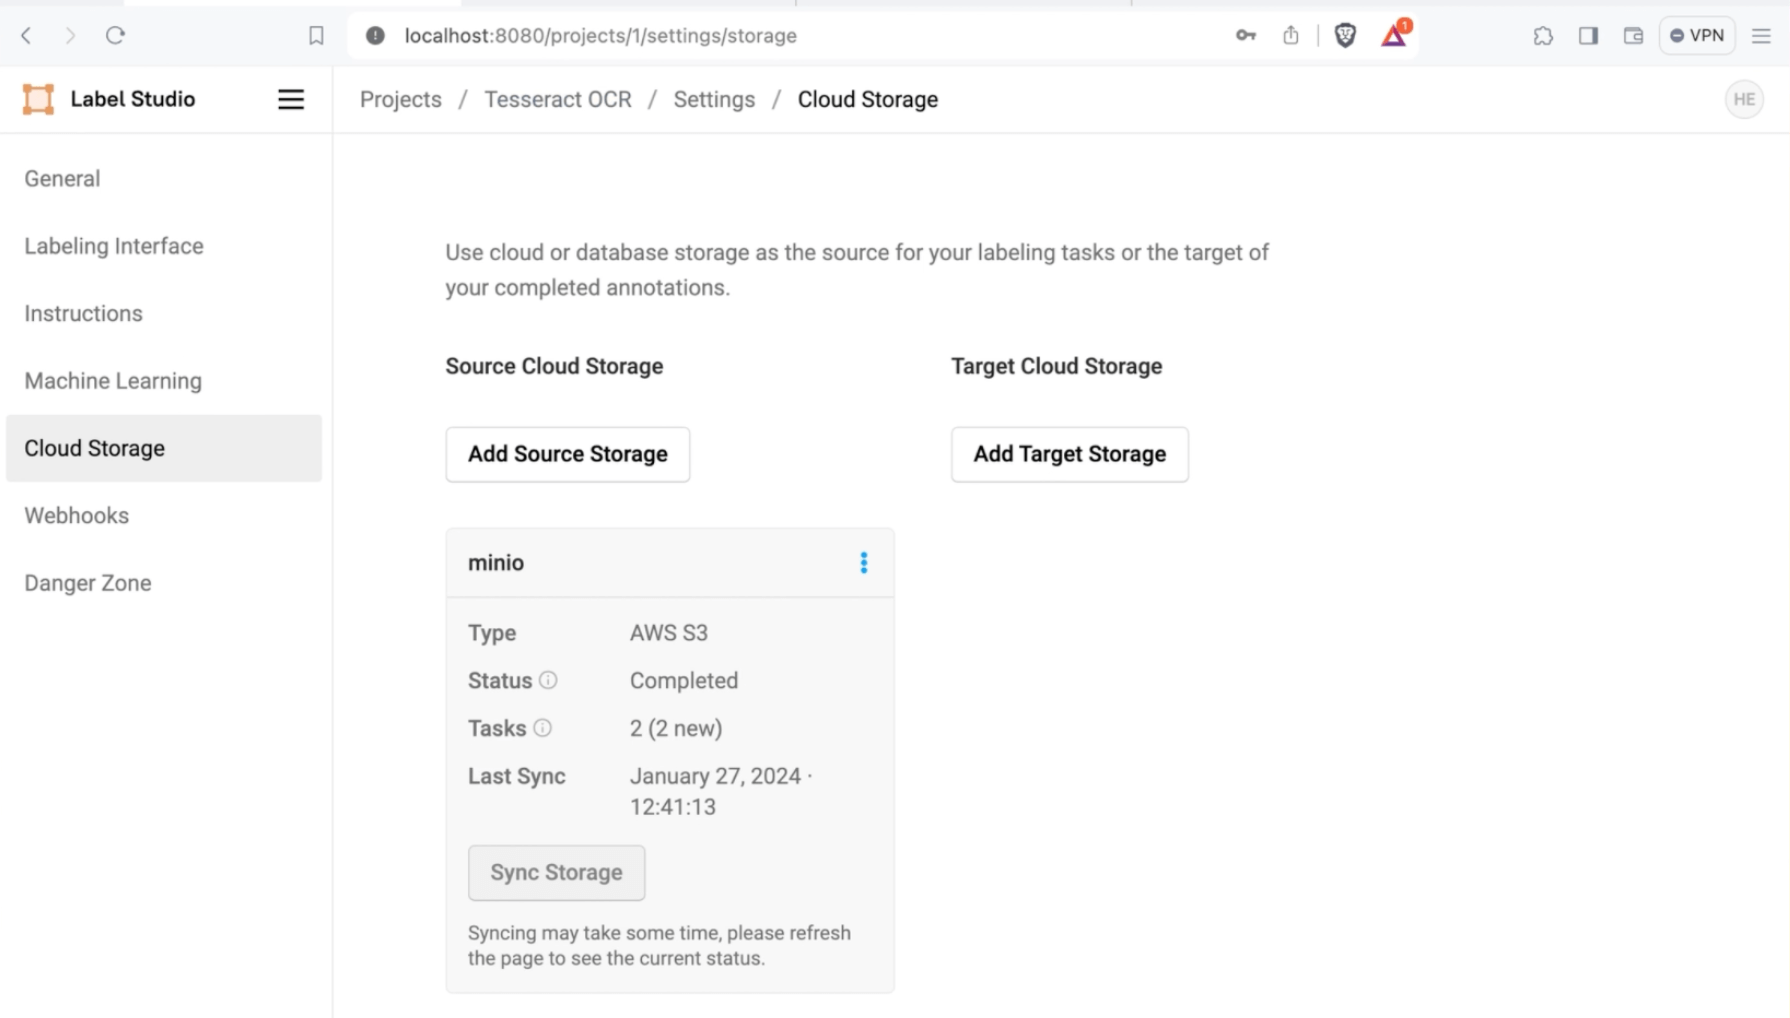
Syncing Cloud Storage Tasks to Label Studio
Configure the ML Backend Connection
From the Tesseract OCR project settings, select “Machine Learning. " Select “Add Model,” set the “Title” to “Tesseract, " and the URL to “http://host.docker.internal:9090. " Toggle “Use for interactive preannotations” to on, then select “Validate and Save.”
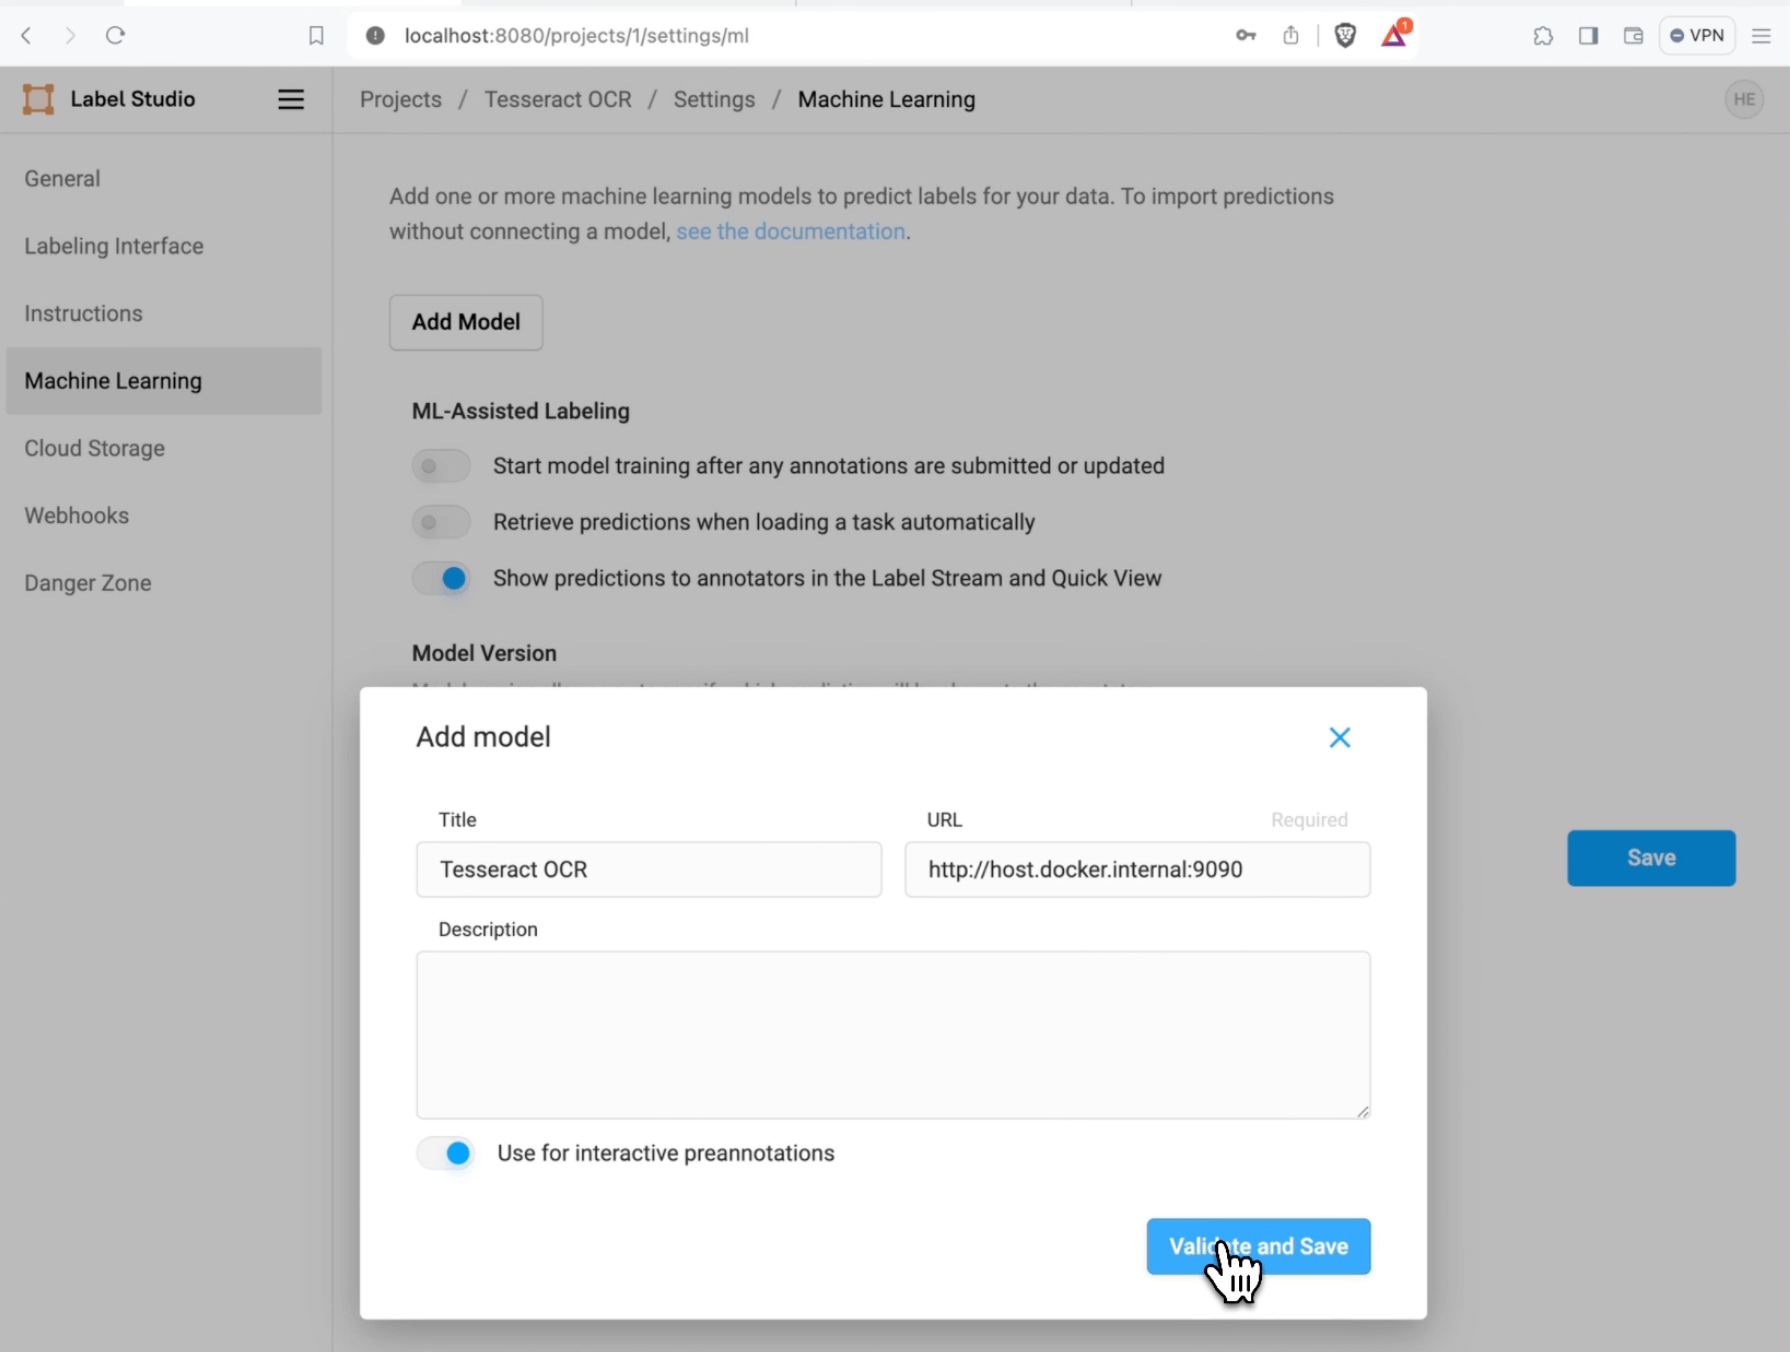
Add Tesseract Model to Label Studio
The dialog will show that the model is connected. Select “Save.”
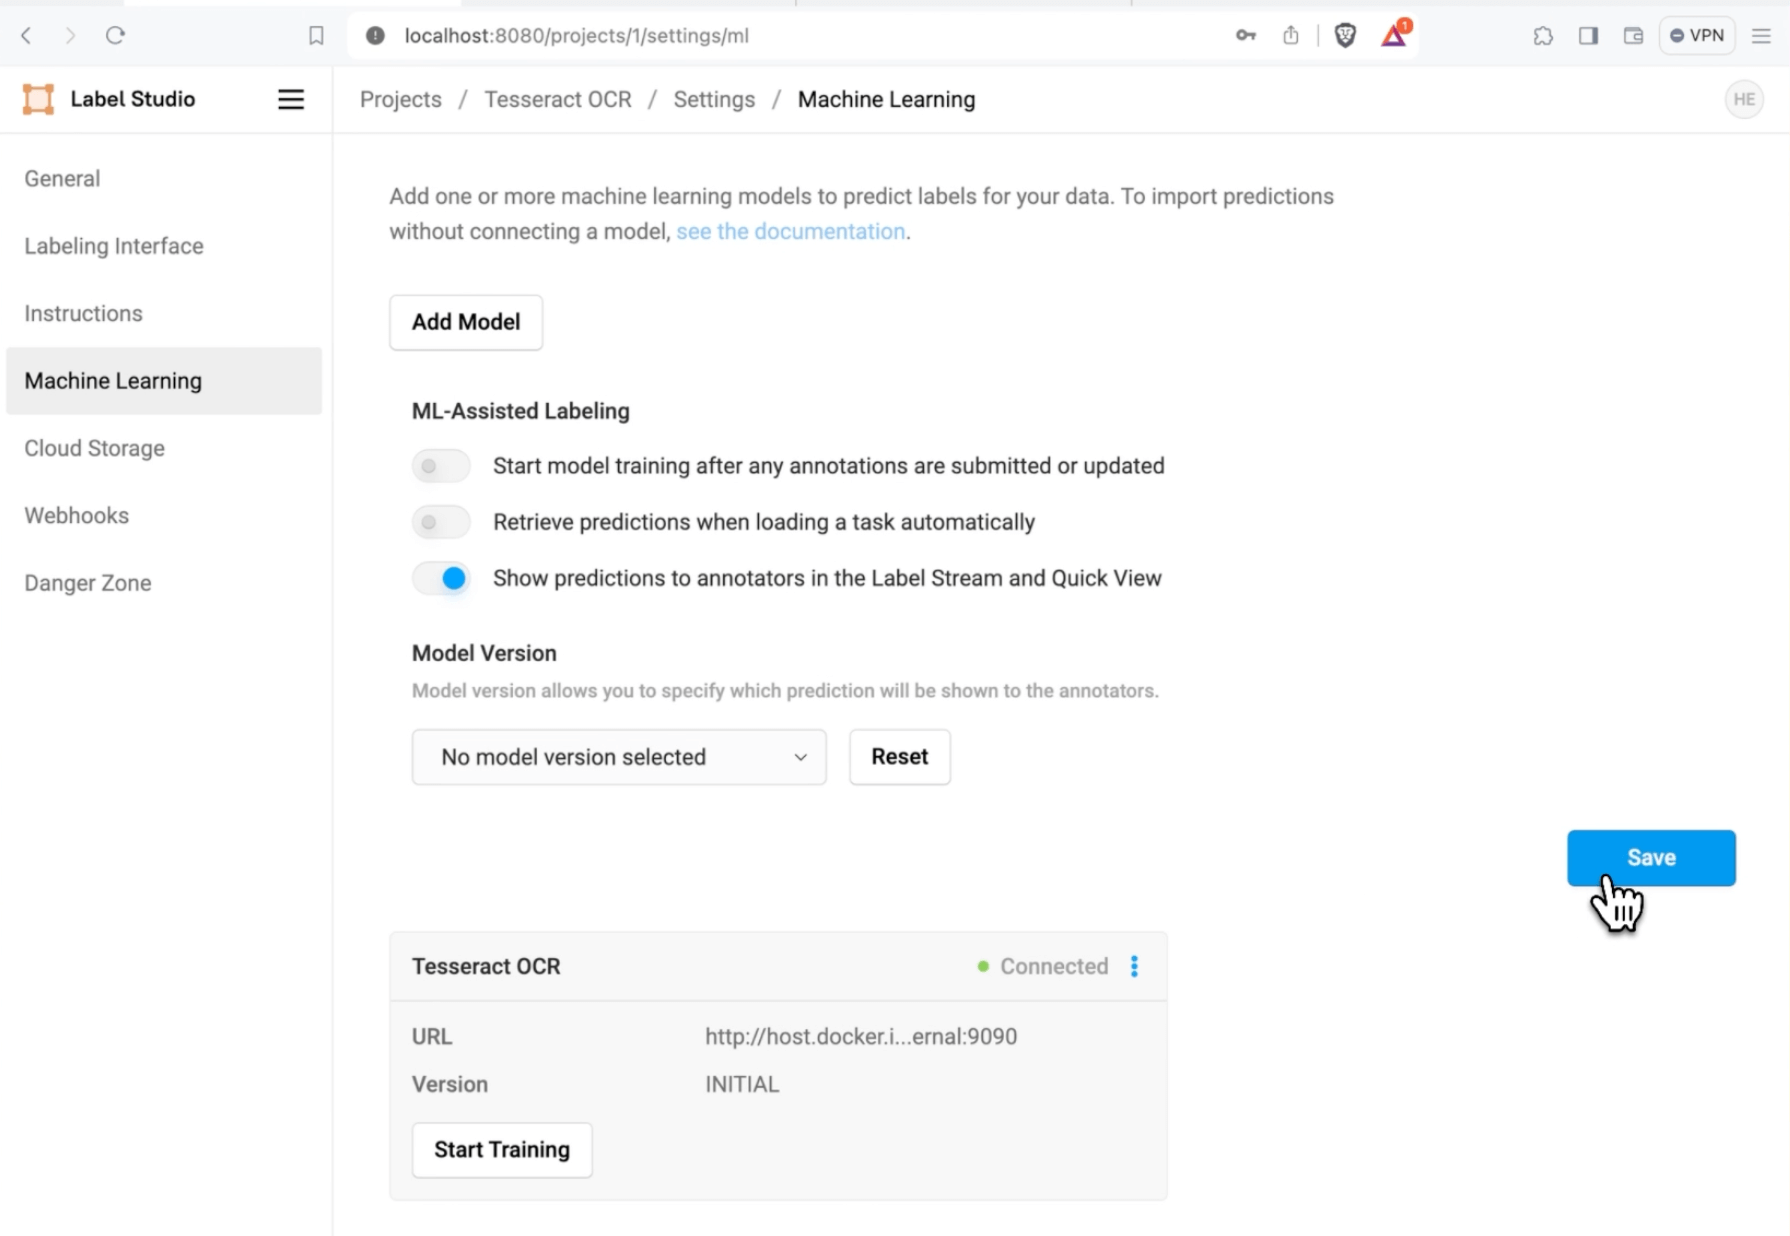
Saving the Tesseract Model to Label Studio
Start Labeling!
With all the setup and configuration completed, we can start labeling data. Navigate back to the project data manager by selecting the path at the top of the Label Studio interface, “Projects / Tesseract OCR.”
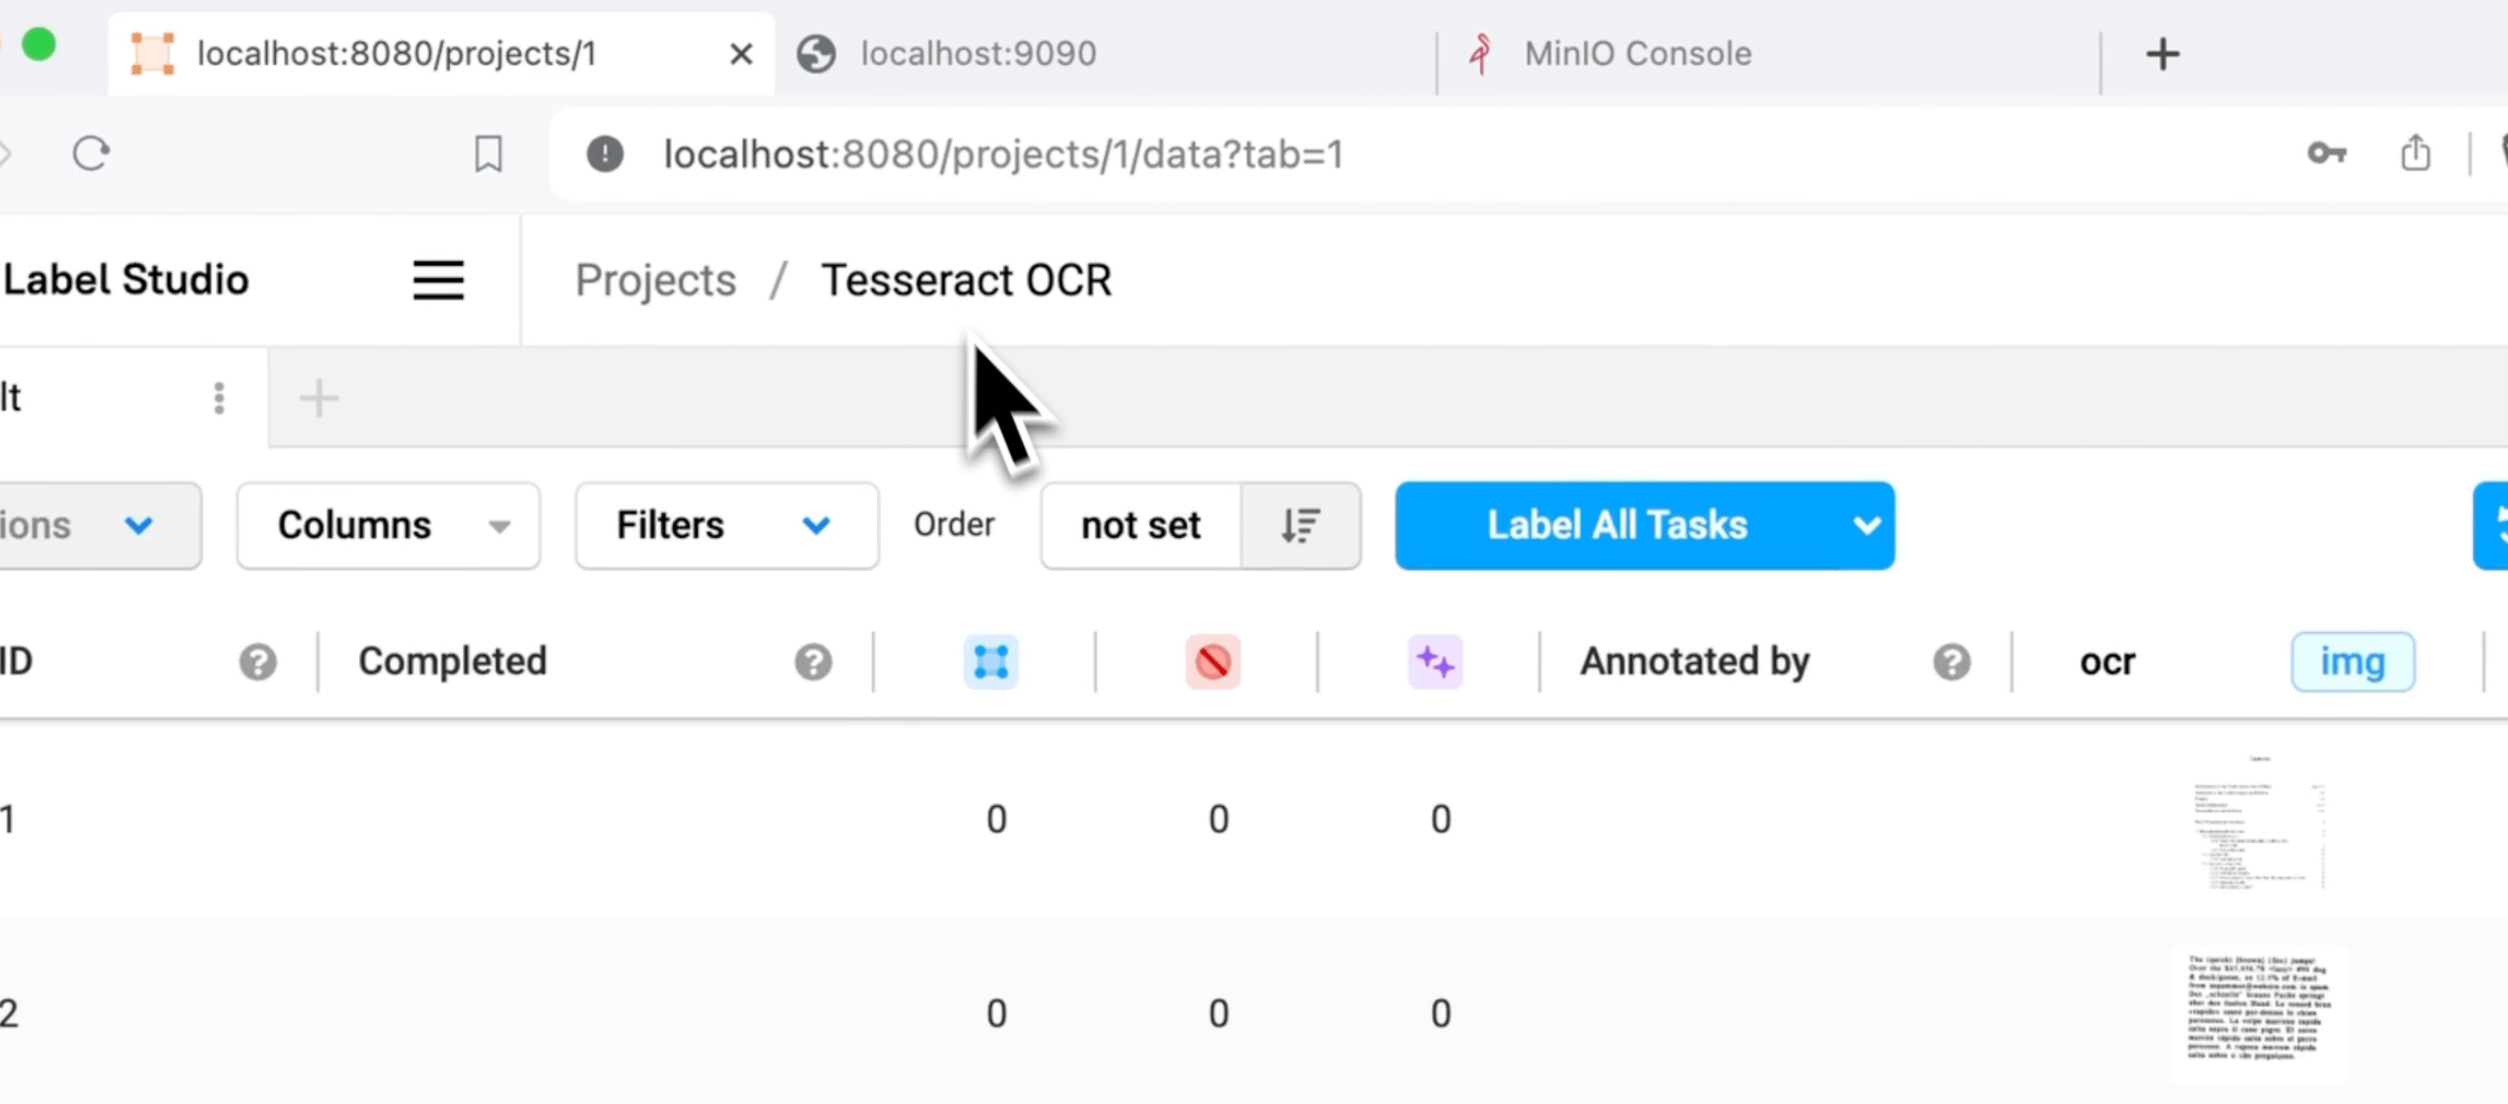
Navigating to the Data Manager
Select “Label All Tasks.” You’ll be presented with an image that has your data and three label options. Toggle “Auto-Annotation” to on, then make sure that “Auto accept annotation suggestions” is checked.
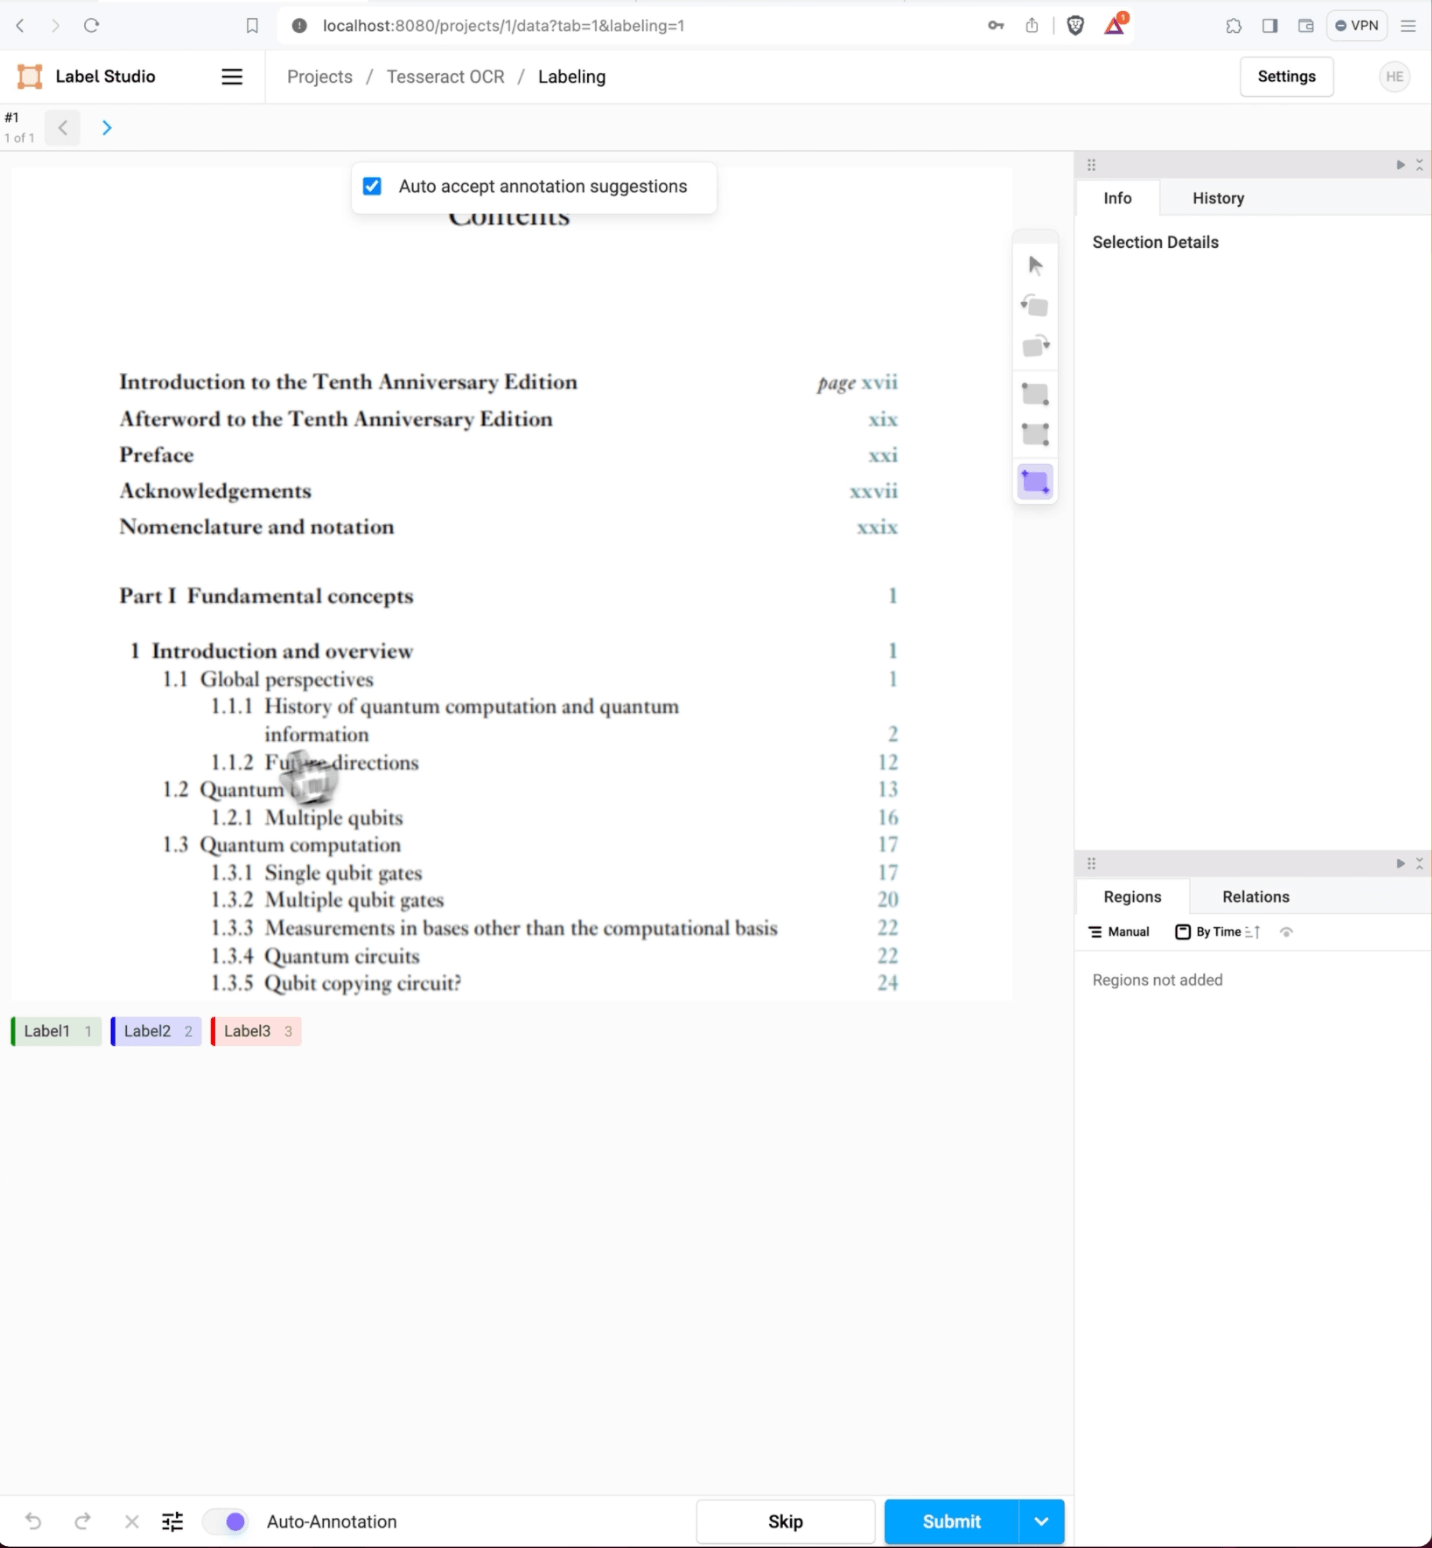
The OCR Labeling Interface
Select the “Auto Detect” bounding box (the purple square on the toolbar).

Enabling the Auto-Detect Rectangle Tool
Select the label you want to apply (you can use the hotkeys ‘1’, ‘2’, or ‘3’ to help speed that process), then draw a bounding box around the text you want to generate a label for. On the right side of the labeling interface, you’ll see the predicted text assigned to the label and bounding box you just applied. You can edit the prediction within this text box.
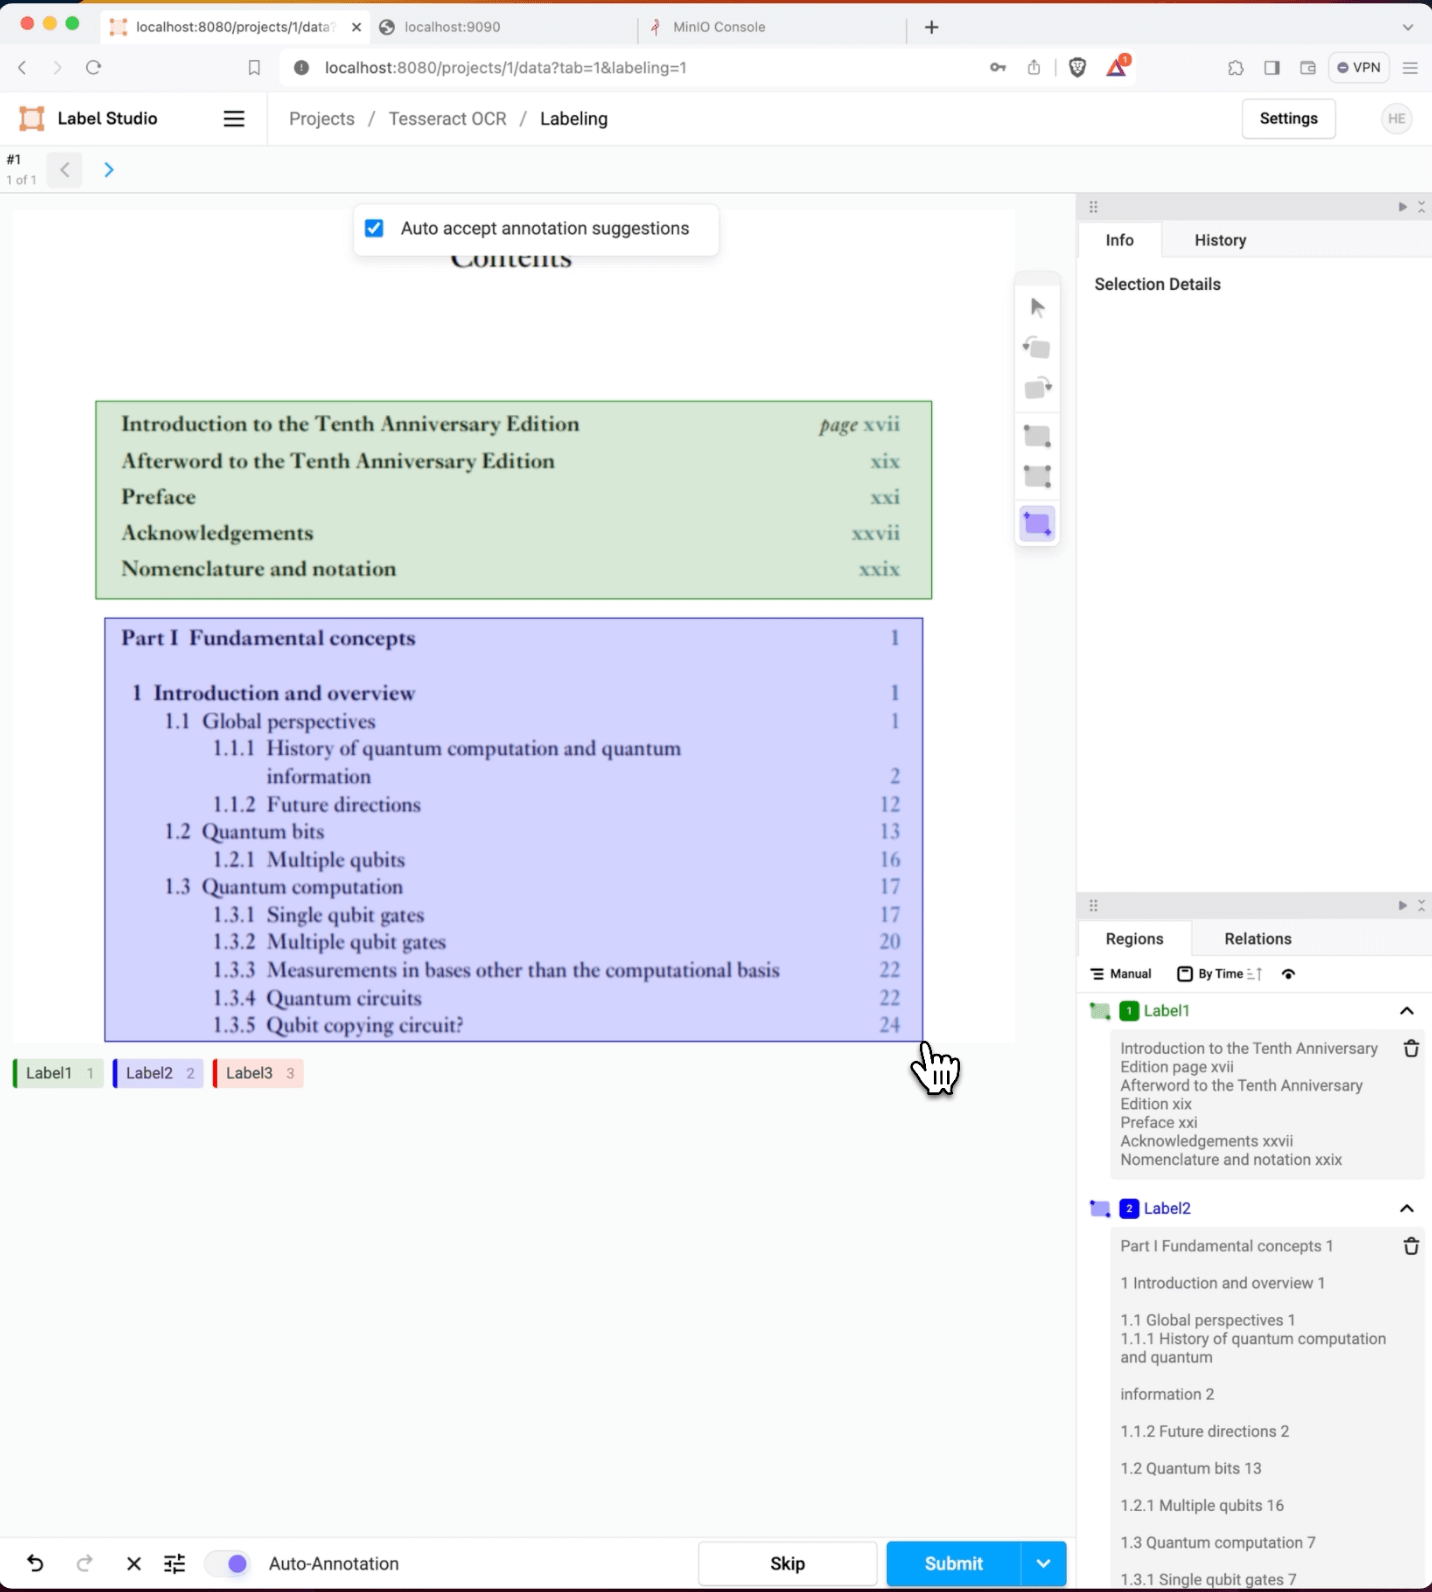
Automated Labeling with Tesseract OCR!
If you’re satisfied with the result, hit the “Submit” button to save the annotation and move on to the next task. Congratulations! You’ve just built an automated annotation workflow that combines the power of Tesseract OCR with the expertise of human annotators.
Digging a bit Deeper
When you’re ready to connect your cloud storage, you will want to modify the ML backend to connect to your images securely. The load_image method in the `tesseract.py` file is a good starting point for understanding how to attach your cloud storage to an ML backend.
def load_image(img_path_url):
    # load an s3 image, this is very basic demonstration code
    # you may need to modify to fit your own needs

    if img_path_url.startswith("s3:"):
        bucket_name = img_path_url.split("/")[2]
        key = "/".join(img_path_url.split("/")[3:])
        obj = S3_TARGET.Object(bucket_name, key).get()
        data = obj['Body'].read()
        image = Image.open(io.BytesIO(data))
        return image
    else:
        filepath = get_image_local_path(img_path_url,
        label_studio_access_token=LABEL_STUDIO_ACCESS_TOKEN,
            label_studio_host=LABEL_STUDIO_HOST)
return Image.open(filepath)This example is designed to get you up and running with an example annotation task. To put this model into production, you must make a few considerations. Packaging a model for general inference requires care and attention. You will want to work with your DevOps team to help build production containers, host the model in a scalable environment, create TLS-enabled endpoints for your application to connect to, and secure the endpoint against malicious attackers. All of these topics are beyond the scope of this article but are things you should consider when building your labeling pipeline. If you’re looking for help in hosting and running a data labeling platform, the HumanSignal team is happy to discuss enterprise hosting options with you.
Interactive annotations aren’t the only way to use Tesseract in your data labeling pipeline. If you want to learn more about running predictions offline and importing them into Label Studio, check out the article “Improve OCR quality for receipt processing with Tesseract and Label Studio.”
Do you have your machine learning workflow built using Label Studio? Join us in the community Slack and share your story!
Happy Labeling!

Heidi says "Happy Labeling!"
Related Content
-
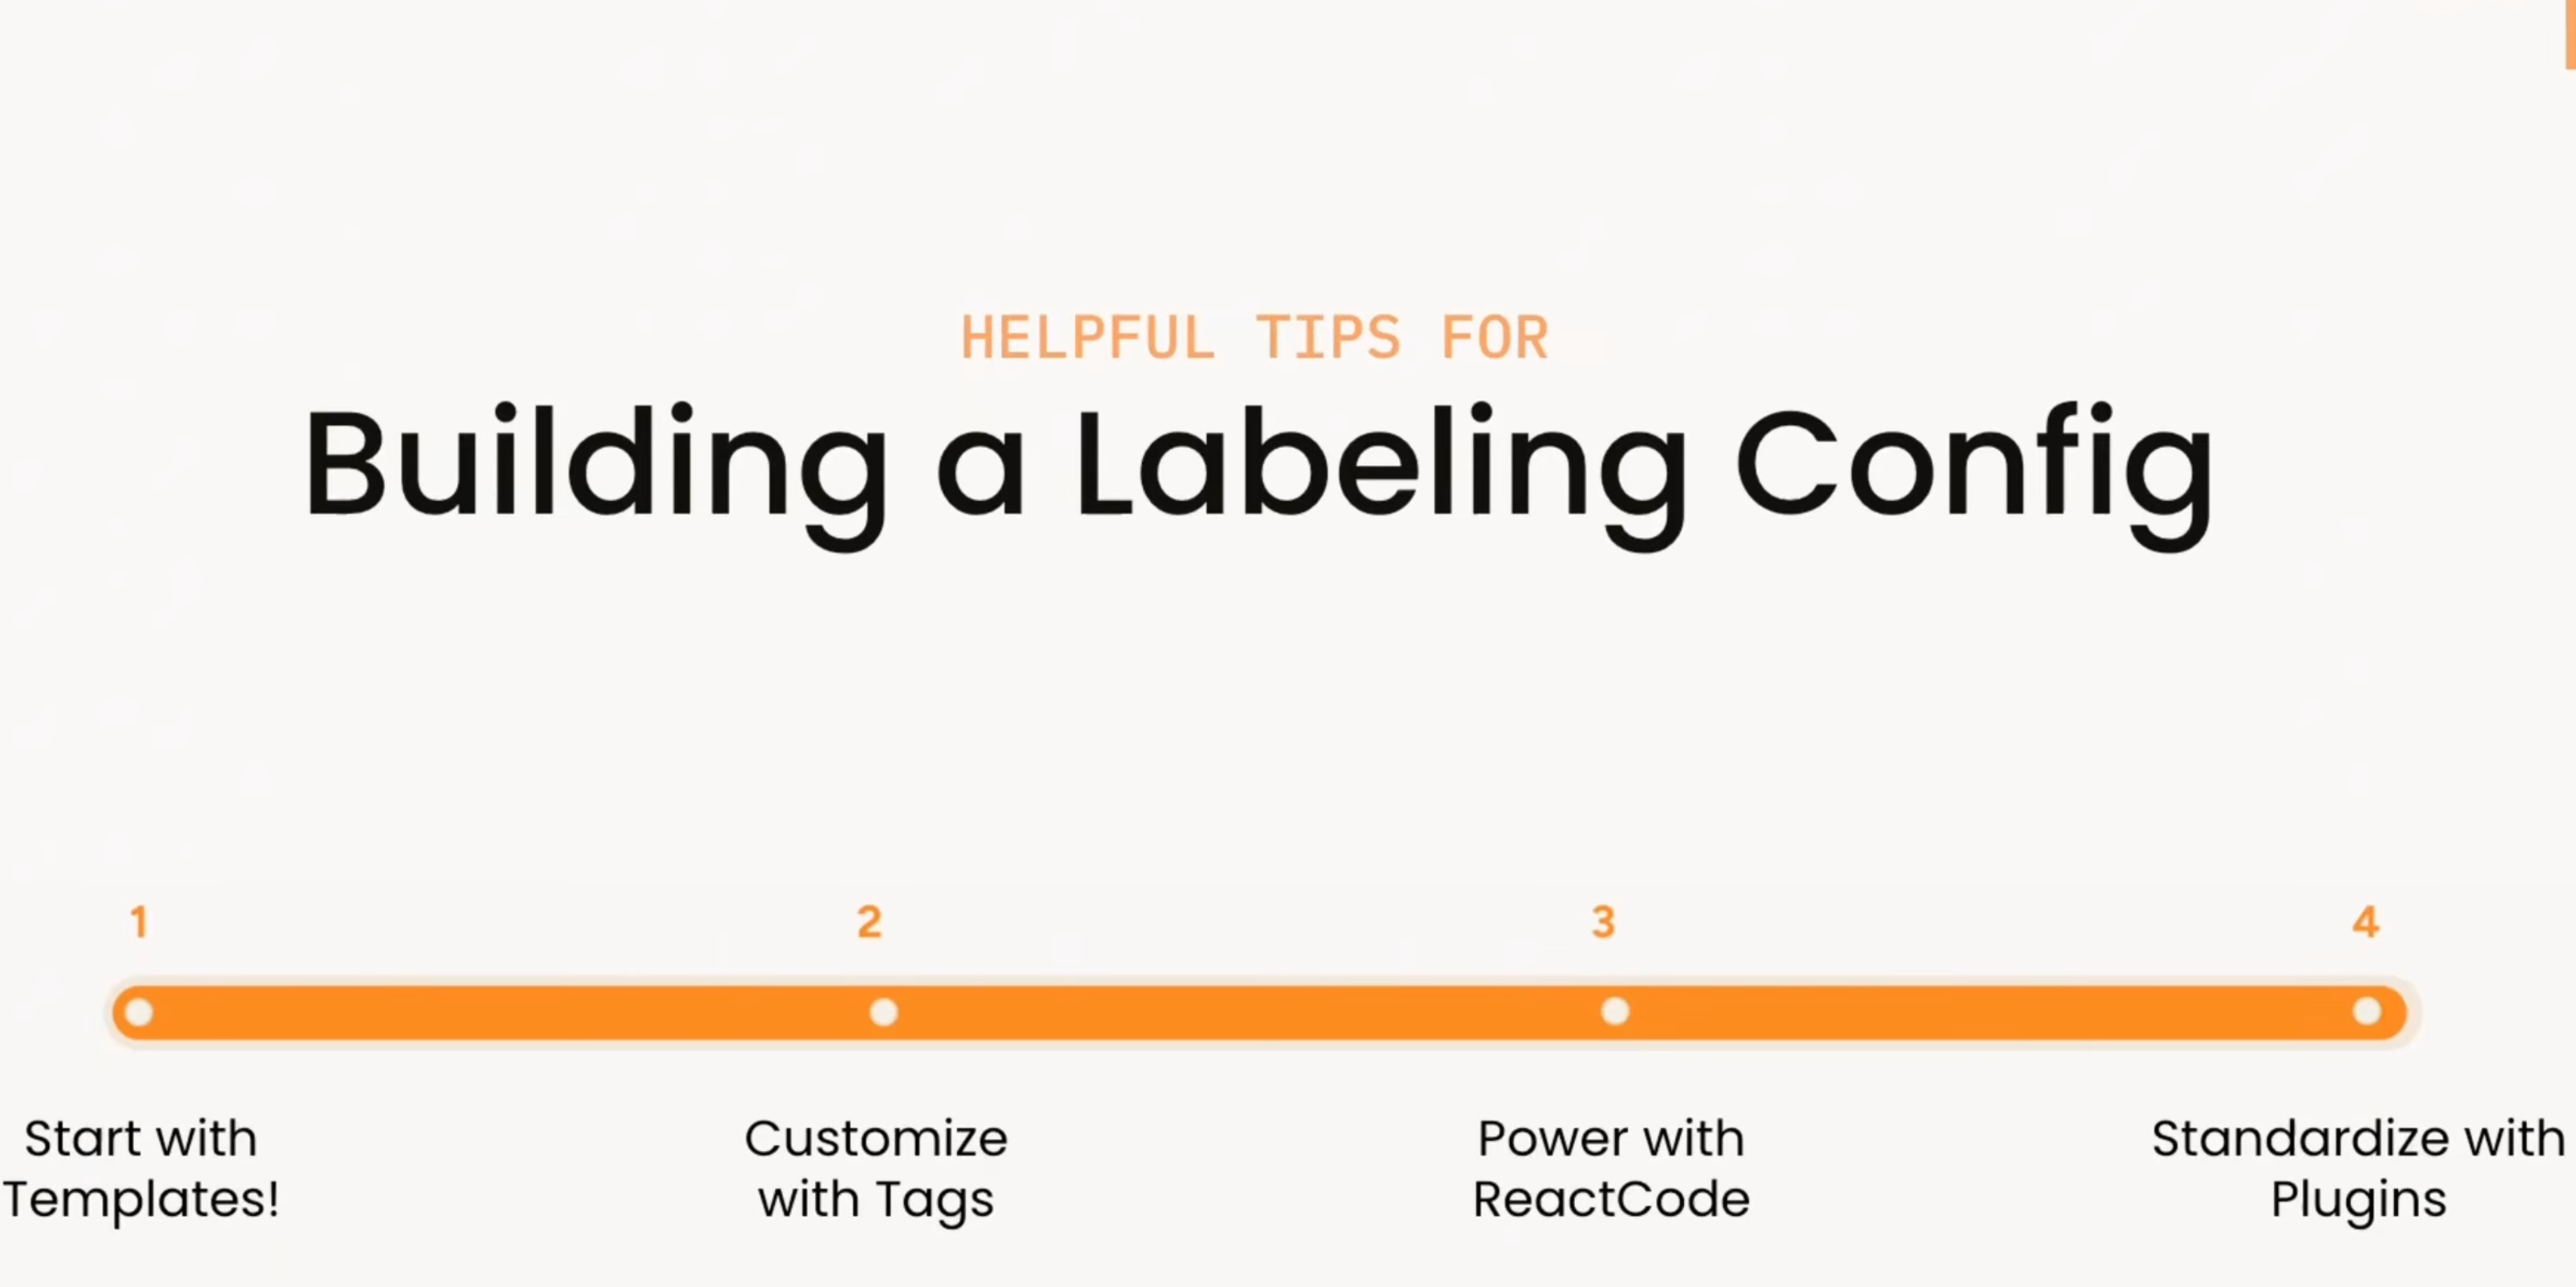
Building A Labeling Config in Label Studio Enterprise
How do you build the right labeling interface in Label Studio? This video walks through a practical progression: start with templates, customize with XML tags, extend with React Code, and standardize workflows with plugins.
-
Learn how to connect YOLO26 to a Label Studio project using the YOLO ML Backend so annotators can start from model predictions and focus on review and correction instead of drawing boxes from scratch.

Micaela Kaplan
February 12, 2026
-
Getting started with Label Studio
Everything you need to know about Label Studio to get started, from downloading and installing the tool to creating your first project, adding new members, and more!