Create and configure projects
All labeling activities in Label Studio occur in the context of a project.
Project setup workflow
After you start Label Studio and create an account, create a project to start labeling your data.
Import data into Label Studio.
For small projects, testing, or proof of concept work, you can import local files directly into Label Studio through the UI. You can do this during the project creation workflow.
However, for larger projects, we recommend setting up cloud storage. You will need to create the project first, and then add storage from the project settings. For more information, see Sync data from external storage.
Customize your labeling interface.
We recommend that you begin with a pre-configured template and modify it, but you can also create your own custom template using our tag library.
-
Finally, you can configure optional settings to such as task sampling and annotation instructions.
Create a project
From Label Studio, click Create Project in the upper right. A window opens with three tabs:
- Project Name
-
This is the only required section.
Here, select your workspace, enter a project name, and (optionally) a project description.
Once complete, you can click Save to create the project, or you can complete the other tabs.
- Data Import
-
From here, you can upload files into Label Studio. You can do this now or after the project has been created.
For larger projects, we recommend setting up cloud storage or using a different import method. For more information, see Get data into Label Studio and Sync data from external storage.
- Labeling Setup
-
You can select a template to begin your labeling configuration. For easier setup, select a template. You can later customize template to meet your needs. See Configure labeling.
You can do this now or after the project has been created.
When you’re done, click Save.
Enterprise
Workspaces are only available for Label Studio Enterprise users. Label Studio Enterprise also includes many additional configuration options for projects, such as role-based access control and workflow automation. For more information, see Compare Community and Enterprise Features.
Set up annotation settings for your project
There are several things you can set up before users begin labeling:
Instructions for data labelers
You also can select whether to show these instructions in a pop-up message when users enter the labeling stream (the labeling stream is when a user clicks Label All Tasks).
-
Task sampling determines the order in which tasks are shown to users in the labeling stream. The default is to use sequential sampling, meaning the users see them in the same order they are sorted in the Data Manager. You can change this to show tasks in random order.
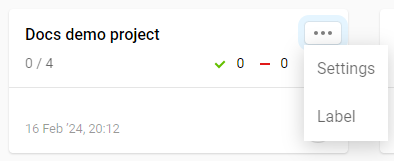
From the Data Manager, click Settings in the upper right. You can also access the settings from the overflow menu for each project:
For information on all available settings, see Project settings.
Where Label Studio stores your project data and configurations
All labeling activities in Label Studio occur in the context of a project.
Starting in version 1.0.0, Label Studio stores your project data and configurations in a SQLite database. You can choose to use PostgreSQL instead. See Set up database storage.
In versions of Label Studio earlier than 1.0.0, when you start Label Studio for the first time, it launches from a project directory that Label Studio creates, called ./my_project by default.
label-studio start ./my_project --init