Magicwand
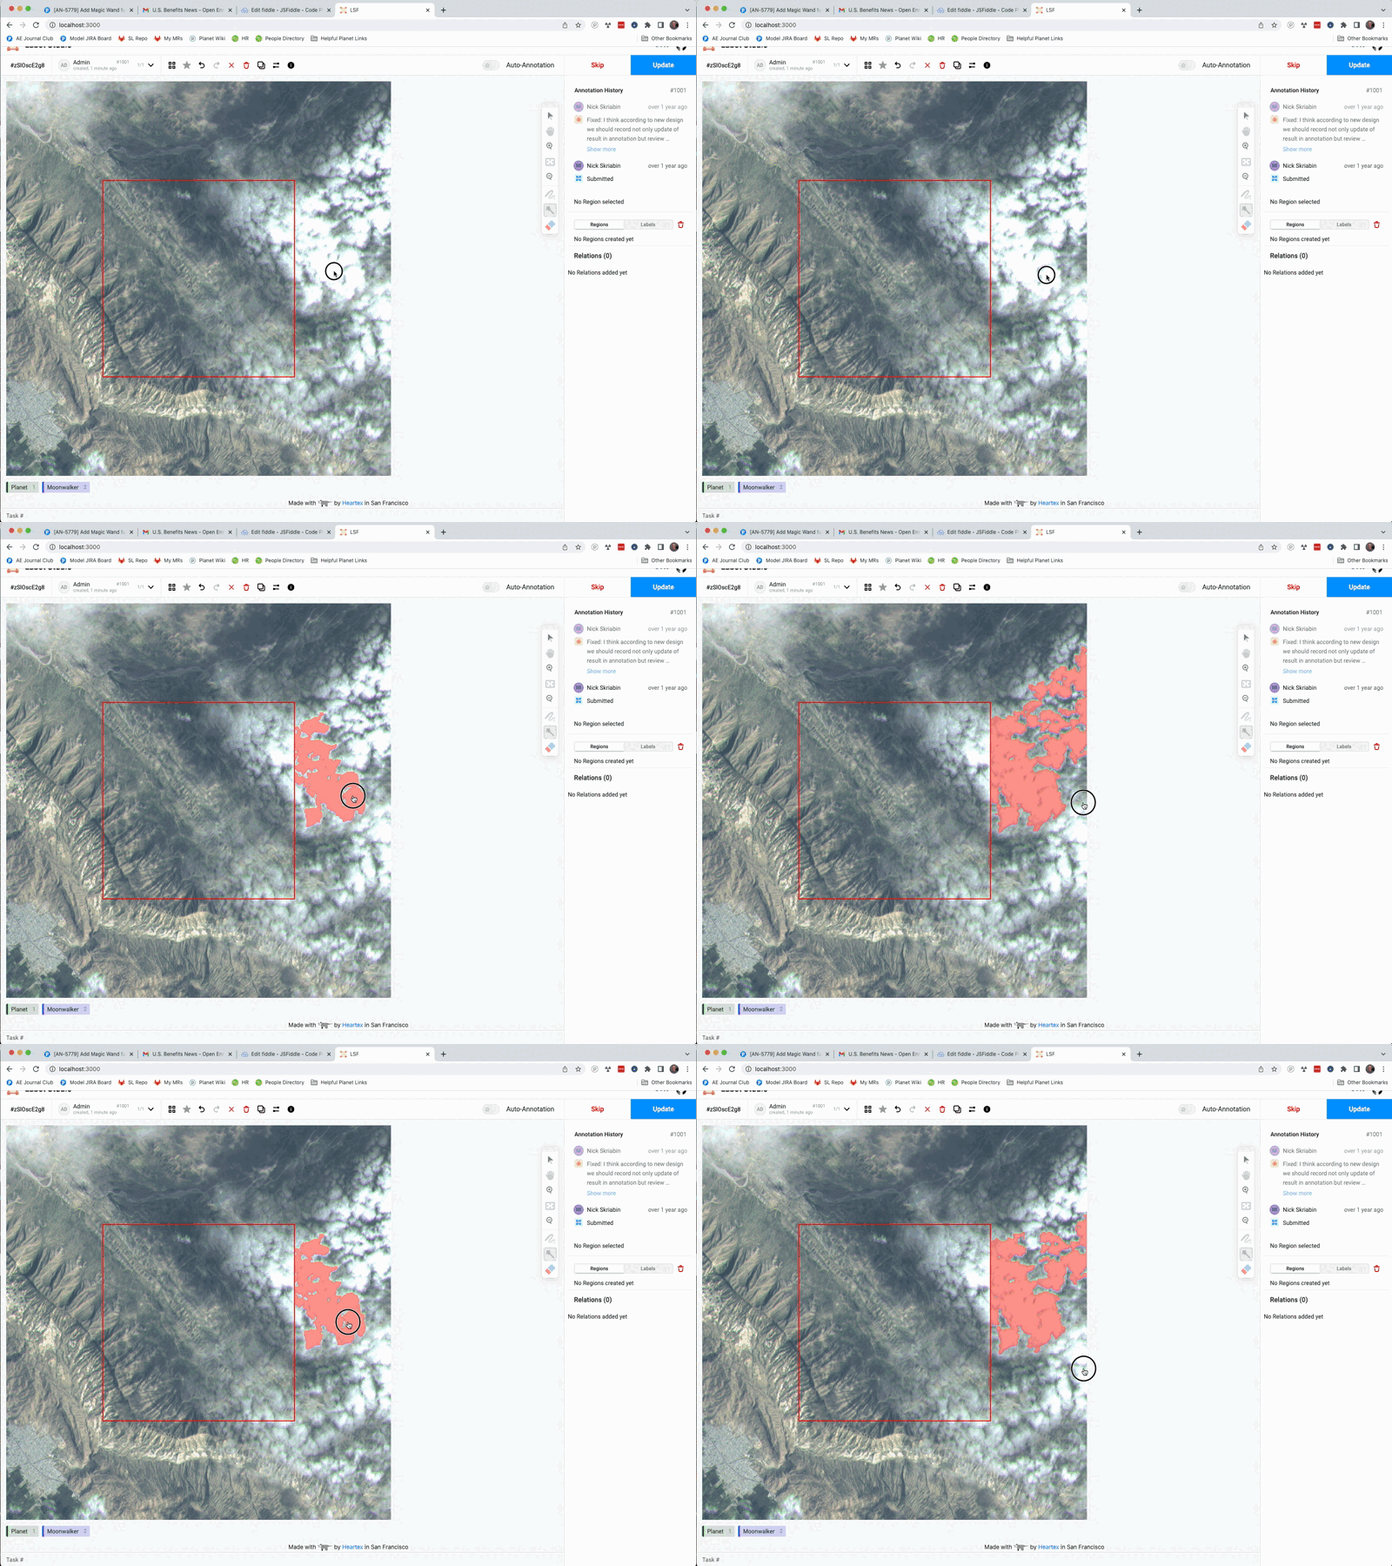
The Magicwand tag makes it possible to click in a region of an image a user is doing segmentation
labeling on, drag the mouse to dynamically change flood filling tolerance, then release the mouse button
to get a new labeled area. It is particularly effective at segmentation labeling broad, diffuse, complex
edged objects, such as clouds, cloud shadows, snow, etc. in earth observation applications or organic
shapes in biomedical applications.
Use with the following data types: image.
Zooming is supported for the Magic Wand, but it will not work on rotated images.
Example of the Magic Wand in use:

CORS Configuration
The Magic Wand requires pixel-level access to images that are being labelled in order to do its
thresholding and flood filling. If you are hosting your images to label on a third-party domain,
you will need to enable CORS headers for the Magic Wand to work with cross domain HTTP GET
requests in order for the Magic Wand to be able to threshold the actual image pixel data. See the
Label Studio storage guide for more
details on configuring CORS.
Image Tag Configuration
The Magicwand tag is configured to work with an Image tag that it will operate on for labeling.
If you are storing an image cross-domain that the Image tag will reference, you will have to
correctly setup the crossOrigin on the Image attribute. This attribute mimics the same
crossOrigin attribute that a normal DOM img tag would
have ([reference])(https://developer.mozilla.org/en-US/docs/Web/API/HTMLImageElement/crossOrigin).
If the image is on a public server or Google/AWS/Azure bucket that is publicly readable
without any authentication, you should set crossOrigin to anonymous.
If the image is on a server or a private cloud bucket that requires authentication of any
kind (i.e. the request must have HTTP headers that prove authentication set along with the
third party request), then you should set crossOrigin to use-credentials. Note that Google’s
cloud buckets do not support authenticated requests for CORS requests,
which means you either need to make that Google bucket world readable to work with the Magic Wand, or
use Label Studio’s signed URL support (AWS,
GCP, and
Azure).
If the image is on the same host as your Label Studio instance, you can simply leave off the
crossOrigin attribute or set it to none.
Parameters
| Param | Type | Default | Description |
|---|---|---|---|
| name | string |
Name of the element | |
| toName | string |
Name of the image to label | |
| [opacity] | float |
0.6 |
Opacity of the Magic Wand region during use |
| [blurradius] | number |
5 |
The edges of a Magic Wand region are blurred and simplified, this is the radius of the blur kernel |
| [defaultthreshold] | number |
15 |
When the user initially clicks without dragging, how far a color has to be from the initial selected pixel to also be selected |
Result parameters
| Name | Type | Description |
|---|---|---|
| original_width | number |
Width of the original image (px) |
| original_height | number |
Height of the original image (px) |
| image_rotation | number |
Rotation degree of the image (deg) |
| value | Object |
|
| value.format | "rle" |
Format of the masks, only RLE is supported for now |
| value.rle | Array.<number> |
RLE-encoded image |
Example JSON
{
  "original_width": 1920,
  "original_height": 1280,
  "image_rotation": 0,
  "value": {
    "format": "rle",
    "rle": [0, 1, 1, 2, 3],
    "brushlabels": ["Car"]
  }
}
Example
Basic image segmentation labeling configuration, with images stored on a third-party public cloud bucket:
<View>
  <Labels name="labels" toName="image">
    <Label value="Person" />
    <Label value="Animal" />
  </Labels>
  <MagicWand name="magicwand" toName="image" />
  <Image name="image" value="$image" crossOrigin="anonymous" />
</View>
Example
Magic Wand example with zoom controls and the brush turned on:
<View>
  <Labels name="labels" toName="image">
    <Label value="Person" />
    <Label value="Animal" />
  </Labels>
  <MagicWand name="magicwand" toName="image" />
  <Brush name="brush" toName="image" />
  <Image name="image" value="$image" zoomControl="true" zoom="true" crossOrigin="anonymous" />
</View>