Audio Classification
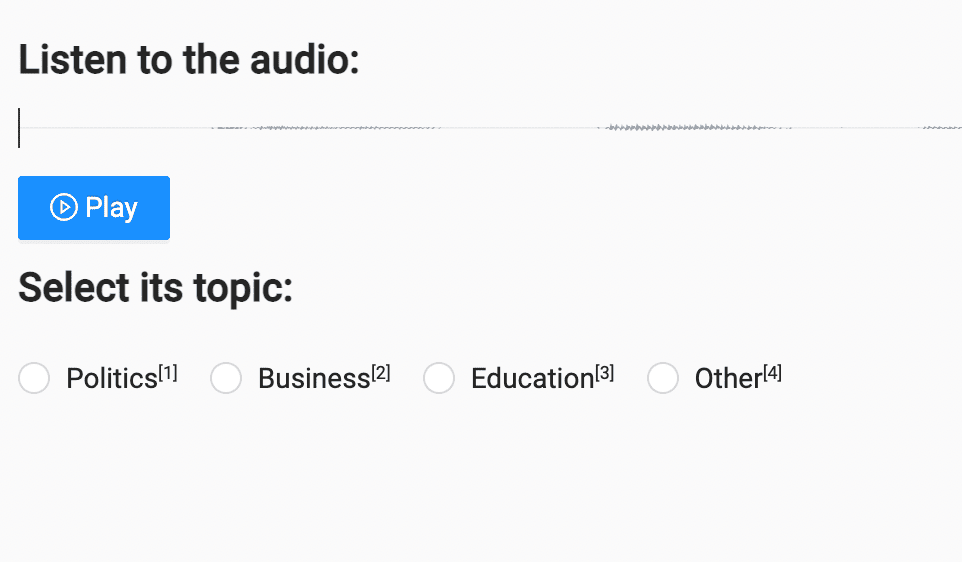
If you want to perform audio classification tasks, such as intent or sentiment classification, you can use this template to listen to an audio file and classify the topic of the clip.
Enterprise
If you're managing more complex or high-volume audio labeling projects, Label Studio Enterprise includes an advanced audio transcription interface built to support faster, more precise annotation at scale.
See our new Multi-Channel Audio Transcription template and learn more in A New Audio Transcription UI for Speed and Quality at Scale (blog post).
Interactive Template Preview
Labeling Configuration
<View>
  <Header value="Listen to the audio:"></Header>
  <Audio name="audio" value="$url"></Audio>
  <Header value="Select its topic:"></Header>
  <Choices name="label" toName="audio" choice="single-radio" showInline="true">
    <Choice value="Politics"></Choice>
    <Choice value="Business"></Choice>
    <Choice value="Education"></Choice>
    <Choice value="Other"></Choice>
  </Choices>
</View>
About the labeling configuration
All labeling configurations must be wrapped in View tags.
You can add a header to provide instructions to the annotator:
<Header value="Listen to the audio:"></Header>Use the Audio object tag to specify the type and the location of the audio clip. In this case, the audio clip is stored with a url key in the data:
<Audio name="audio" value="$url"></Audio>Use the Choices control tag to manage how the classification choices appear to annotators with showInline="true" and what selection option is used on the interface with choice="single-radio". The toName="audio" option associates the choices with the audio clip.
<Choices name="label" toName="audio" choice="single-radio" showInline="true">You must use the Choices tag in combination with the Choice to specify the available choices to classify the audio, then close the Choices tag:
    <Choice value="Politics"></Choice>
    <Choice value="Business"></Choice>
    <Choice value="Education"></Choice>
    <Choice value="Other"></Choice>
</Choices>
Enhance this template
This template can be enhanced in many ways.
Change the appearance of choices
If you want to make the classification section visually distinct from the rest of the labeling interface, you can add styling to the View tag. Wrap the Choices and Header in their own View tag:
<View style="box-shadow: 2px 2px 5px #999;
             padding: 20px; margin-top: 2em;
             border-radius: 5px;">
  <Header value="Select the topic of the audio clip"/>
  <Choices name="label" toName="audio" choice="single-radio" showInline="true">
    <Choice value="Politics"></Choice>
    <Choice value="Business"></Choice>
    <Choice value="Education"></Choice>
    <Choice value="Other"></Choice>
  </Choices>
</View>
Enhance classification templates with nested choices
You can add conditional or nested choices to any classification template. If you want classification options to appear only if certain conditions are met, such as specific choices being selected by annotators, adapt one of these conditional and nested classification examples.
Conditional classification
You can use conditional parameters available with the View and Choices tags to create a conditional classification task. In this example, you can display an additional text sample and classification task based on the choice selection for the first text sample.
Start with an object tag for the type of data that you want to classify. This example uses the Text object tag for a text classification example, but you can adapt it for image or audio classification tasks:
<Text name="text1" value="$text1" />Use the Choices control tag to display classification options. The name parameter identifies the purpose of the choices, and the toName parameter references the text sample to which the choices apply.
<Choices name="sentiment" toName="text1" showInline="true">
    <Choice value="Positive" />
    <Choice value="Negative" />
    <Choice value="Neutral" />
</Choices>
Create a conditional View tag that appears only when a choice is selected, visibleWhen="choice-selected", and specifically when the choice is selected as part of the Choices tag with the name parameter set to sentiment, whenTagName="sentiment" and the selected choice is Positive, whenChoiceValue="Positive". You must use whenTagName with whenChoiceValue.
<View visibleWhen="choice-selected"
      whenTagName="sentiment" whenChoiceValue="Positive">
    <Header value="What about this text?" />
    <Text name="text2" value="$text2" />
</View>
In this case, the view tags wrap a second text sample with a header that provides instructions to the annotator.
A second Choices control tag displays classification options that apply specifically to the second passage of text, specified with toName="text2". These choices have the samea conditional setting as the header and text sample, specified with visibleWhen="choice-selected", whenTagName="sentiment", and whenChoiceValue="Positive".
<Choices name="sentiment2" toName="text2"
         choice="single" showInline="true"
         visibleWhen="choice-selected"
         whenTagName="sentiment"
         whenChoiceValue="Positive">
    <Choice value="Positive" />
    <Choice value="Negative" />
    <Choice value="Neutral" />
</Choices>
Two level nested classification
You can also perform conditional classification without a second set of data in the task. In this case, you create two sets of Choices control tags, with the second set of choices dependent on the first. For example, a classification task where you want to collect additional details for a specific choice selected by the annotator.
Start with an object tag for the type of data that you want to classify. This example uses the Image object tag for an image classification example, but you can adapt it for text or audio classification tasks:
<Image name="image" value="$image"/>Use the Choices control tag to display classification options. The name parameter identifies the purpose of the choices, and the toName parameter references the data to which the choices apply.
<Choices name="content" toName="image">
    <Choice value="Adult content"/>
    <Choice value="Weapons" />
    <Choice value="Violence" />
</Choices>
Add a second Choices control tag to the configuration to display other properties relevant to the classification task. In this case, the choice options appear when any choice is selected from the earlier classification options, specified by the visibleWhen="choice-selected" and whenTagName="content" parameter values.
<Choices name="other-props" toName="image"
         choice="single" showInline="true"
         visibleWhen="choice-selected"
         whenTagName="content">
    <Header value="Are there people or animals?" />
    <Choice value="Yes" />
    <Choice value="No" />
</Choices>
Three level nested classification
You can nest classification options beyond two levels. In this case, you can create three sets of Choices control tags. The second set of choices is dependent on any choice being selected in the first set, and the third set of choices is dependent on a specific choice in the second set. You can combine the parameter options described here to create a nested and conditional classification task that is more or less complex than this example.
Start with an object tag for the type of data that you want to classify. This example uses the Audio object tag for an audio classification example, but you can adapt it for text or image classification tasks:
<Audio name="audio" value="$audio" />Use the Choices control tag to display classification options. The name parameter identifies the purpose of the choices, and the toName parameter references the data to which the choices apply.
<Choices name="intent" toName="audio" showInline="true">
    <Choice value="Positive" />
    <Choice value="Negative" />
    <Choice value="Neutral" />
</Choices>
Add a second Choices control tag to the configuration to display other properties relevant to the classification task. In this case, the choice options appear when any choice is selected from the earlier classification options, specified by the visibleWhen="choice-selected" and whenTagName="intent" parameter values.
<Choices name="other-props" toName="audio"
         choice="single" showInline="true"
         visibleWhen="choice-selected"
         whenTagName="intent">
    <Header value="Other properties of the audio clip" />
    <Choice value="Noisy" />
    <Choice value="Clear" />
</Choices>
Add a third Choices control tag to prompt the annotator to add extra detail about a specific choice. In this case, the choice options appear when the annotator selects Noisy from the previous set of choices, specified with the whenChoiceValue="Noisy" parameter. The whenChoiceValue parameter must be used with the whenTagName parameter, in this case referencing the name parameter of the Choices with the Noisy option, whenTagName="other-props". The visibleWhen="choice-selected" parameter controls the visibility of these choices.
<Choices name="emotion" toName="text"
         choice="single" showInline="true"
         visibleWhen="choice-selected"
         whenTagName="other-props"
         whenChoiceValue="Noisy">
    <Header value="What type of noise?" />
    <Choice value="Crowd" />
    <Choice value="Machinery" />
    <Choice value="Traffic" />
    <Choice value="Unsure/Other" />
</Choices>