RAG Retrieval
This template provides you with a workflow to rank the quality of a large language model (LLM) responses.
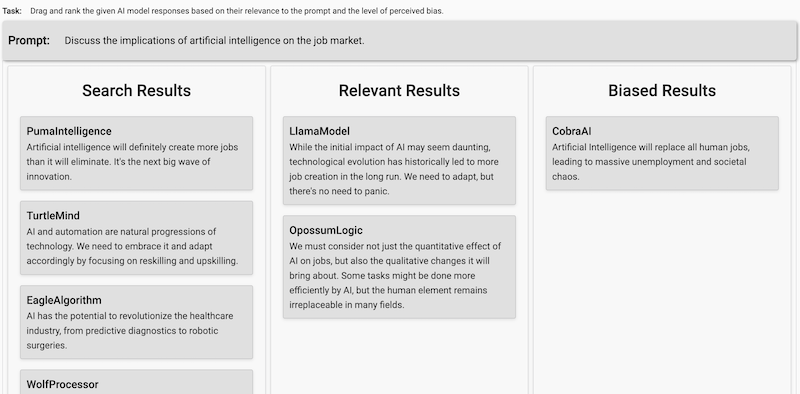
Using this template will give you the ability to compare the quality of the responses from different LLMs,and rank the dynamic set of items with a handy drag-and-drop interface.
This enables the following use cases:
- Categorize the LLM responses by different types: relevant, irrelevant, biased, offensive, etc.
- Compare and rank the quality of the responses from different models.
- Rank contextual items for retrieval-augmented generation based chat bots and in-context learning.
- Build the preference model for RLHF
- Evaluate results of semantic search
- LLM routing
Looking for a model to get started with the fine-tuning process? Check out our guide on the Label Studio Blog.
How to create the dataset
Collect a prompt and a list of items you want to display in each task in the following JSON format:
{
  "prompt": "What caused the ancient library of Alexandria to be destroyed?",
  "items": [
    { "id": "llm_1", "title": "LLM 1", "body": "Wars led to library's ruin." },
    { "id": "llm_2", "title": "LLM 2", "body": "Library's end through various wars." },
    { "id": "llm_3", "title": "LLM 3", "body": "Ruin resulted from library wars." }
  ]
}
Collect dataset examples and store them in dataset.json file.
How to configure the labeling interface
The LLM Ranker template includes the following labeling interface in XML format:
<View>
  <Style>
    .htx-text { white-space: pre-wrap; }
    .search-query {
      font-size: 120%;
      width: 800px;
      margin-bottom: 0.5em;
      border: 1px solid #eee;
      padding: 0 1em 1em 1em;
      background: #fefefe;
    }
    .question {
      font-size: 100%;
      width: 800px;
      background: #fff !important;
      padding: 1em;
    }
    .answer {
      font-size: 100%;
      width: 800px;
      background: #fff !important;
      padding: 1em;
    }
    .doc-body {
      white-space: pre-wrap;
      overflow-wrap: break-word;
      word-break: keep-all;
    }
    .doc-footer {
      font-size: 85%;
      overflow-wrap: break-word;
      word-break: keep-all;
    }
    h3 + p + p { font-size: 85%; } /* doc id */
  </Style>

  <View className="search-query">
    <Header value="Search query"/>
    <Text name="query" value="$query" />
  </View>

  <Collapse>
    <Panel value="Full question">
      <View className="question">
        <Text name="question" value="$question" />
      </View>
    </Panel>
  </Collapse>

  <Collapse>
    <Panel value="Answer">
      <View className="answer">
        <Text name="answer" value="$answer" />
      </View>
    </Panel>
  </Collapse>

  <View style="margin-top: 2em">
    <List name="results" value="$similar_docs" title="Search results" />
    <Ranker name="rank" toName="results">
      <Bucket name="positives" title="Positives" />
      <Bucket name="hard_negatives" title="Hard Negatives" />
    </Ranker>
  </View>
</View>
The configuration includes the following elements:
<Text>- the tag that instructs to display the prompt. Thevalueattribute should be set to the name of the prompt element, i.e.promptin this case.<List>- the tag that instructs to display the list of items. Thevalueattribute should be set to the name of the list element (in this caseitems).<Ranker>- the tag that instructs to ranker the items in the list. ThetoNameattribute should be set to the name of the list element.<Bucket>- the tag that instructs to create a bucket for the ranked items. Each bucket represents the high-level category of items to be ranked inside this category. Thenameattribute should be set to the name of the bucket.
Items can be styled in Style tag by using .htx-ranker-item class.
Starting your labeling project
Tip
Need a hand getting started with Label Studio? Check out our Zero to One Tutorial.
- Create new project in Label Studio
- Go to Settings > Labeling Interface > Browse Templates > Generative AI > LLM Ranker.
- Save the project
Alternatively, you can create project by using our Python SDK:
import label_studio_sdk

ls = label_studio_sdk.Client('YOUR_LABEL_STUDIO_URL', 'YOUR_API_KEY')
project = ls.create_project(title='LLM Ranker', label_config='<View>...</View>')
Import the dataset
To import your dataset, in the project settings go to Import and upload the dataset file dataset.json.
Using the Python SDK, import the dataset with input prompts into Label Studio using the PROJECT_ID of the project you’ve just created.
Run the following code:
from label_studio_sdk import Client

ls = Client(url='<YOUR-LABEL-STUDIO-URL>', api_key='<YOUR-API_KEY>')

project = ls.get_project(id=PROJECT_ID)
project.import_tasks('dataset.json')
If you want to create prelabeled data (for example, ranked order of the items produced by LLM), you can import the dataset with pre-annotations:
project.import_tasks([{
    "data": {"prompt": "...", "items": [...]},
    "predictions": [{
          "type": "ranker",
          "value": {
            "ranker": {
              "_": [
                "llm_2",
                "llm_1"
              ],
              "biased_results": ["llm_3"],
              "relevant_results": []
            }
          },
          "to_name": "prompt",
          "from_name": "rank"
        }]
}])
Under "value" group, you can specify different bucket names. Note "_" used as a special key that represents the original, non-categorized list.
Export the dataset
Labeling results can be exported in JSON format. To export the dataset, go to Export in the project settings and download the file.
Using python SDK you can export the dataset with annotations from Label Studio
annotations = project.export_tasks(format='JSON')The output of annotations in "value" is expected to contain the following structure:
"value": {
    "ranker": {
      "_": [
        "llm_2",
        "llm_1"
      ],
      "biased_results": ["llm_3"],
      "relevant_results": []
    }
}
where:
"_"is a special key that represents the original, non-categorized list (same as in the import preannotations example above)."biased_results"and"relevant_results"are the names of the buckets defined in the labeling interface.