Optical Character Recognition (OCR)

Perform optical character recognition (OCR) tasks using a variety of shapes on an image. Use this template to identify regions using shapes and transcribe the associated text for specific regions of the image.
Labeling Configuration
<View>
  <Image name="image" value="$ocr"/>
  <Labels name="label" toName="image">
    <Label value="Text" background="green"/>
    <Label value="Handwriting" background="blue"/>
  </Labels>
  <Rectangle name="bbox" toName="image" strokeWidth="3"/>
  <Polygon name="poly" toName="image" strokeWidth="3"/>
  <TextArea name="transcription" toName="image"
            editable="true"
            perRegion="true"
            required="true"
            maxSubmissions="1"
            rows="5"
            placeholder="Recognized Text"
            displayMode="region-list"
            />
</View>
About the labeling configuration
All labeling configurations must be wrapped in View tags.
Use the Image object tag to specify the image to label:
<Image name="image" value="$ocr"/>Use the Labels control tag to specify which labels are available to apply to the different shapes added to the image:
<Labels name="label" toName="image">
    <Label value="Text" background="green"/>
    <Label value="Handwriting" background="blue"/>
</Labels>
You can change the value of each Label to assign different labels to regions on the OCR task, such as “Letters” and “Numbers” or something else.
Use the Rectangle control tag to add unlabeled rectangles:
<Rectangle name="bbox" toName="image" strokeWidth="3"/>Using the Rectangle tag instead of the RectangleLabels tag means that you can have annotators perform OCR annotation in three steps: first by creating regions to highlight text, then associating labels with each region, then transcribing the text for each region. This also makes it easier to add pre-annotations for OCR tasks.
Use the Polygon control tag to add unlabeled polygons:
<Polygon name="poly" toName="image" strokeWidth="3"/>The strokeWidth argument controls the width of the line outlining the polygon.
Use the TextArea control tag to add transcripts for each region drawn on the image, whether a rectangle or polygon.
<TextArea name="transcription" toName="image"
            editable="true"
            perRegion="true"
            required="true"
            maxSubmissions="1"
            rows="5"
            placeholder="Recognized Text"
            displayMode="region-list"
            />
The editable="true" argument allows annotators to edit the text after submitting it, and displayMode="region-list" means that the text boxes appear in the region list associated with each rectangle or polygon, to make it easier to update the text. perRegion="true" means that each text box applies to a specific region, and required="true" means that annotators must add text to each text box before they can submit the annotation. The placeholder argument lets you specify placeholder text that is shown to annotators before they edit the text box.
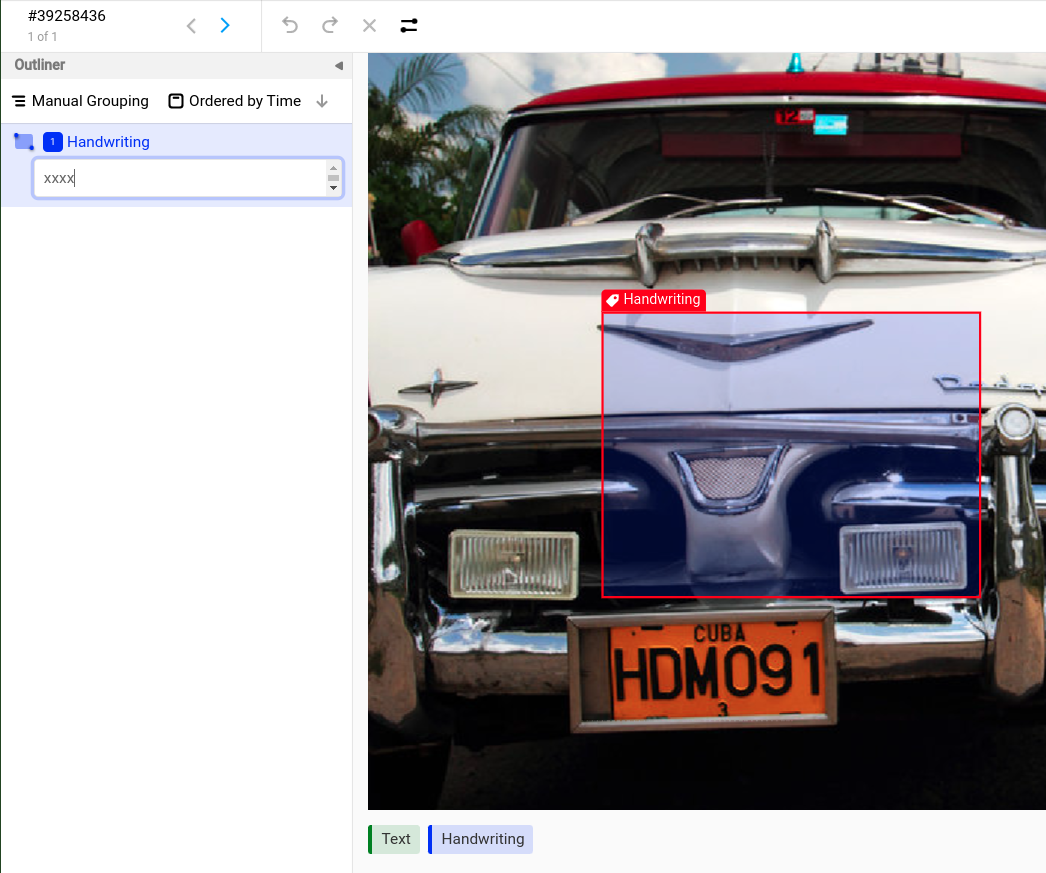
About the labeling process
- Select a label (e.g. “Handwriting”), create a new bounding box and select it.
- Open the Outliner panel if it’s not yet opened. Usually it’s located on the left side.
- Add text to each bounding box. Otherwise you will get a warning about missing text because the labeling configuration is using
required="true".